[Tutorial] Create Realistic Water with Ripples Effect
-
Hai, i am from Indoensia. This is my first time making a tutorial here
 ..
..
I want to share a simpel tutorial about How to Create Realistic Water with ripples in Vray Sketchup. Perhaps this is useful for you.
Firstly, Download the sketchup file “Realistic water by ferry sugianto.skp” http://www.4shared.com/file/eNUFfkyw/Realistic_water_by_ferry_sugia.html
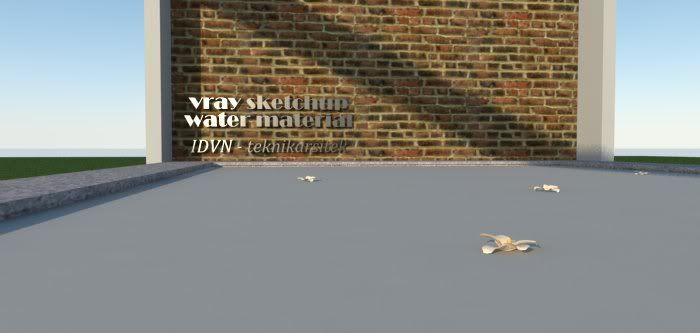
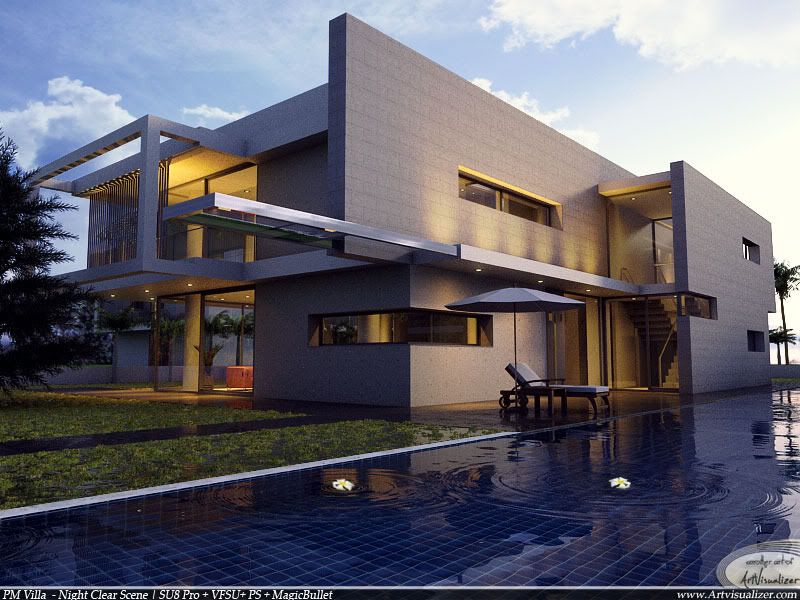
The file is sketchup7 format, and vray i used is vray 1.48. But, this should be working also for higher version. The drawing unit is millimeter.So, here is the figure when start and render the file.
Now, select that water object in the scene, and then, open Vray Material Editor window. From the list, create new material (right click on the “Scenes Materials”, then choose “Create Material”, then “V-ray Default Material”). Rename the material as “water_vray” or something else. And then right click that name and choose "Apply material to selection" so the water will be in grey. Apply also to all surface inside the object water's group.
Now, please follow the step by step below :
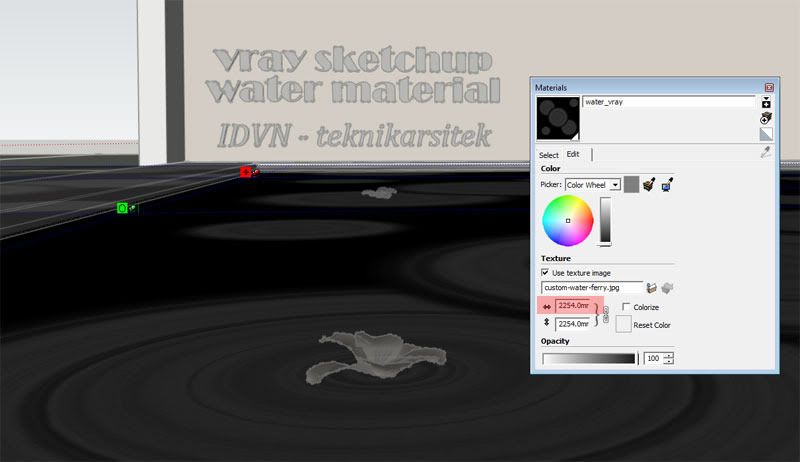
1.On the diffuse tab, change the diffuse color to black. And click "m" button. Then, we will see the Texture Editor dialog window. In the File name, click "..." button and select file "custom-water-ferry.jpg" that already on the folder you've downloaded. Then click OK.2.Now, back to the vray material window. Close this window. In the scene, you should see like in picture below.

3.Now, arrange the bitmap tiling so the ripple can look nice, i try to set by go to the inside the group, and select the surface of the water object, the right click, and choose Texture -> Position. Or you can set this via the value at Material default sketchup ( i set to 2254). See the pict below.
And then i re-arrange the flower to match the center of the ripple. This is the advantage of this water trick. ^_^.
After finish with tweaking the ripple, now open the material vray, and set the Transparancy color in the Diffuse tab to white. see pict below.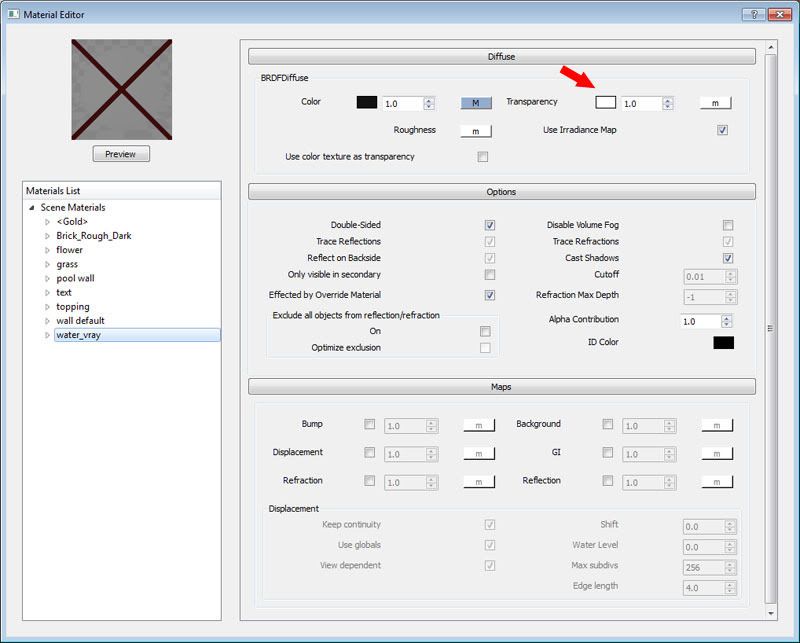
This will make your object like invisible, don't worry, because this mean that the water is really transparant.
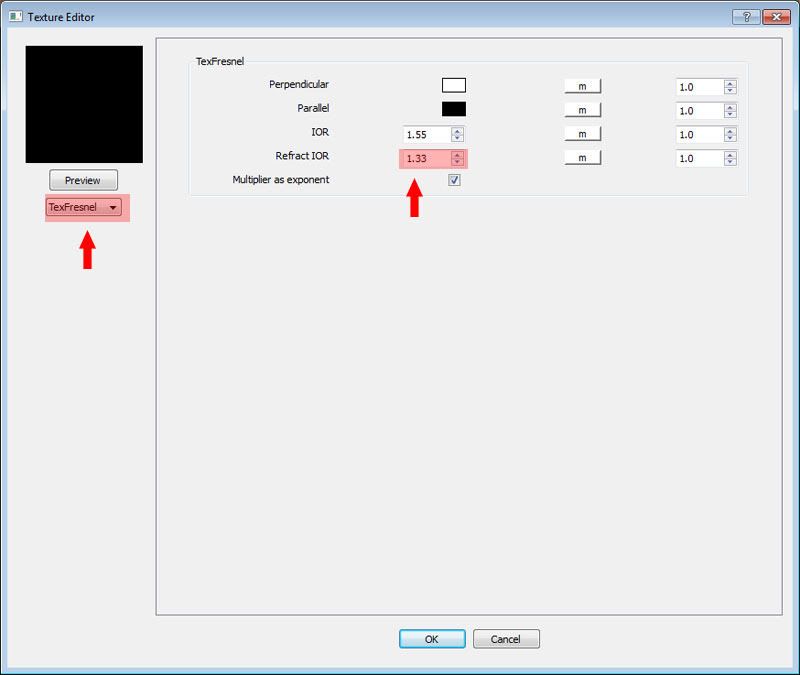
4.Now, we will add Reflection layer, by right click from the material name, and select Create Layer -> Reflection. Then, on the "m" button, click and select TextFresnel from the rollout menu. And set the Refract IOR to 1.33. see the picture below
then click OK.
5.Now, we add Refraction layer, by right click from the material name, and select
Create Layer -> Refraction. Then, in the IOR option, change the value to 1.33. Then, in Fog option, set the color RGB to 245,255,255, or change the color as what you want. This fog will be the color tone of your water. Then, change the value of Color Multiplier to 0.05. See pict below.
6.Now, in the Bump section, click the "m" button, and in the file, insert the same JPG map on the diffuse. then OK. Now, let's try render, and if you following the step correctly, you will see like the picture below.
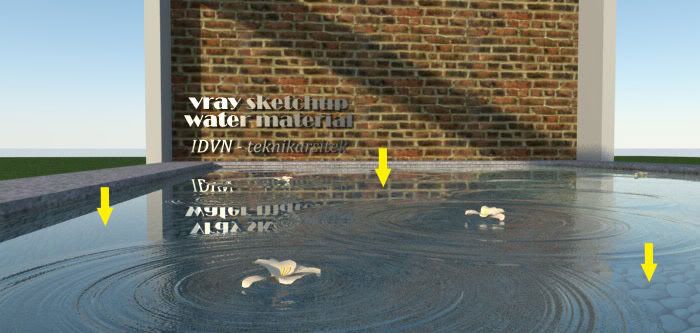
The yellow arrow i shown is the surface that makes our water too flat. This is not real, so how?
7.Open your material window, in the Maps tab, mark the Displacement, set the value to 0.1, and click "m", choose TextNoise from the rollot menu, and set the size to 7. This value can be various depend on your pool size.
See pict below.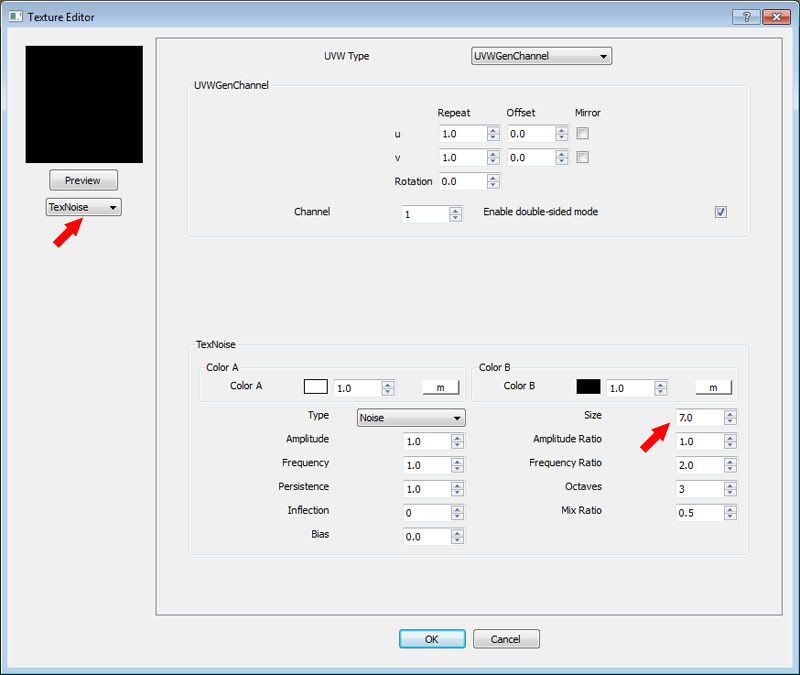
Then OK, and close the material editor. Now, try hit Render.
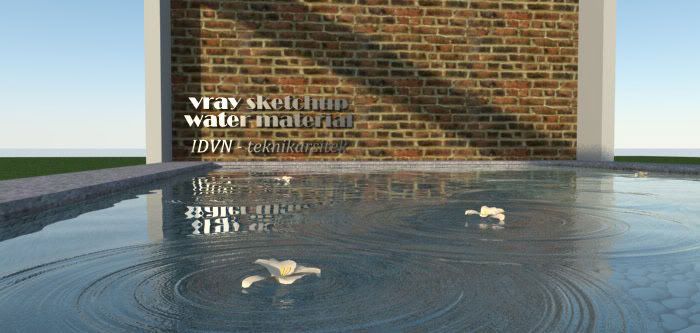
DONE.. ! .. ^_^ but, how if we want to move the ripples ? In some cases, sometimes we want to re-modificate the ripple location, but we can't see the texture because it's really transparant. Don't worry, it's very simple way, just go to the material editor, in the Diffuse tab, set the transparancy color to Black, ahaaa.. now you see the texture, right? You can modif the ripple location, after finish, don't forget to change the transparancy color back to white.
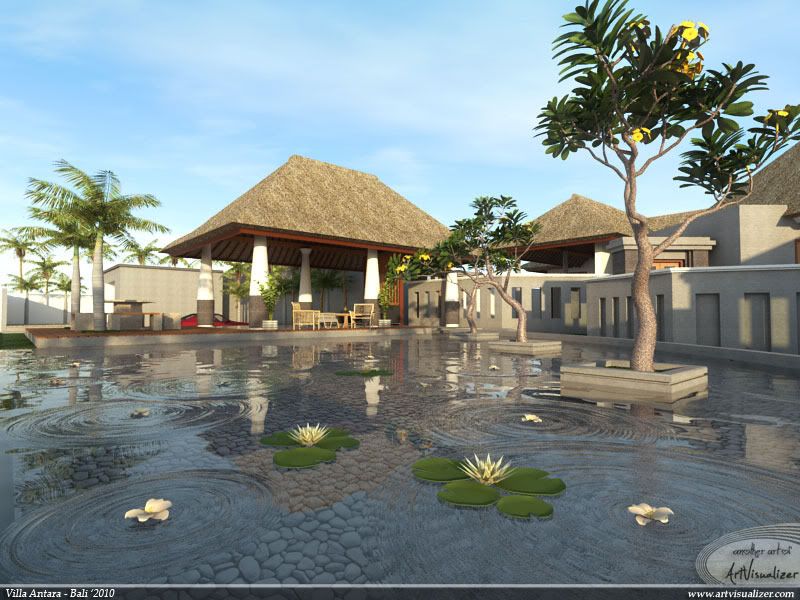
Here is some modification result
This trick can be applied to vray in 3dsmax. I already test and it's work because the concept is similar.
OKE .. perhaps this little water trick is useful. Cheers .. ^_^
Any questions or maybe there is another way, please share in my FB at :
http://www.facebook.com/ferry.sugianto
. -
Wow that is really good. Thanks for posting
-
Very good tutorial i fixed it and it worked good.
But i have a small question about your photo's after modification result.There everyone could see through the pool water till the bottom of the pool. How did you do that, is it the color of water or something else. Please explain me how to do that effect.
-
thanks for this post sir Ferry...=)

-
THANK YOU VERY MUCH.
GREETINGS
-
WOW
Trying to achieve this with maxwell render, any help will be much appreciated.
-
Spent 2 hours and figured out how to achieve this in Maxwell render.

-
thanks ....very useful
-
KEREN ! SUCCESS
-
This is wonderful!!! Congratulations and thank you for the tutorial!!
-
@All : thanks .. perhaps its useful ^_^
Hello! It looks like you're interested in this conversation, but you don't have an account yet.
Getting fed up of having to scroll through the same posts each visit? When you register for an account, you'll always come back to exactly where you were before, and choose to be notified of new replies (either via email, or push notification). You'll also be able to save bookmarks and upvote posts to show your appreciation to other community members.
With your input, this post could be even better 💗
Register Login


Advertisement