Creation & Scaling of Materials
-
Hi All
Please could someone help me.
I have created a Marsailles Clay Roof Tile material in a model and now want to save it from the model into SketchUp's main material folder for use in other models. I have tried using the create material in the material editor and saving as, without any success.
Also how do I create and scale a seamless material. I have numerous .bmp and .jpg files of different face-brick types and colours that I need to turn into seamless textures for use on a commercial project that I am working on
Thank you
Mike Backler
-
Hi Mike,
First of all, scaling a (to-be) material... I would only use jpg's so convert the bmp's to jpg's first... Then to get the correct dimensions, follow these steps (there are other wways, too, but I find this way very easy to explain)
-
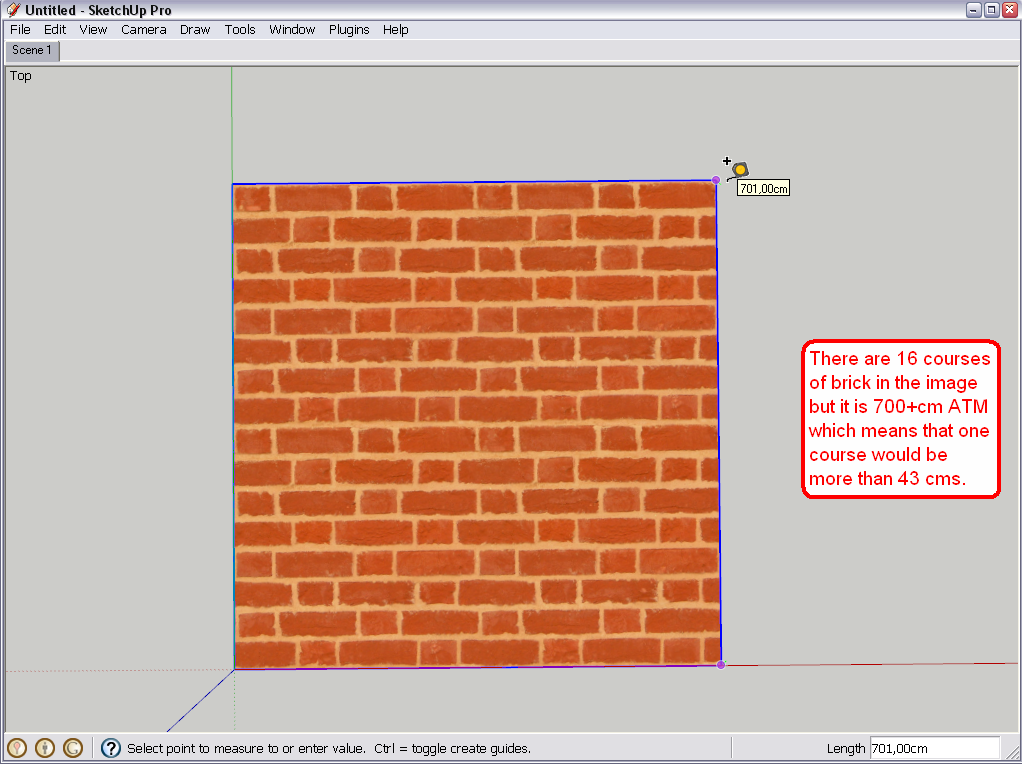
Import the image as image
-
Use the tape measure tool to measure the image. In my example, it is 700+ cms high which would mean that one course of brick would be more than 43 cms which is of course ridiculously large.
-
It should be around 5 cms (or 2") so click second with the Tape measure tool,
-
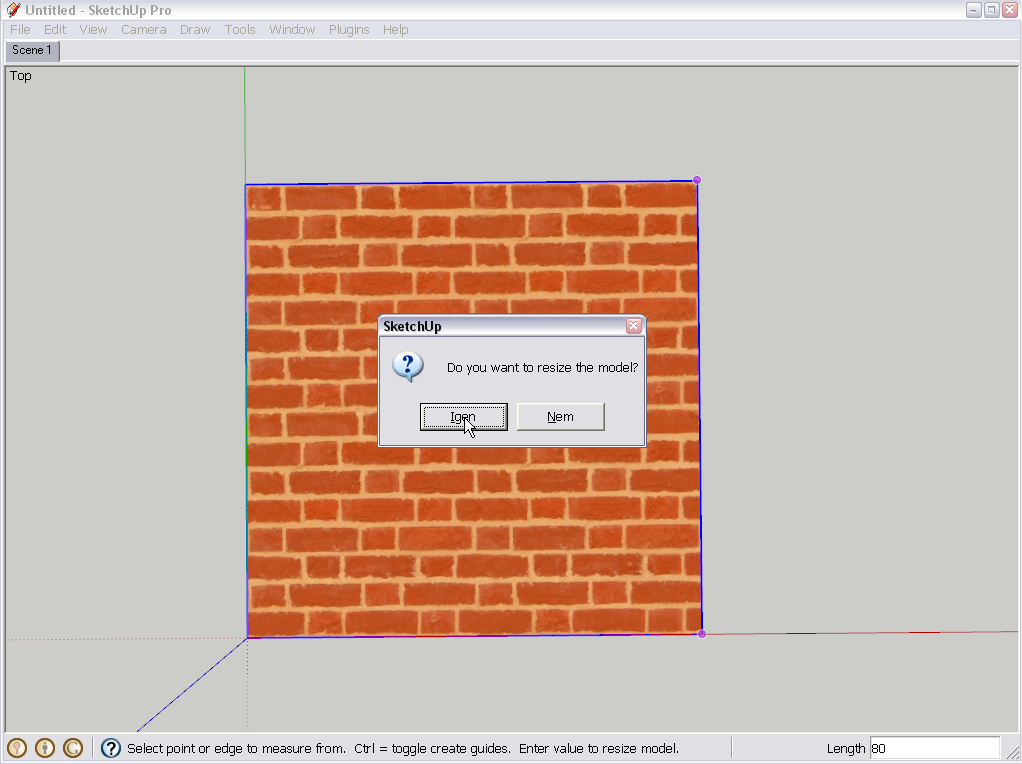
type 80 cm (in this case only of course as 5x16 which is the number of courses = 80)
-
and press Enter. SU will display this question;
-
Answer YES and it will rescale your image.
-
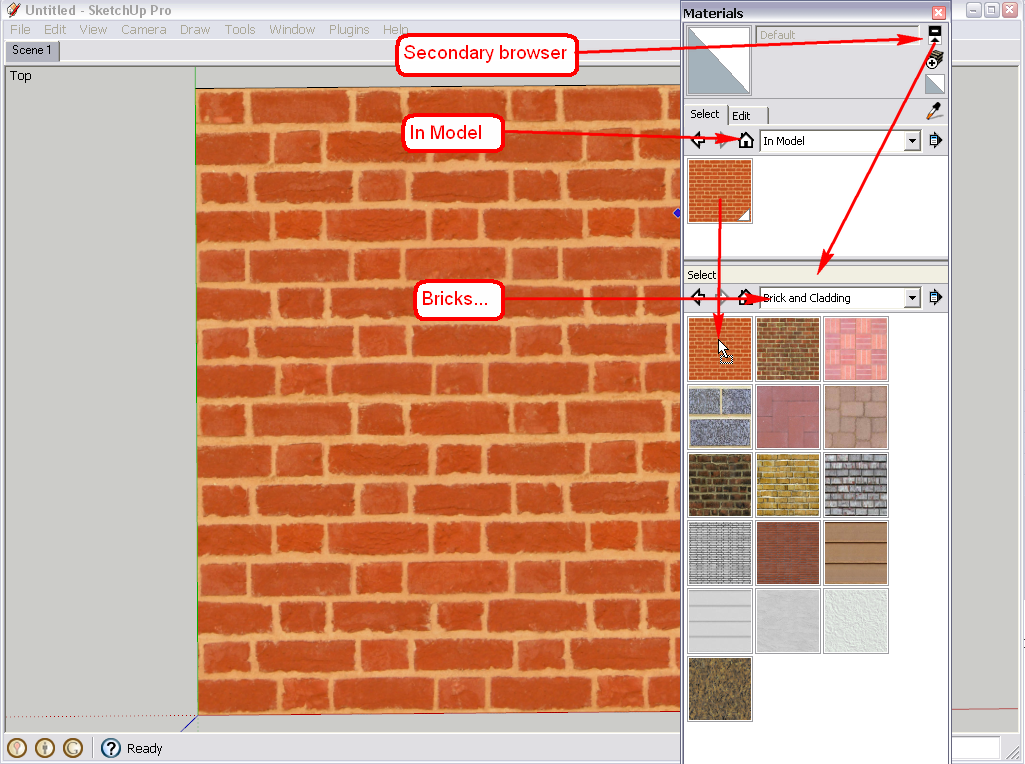
Now right click on the image and "Explode". It will create a face with the image already applied as material with the correct scale.
-
Now open your material editor and go to "In model" to see your newly created material.
-
Also open the secondary browser and navigate to the Bricks library (in my case)
-
Finally drag and drop the new material into the already existing library.
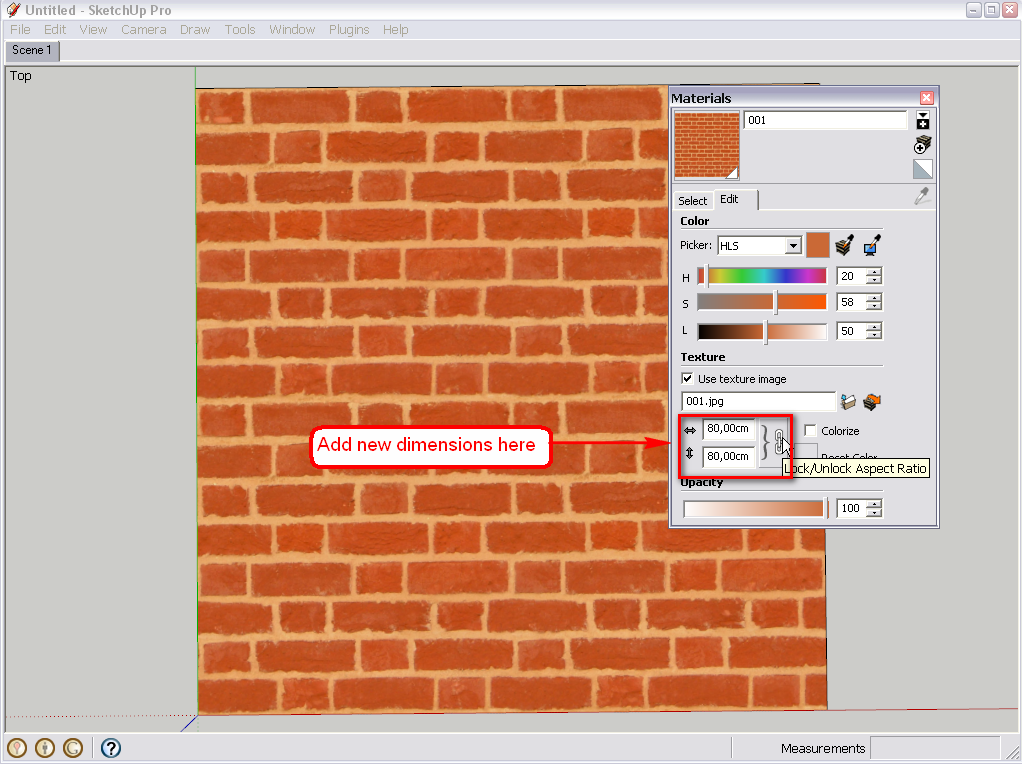
There is a massmaterialimporter.rb plugin that would import and make materials from a whole library at once. However of course it does not know what the "real life" size of these materials should be so you will need to edit them manually to fit to the criteria above. You can do this in your material browser > In model (select a material) > Edit tab. Calculate the desired size in centimetres/inches whatever and enter those values there. Then save the material to your existing libraries as per above.
-
-
@gaieus said:
Hi Mike,
- Import the image as image
- Use the tape measure tool to measure
[attachment=0:hw4kkr9a]<!-- ia0 -->4.png<!-- ia0 -->[/attachment:hw4kkr9a]
Be sure to import into an NEW model, by itself. Don't rescale your working model!
Also AFAIK SU doesn't help you make a seamless tiling image. You need to do it before you import in an image editor or texture creating software.
-
@pbacot said:
Be sure to import into an NEW model, by itself. Don't rescale your working model!
True, I forgot to mention, thanks...
@pbacot said:
Also AFAIK SU doesn't help you make a seamless tiling image. You need to do it before you import in an image editor or texture creating software.
Yes, definitely.

-
If you know the length and width covered by the images you have or even just one of the dimensions, you can draw faces of that size and import the images as with Use as texture selected. I do this with wood grain images where I know the size of the image. Many of the images cover boards that are 8 feet long and somewhere between 4 and 8 inches wide. I draw rectangles that are 8 feet long and 8 inches wide. Then I drag out the image to 8' long and it is automatically scale correctly.
When I have a lot of images to import, I make copies of the face to streamline the process. If I do a bunch of related images (usually wood in my case) I'll save those images into a new local collection. Save Collection As... If I want the materials included in an existing collection I just move the SKM files afterward. Makes me wonder if it would be possible to move the textures from the In Model library to an existing library en masse. It can be kind of tedious copying them individually with click and drag.
-
@dave r said:
If you know the length and width covered by the images you have or even just one of the dimensions, you can draw faces of that size and import the images as with Use as texture selected...
Yes, I also do that most of the times just somehow it's harder to fully explain the method and you know...
@gaieus said:
(there are other wways, too, but I find this way very easy to explain)

-
Good point, Gai. And I may not have done a good job explaining, either.

-
Well, when in a model and I quickly need to import a material, I generally use the method of importing it as texture on a face with a known size.
When importing images for "to-be" 2D Face me components for instance, I generally use the image import function as it is easier to set up that way since it's not a tiling image etc... -
Good idea. When I am importing wood grain materials it is usually 9 or more at a time so I like being able to bring them in so they are scaled correctly right away. I usually have 8 foot long "planks" and 1" thick end grain so I make some 8' long faces and some that are 1" long. Then I just repeatedly do File>Import with Use as texture selected until I have all of the images in the model.
-
Thank you Gaieus and Dave R. Works like a dream, I can now save and store all the materials that I have created in various models and have'nt been able to use again. Durrr so simple.
Thanks again
Mike Backler
Hello! It looks like you're interested in this conversation, but you don't have an account yet.
Getting fed up of having to scroll through the same posts each visit? When you register for an account, you'll always come back to exactly where you were before, and choose to be notified of new replies (either via email, or push notification). You'll also be able to save bookmarks and upvote posts to show your appreciation to other community members.
With your input, this post could be even better 💗
Register Login


Advertisement