Getting rid of projected textures (& their hidden lines)
-
Hi
I projected some textures from a photo onto my model, but this has created a lot of hidden geometry which limits the textures to certain areas.
I want to do two things:
Get rid of the textures
Get rid of the hidden geometryIs this still possible?
-
Hi Marius,
Applying texture (projected or not) should not affect your geometry. There must be something else in your model - can you share it?
-
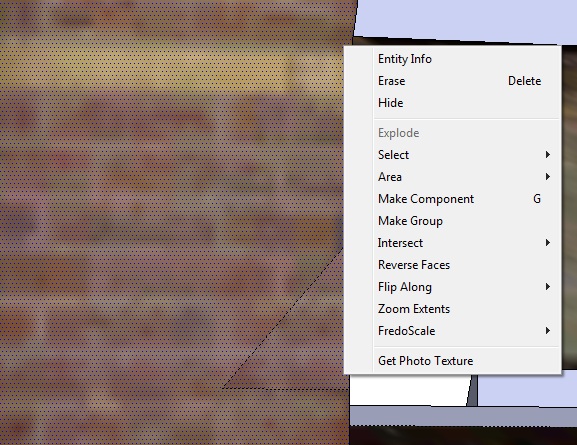
Maybe I used the wrong word, it's not affecting geometry, but it's creating helper lines to limit the textures to certain areas on a face. I'm using the "Project textures from photo" feature, which does this. I've attached the model, and a picture of what I'm talking about:

Yes, I'm aware my model is inside-out. That's why I wanted to remove the textures and helper lines, and then flip all faces, and then apply textures manually so I don't get these helper lines.
-
Yeah, sure. It's attached to this post.
Also, here's a picture of the hidden geometry created:

Sorry if I'm trying to post twice, I'm not entirely sure if my previous attempt to post this succeeded..
-
@m.qrius said:
I want to do two things:
Get rid of the textures
Get rid of the hidden geometryOpen the Material browser, click on the little house icon to see all the textures in the model, find the offending texture, Right click, Delete and say yes the to the pop-up window. If you wish to save any textures, say the roof for example, right click > 'Make Unique Texture' before deleting the entire texture from the Material browser.
Then with hidden geometry on, it is a simple matter to just erase the unnecessary lines with the eraser tool.
-
Edited my previous post.
-
You can simply delete those edges. Then the projected corners of the panel will still be visible so this is how I would go about it:
- Use the Alt+Paint bucket tool to sample the brick texture of the tower
- Paint one of those triangles with this sampled texture (it will still show that corner)
- Right click on this triangle > Texture > Position and move it a bit to the right so the brick texture will show here, too. Press Enter when done
- Now sample this positioned material with the Alt+Paint bucket tool and apply it on each of the other triangles.
- Right click on any of the painted faces an "Make texture unique"
- Finally select all the triangles AND the main face with the brick/arches (you can add to the selection with the Shift key pressed), right click > "Combine textures"
When it asks if you also want to delete the dividing edges, choose Yes. This will also make the texture for this face unique thus much smaller in file size than if you left the whole texture on top.
-
Thanks for the replies guys
 Nice way to delete all textures at once. I only figured out the painting everything with the default material selected.
@gaieus said:
You can simply delete those edges. Then the projected corners of the panel will still be visible so this is how I would go about it:
- Use the Alt+Paint bucket tool to sample the brick texture of the tower
- Paint one of those triangles with this sampled texture (it will still show that corner)
- Right click on this triangle > Texture > Position and move it a bit to the right so the brick texture will show here, too. Press Enter when done
- Now sample this positioned material with the Alt+Paint bucket tool and apply it on each of the other triangles.
- Right click on any of the painted faces an "Make texture unique"
- Finally select all the triangles AND the main face with the brick/arches (you can add to the selection with the Shift key pressed), right click > "Combine textures"
When it asks if you also want to delete the dividing edges, choose Yes. This will also make the texture for this face unique thus much smaller in file size than if you left the whole texture on top.
This sounds good. It's a convenient way to fill in those triangles with proper textures, and also gets rid of the hidden lines (reducing unnecessary face count). However, when I try it, it doesn't give me the option to combine the textures. I don't have a clue why it wouldn't do that... I'm using version 7.1.4871 Pro.
Example below. Only the faces visible in the screen shot have been selected.
-
You probably missed step 5. You have to make the texture on one of the faces unique in order to get this option. After all, until that point each face is painted with the same texture and you cannot combine only one texture with itself (although I do not really see the reasoning behind this).
-
@gaieus said:
You probably missed step 5. You have to make the texture on one of the faces unique in order to get this option. After all, until that point each face is painted with the same texture and you cannot combine only one texture with itself (although I do not really see the reasoning behind this).
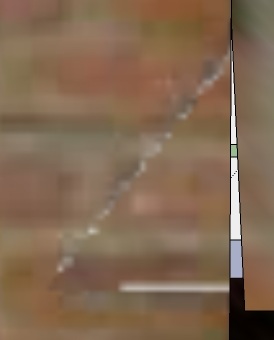
Oh, dang, sorry.. It was early when I read this. Thanks for the great help It works now. For the record; only one of the textures needs to be uniqueified.Too bad that you have to make the texture unique. This can result in some nasty aliasing on the dividing edges if they are removed. If you didn't have to make the texture unique, it could use the surrounding texture to avoid that I guess. But I guess I'll have to live with that right now, and touch up the textures in an image editor afterwards..
Example of nasty aliasing:
-
Go to your Window > Preferences > Applications panel and set up your favourite image editor there. Now when you right click on a face and go to Texture > Edit texture image, it will open in that application. You can re-touch the image there, also save it in a bit smaller file size (this will be important if you are modelling for GE) and all. When you save the image, it will instantly update in SU.
Best would be to make the texture unique on each side (or if there are identical sides, use the same image) and reduce the file size this way.
-
Thanks for all the help.
For future reference; the new content aware fill of Photoshop CS5 would work magic on these artefacts. It really looks like it's a feature imported from the future... from the videos anyway. CS5 isn't available here yet GIMP's resynthesizer plugin isn't hardly as good.
Hello! It looks like you're interested in this conversation, but you don't have an account yet.
Getting fed up of having to scroll through the same posts each visit? When you register for an account, you'll always come back to exactly where you were before, and choose to be notified of new replies (either via email, or push notification). You'll also be able to save bookmarks and upvote posts to show your appreciation to other community members.
With your input, this post could be even better 💗
Register Login


Advertisement