Help for another newbie!! please
-
hi all - brand new here
although i use sketchup a fair bit ...
i am wondering if any one out there can help me create a simple 3d model as i have no idea how to do so for the following subject!!
i don't know if it is best to have it created in another program or if it can be done in sketchup successfully
it is a model of an xperimental aircraft - an x24a 'lifting body' circa 1965
i have a good '3 view' image - front, side and top which i have brought into sketchup - but i am struggling with what to do next!!
if there is a forum or other location where this is better posted, or if any of you can help me please let me know!!
for a competent modeller it likely would take all of about 30 min to model but i don't have the skills
it is for personal use only and not for profit - would love to see a decent version on the 'warehouse' section
at any rate any help much appreciated so i can get a reasonable version into a sketchup model i am doing of a titan iii rocket and launch pad
 don't ask!
the x24a was to sit atop the titan iii rocket tip, rocket taking the payload into orbit - the x24a was a precursor to space shuttle concept
i am not sure if i should try to attach the beginnings of the sketchup model here or email should anyone request, to try and help
thanks for your time
Ron
-
Hi, manitouguy,
A good 3 view drawing plus a lot of reference photos are a good start.
Next I would suggest checking out some tutorials about setting up blueprints, like this one http://docs.google.com/Doc?id=dcrnv7zc_95hfdm8wgg
as well as some tutorials about modeling an aircraft (or whatever)
http://www.youtube.com/watch?v=RujtNTou9YU&feature=related
http://forums.sketchucation.com/viewtopic.php?f=18&t=26523
If you get stuck in your work, you can always upload a screenshot or a model, there´s always someone who will help you out.
Someone could even make that model for you ( because this is surely what it says above - the friendly place for your SU needs ) - but you are not going to gain much experience in modeling that way.
If you just need a model, try searching 3D warehouse.
Best regards,
NT -
thanks very much for the response and the links - i will dig in and check them out!
i have a pretty strong understanding of sketchup basics but when it comes to modelling more organic shapes i get lost pretty quick
lots to learn
was just checking out some of the work posted in the forum here, cars, spaceships and autos!! fantastic and hard to believe they were done in sketchup - so...now to learn how!! excited to know it can be done

surely more questions to follow ...
regards, Ron
-
@manitouguy said:
but when it comes to modelling more organic shapes i get lost pretty quick
Don´t worry, Ron, you are not the only one who feels that way!

-
ok - checked out the first couple of links
i understand how to set up the 3 views over each other ...
but without some cross sections not sure how to 'skin' or poly the 3d form??
are there plug ins i should be aware of ??
do i need to create at least a couple of key sections from my 3 view amalgamation
also saw a reference to a weld plugin earlier - is that something i should be getting familiar with!!??
back to reread the first post as well
cheers, Ron
-
Hi manitouguy,
I'm the writer of that aircraft tutorial, and no, you don't need cross-sections to build planes, just 3 views. Cross-sections are needed if you want to be accurate. Yes, you need to download the weld plugin if you want it to be accurate. Firstly, outline the side view and then outline the front view fuselage. Then, group and lock the side view outline. After that weld the front view fuselage outline. Then, move the front view outline to the side view outline. Then, copy it to every endpoint of the side view outline except the last endpoint on the back. After that, move the endpoints on the blue axis so that it connects to the side view outline. Then, unlock and eexplode the side view outline group. After that, just mesh it by connecting the endpoints with lines.
ultimatez
-
thanks ultimatez -
the three view i have is from online - and i noticed it does have a few indicators for sectional info - last night i battled with it trying to line up the 3 views as ref images on the axis
and then tried offsetting the sections
this plane has such an odd shape - it is hard to even visualize it mentally!!
i will take anothe crack at it today creating more sections
your method ... if the frontal outline changes considerably as you move back through the body of the plane (from skinny nose cone, to fat and round and back to flattened taper) - i am a bit unclear as to how your method accounts for that??
off to try some more - at least i am learning!!!
will see if i can post a pic or two
thanks again all, Ron
-
@manitouguy said:
your method ... if the frontal outline changes considerably as you move back through the body of the plane (from skinny nose cone, to fat and round and back to flattened taper) - i am a bit unclear as to how your method accounts for that??
You should scale each section to fit into the outline ( of course, it would be much easier to visualize that odd-shaped plane of yours if you could post at least a screenshot )
Take a look at this tutorial http://www.flightgear.org/forums/viewtopic.php?f=4&t=6302&start=0&st=0&sk=t&sd=a -
ok - a few screenshots coming over shortly
Ron -
ok - a few images
no laughing please!!! i have NEVER tried this type of modelling before

i set up the 3 view in typ blueprint fashion - then set up some cross sections as best i could
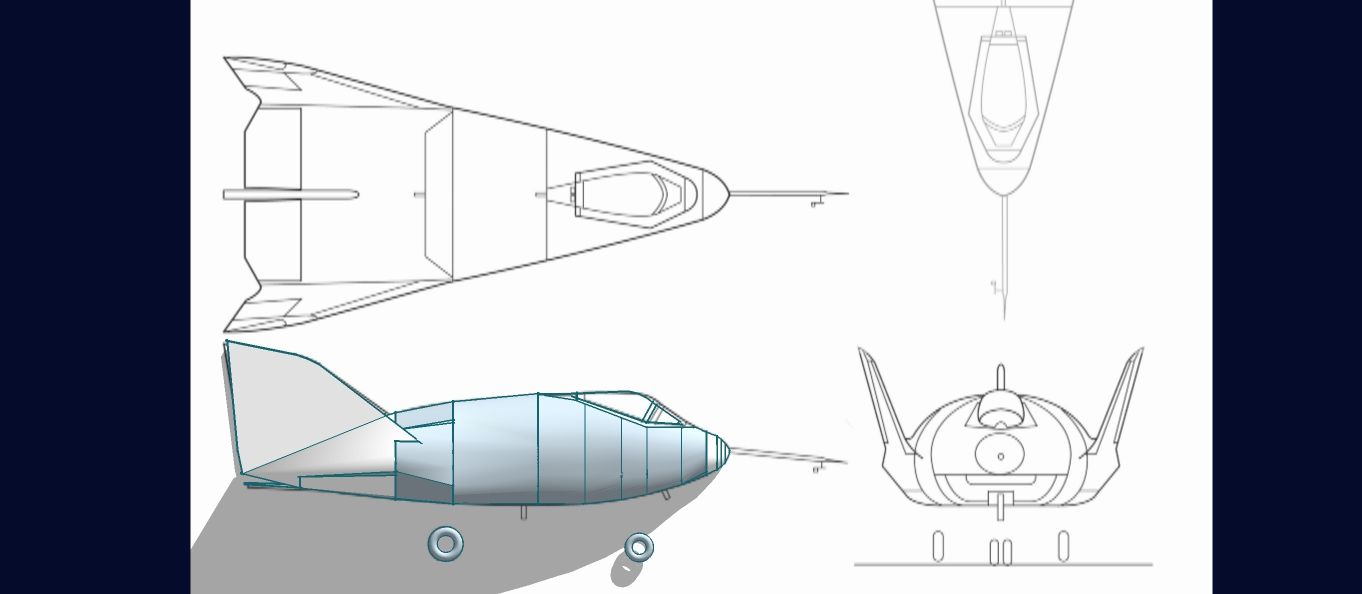
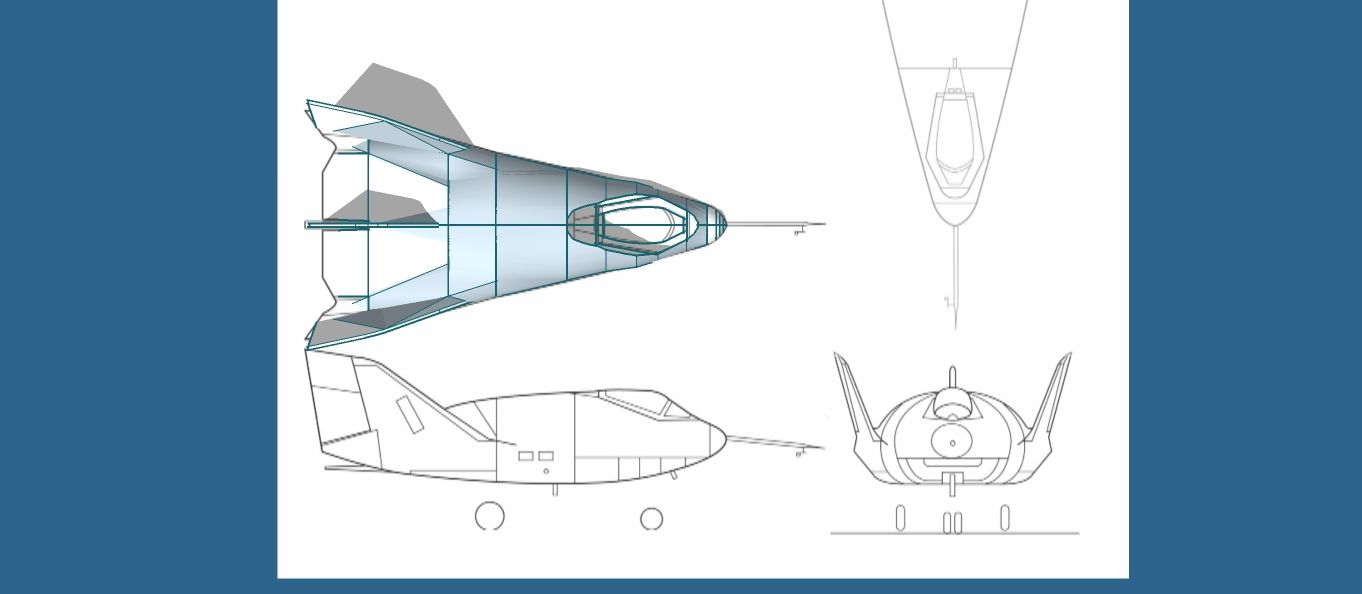

as you can see the x24a is an odd lump - the brain can't really grasp its final shape ... ! i only have a few internet images and an old mag article, i have a plastic kit coming in the mail which should help
after positioning the sections i then 'hand stiched' the sections one by one (surely there is an easier way?)- faceting them with know knowledge of what i was up to
i then used the smooth tool
now trying to figure out how to build a canopy (it is just wireframe at the moment)
all in all a great exercise and although it looks more like a bag of rocks than anything aerodynamic, i must say i am pleased with my first effort and will continue to work on it as an ongoing 'modelling self tutorial' of sorts - but i am sure we can use this as a good example of what NOT to do

please, fire away comments and criticisms as how to model something like this properly - i want to learn how to do it right and well
oh - and for kicks a pic of it 'mocked up' in a very prelim manner on the beginnings of a titan iii rocket
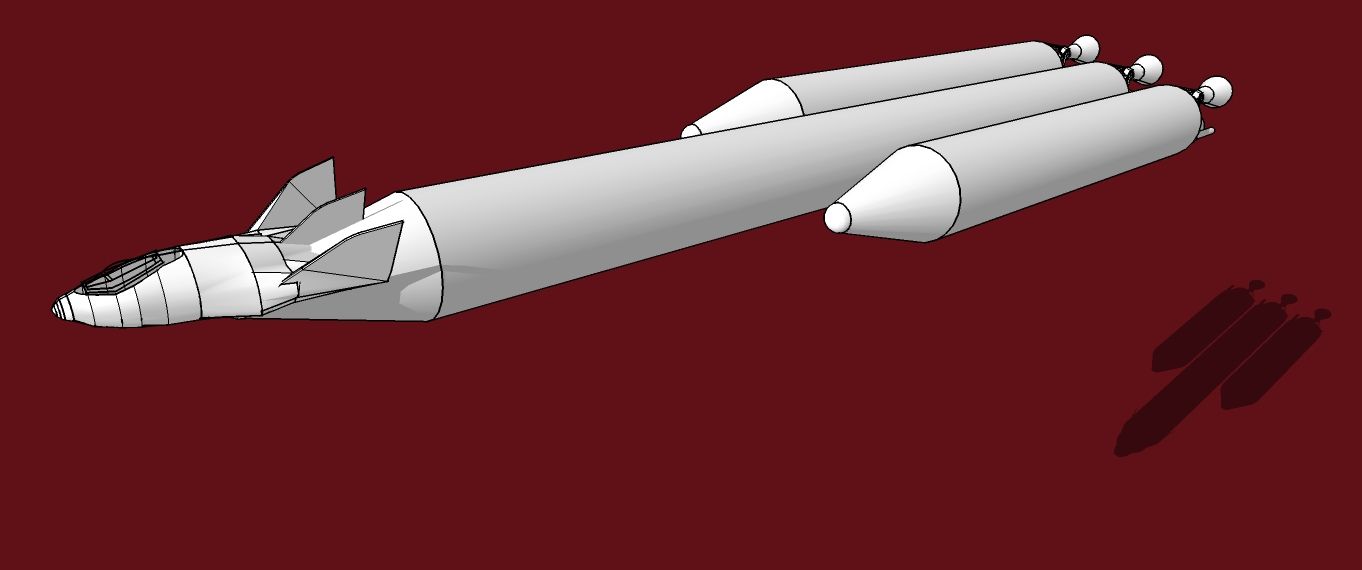
thanks for looking
Ron
-
and a couple more - trying to make the bag of rocks like it might actually be aerodynamic ...
because i don't know the proper way - just started laying new facets over the areas which were pinched or lumpy
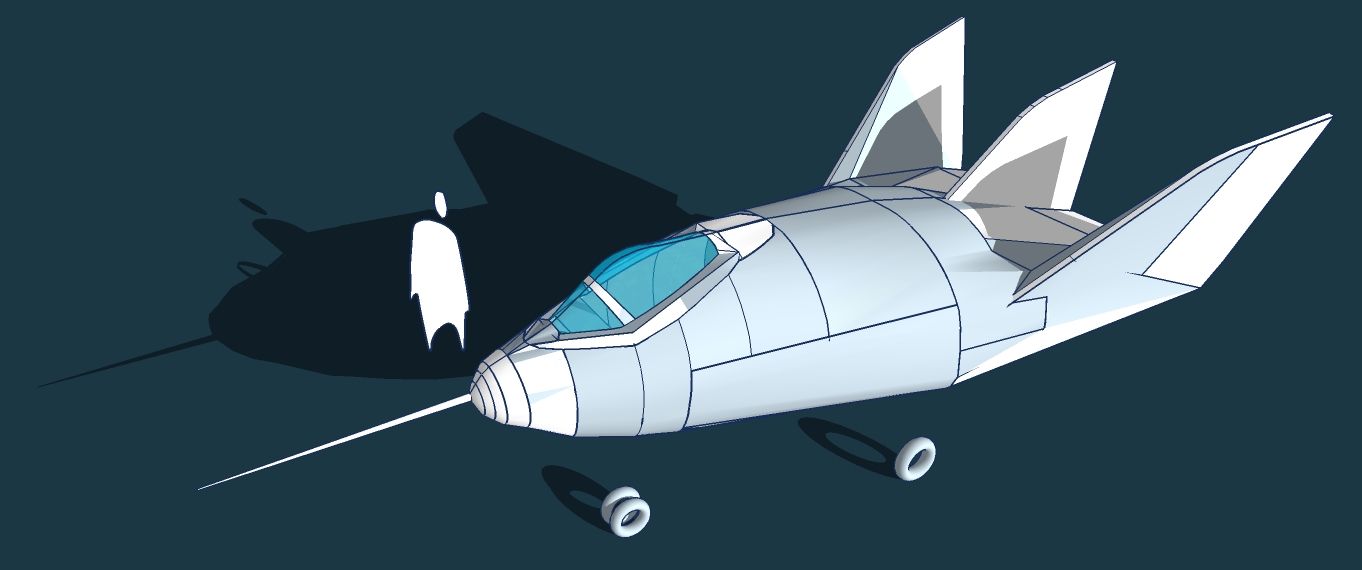
had fun experimenting on making a canopy too - didn't think i could do it but it turned out nicely (at least to my eyes .. for a beginner)
and did a quick render in idx to see how lumpy it is
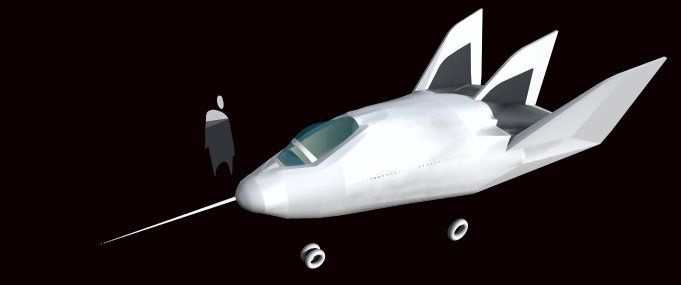
now - how would one go back and clean it up and improve the smoothness and polygons??
any help or direction much appreciated
and if anyone wants a copy to examine and critique let me know
cheers, Ron
-
It seems like you´re making quite a good progress, Ron!
As for the hand-stitching - TIG´s extrusion tools could save you a lot of frustration IMHO http://forums.sketchucation.com/viewtopic.php?p=217663#p217663
Another one worth having in any case http://www.smustard.com/script/SubdivideAndSmooth -
thanks very much for the links - will check them out
much appreciated
Ron
Advertisement


