Help Me Draw A Dome [TUTORIAL]
-
Hi D0me and good morning!
Yes, something like that. We have already done intersection - we are going to use that technique again.
First of all, let's hide the inner dome pieces again so that they will not get intersected with the outer pieces (remember when your dome turned into a chess-board?).
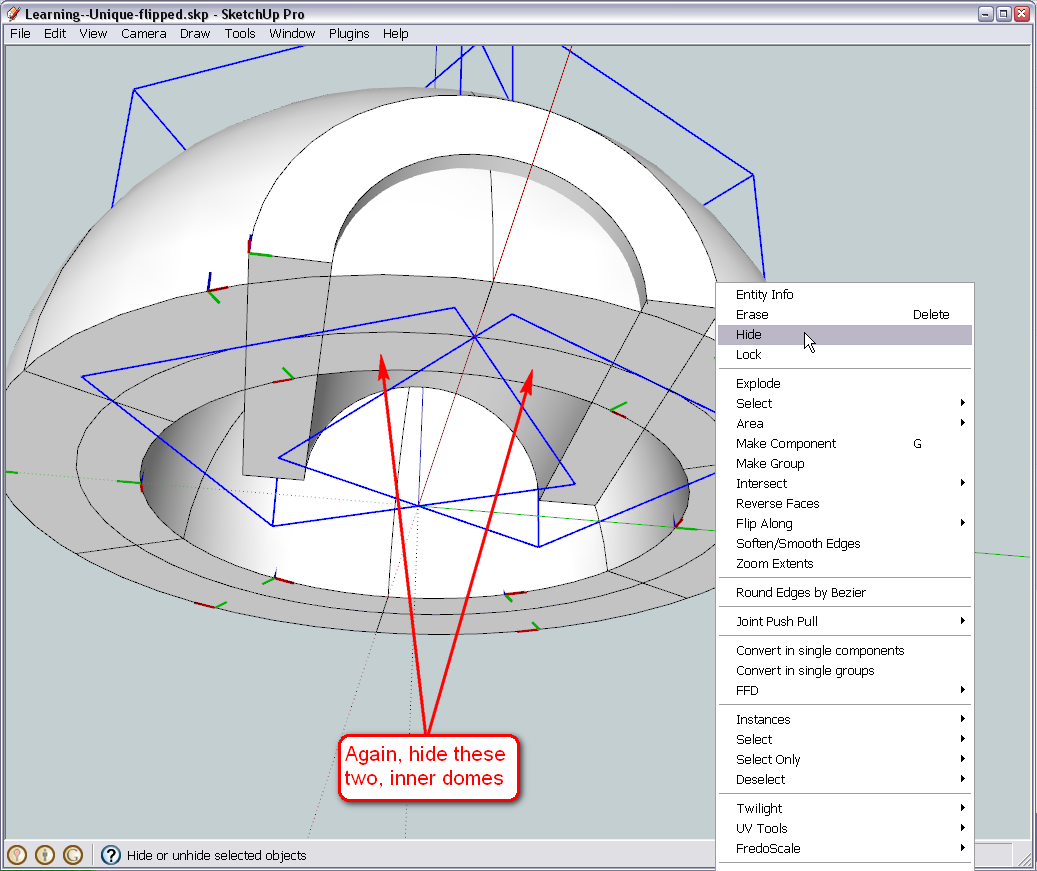
Now edit ONE of the outer components, select all by triple clicking on the bare geometry, right click and "Intersect... with model".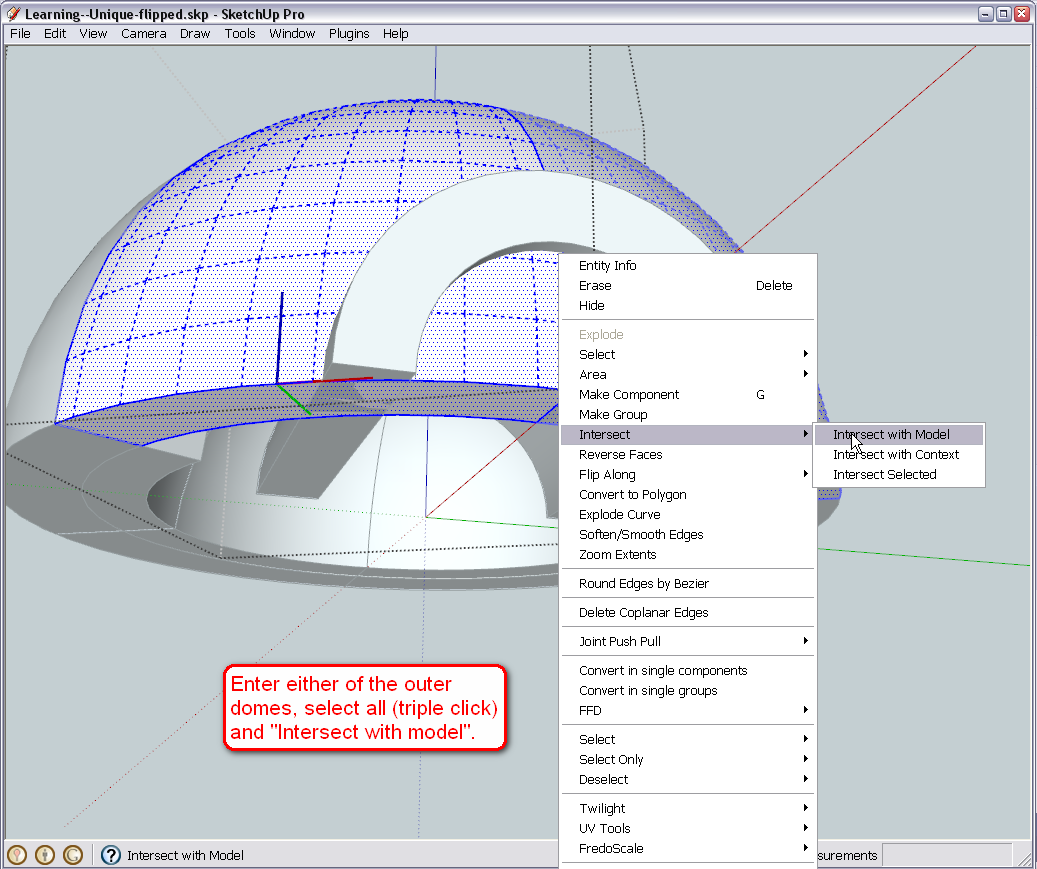
If you now hide the rest of your model (Ctrl+H, remember), you get a clean view of what is needed to clean up. Start carefully deleting unwanted geometry. Note that this is a sensitive part as we don't want to delete what we need but keep in mind that there is the Undo command (Edit menu or Ctrl+Z) all the time should you make any mistake so do it bravely.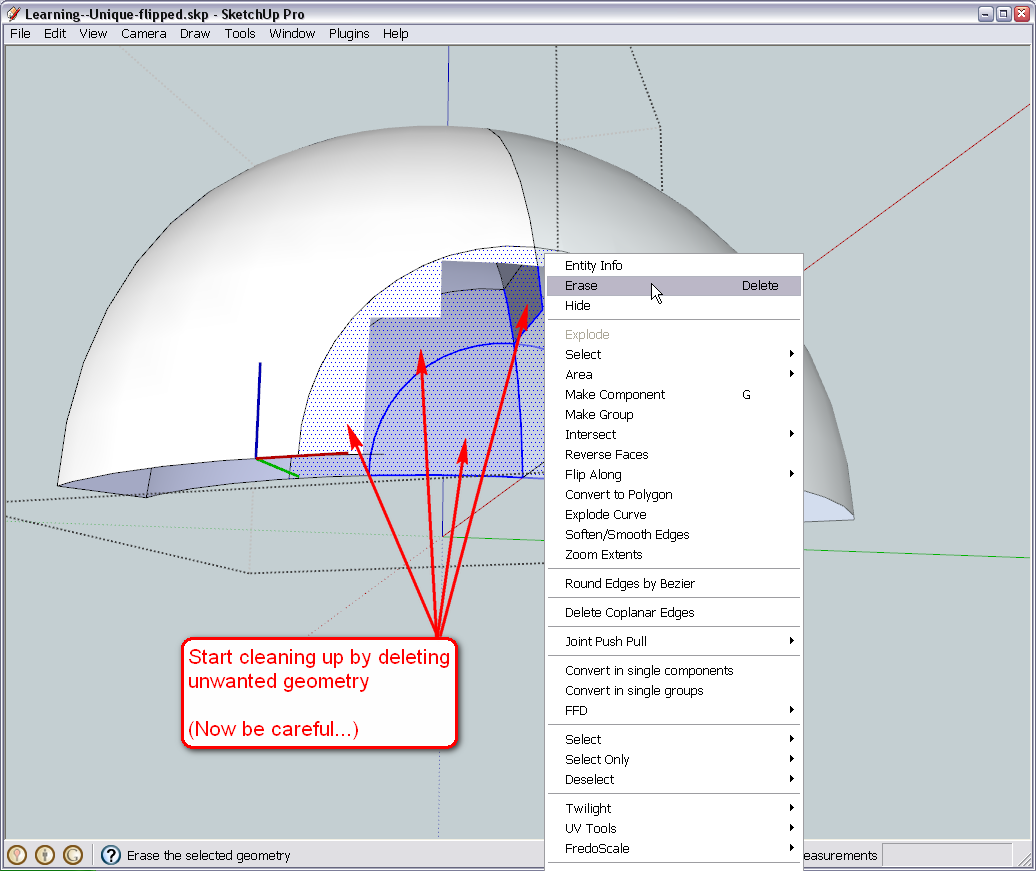
As you can see, this is where we make use of components and that we have a pair of mirrored components mated. We only work with one and the other is modified automatically.
We may need to redraw some pieces to close open gaps but that's already a piece of cake.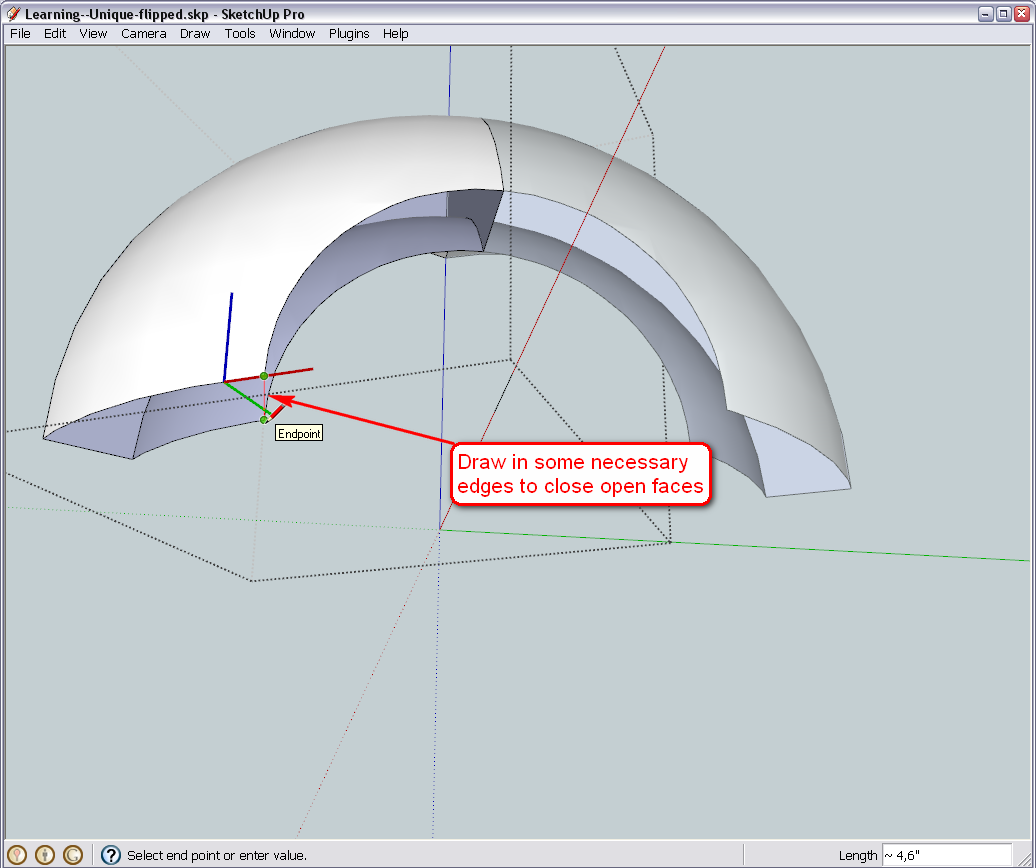
Now we change components - unhide the inner pieces (Edit menu) and hide the outer ones.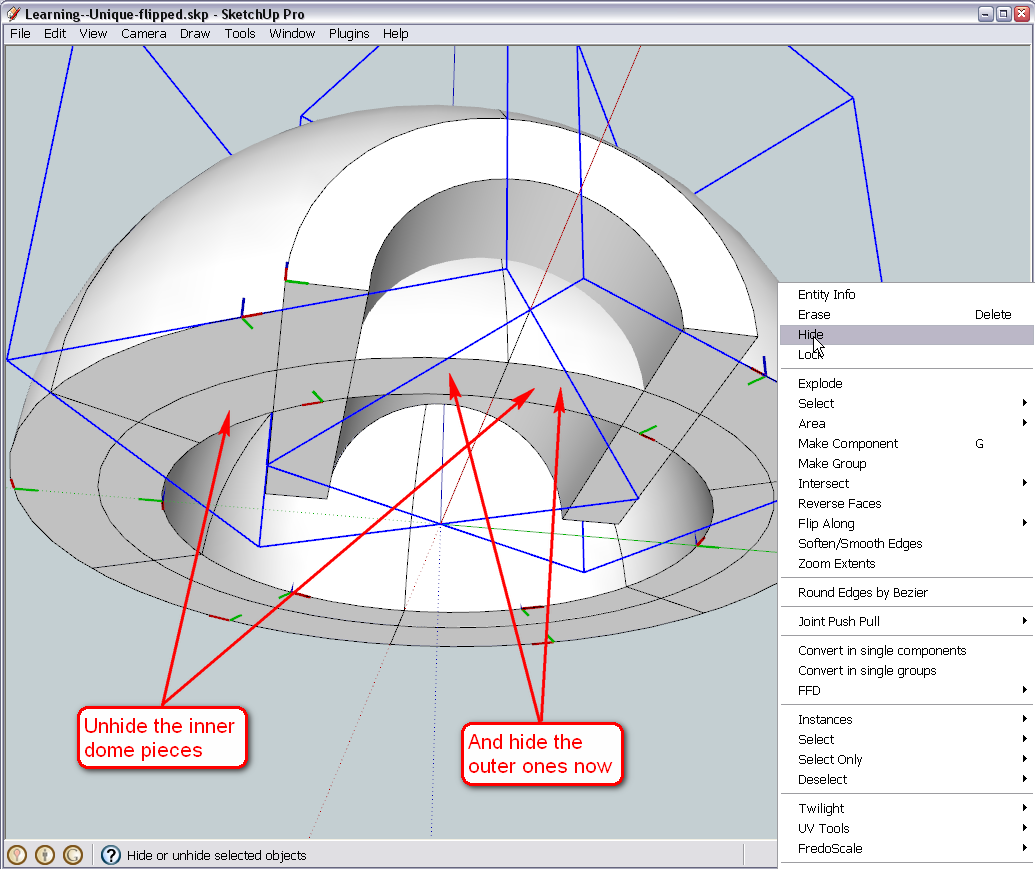
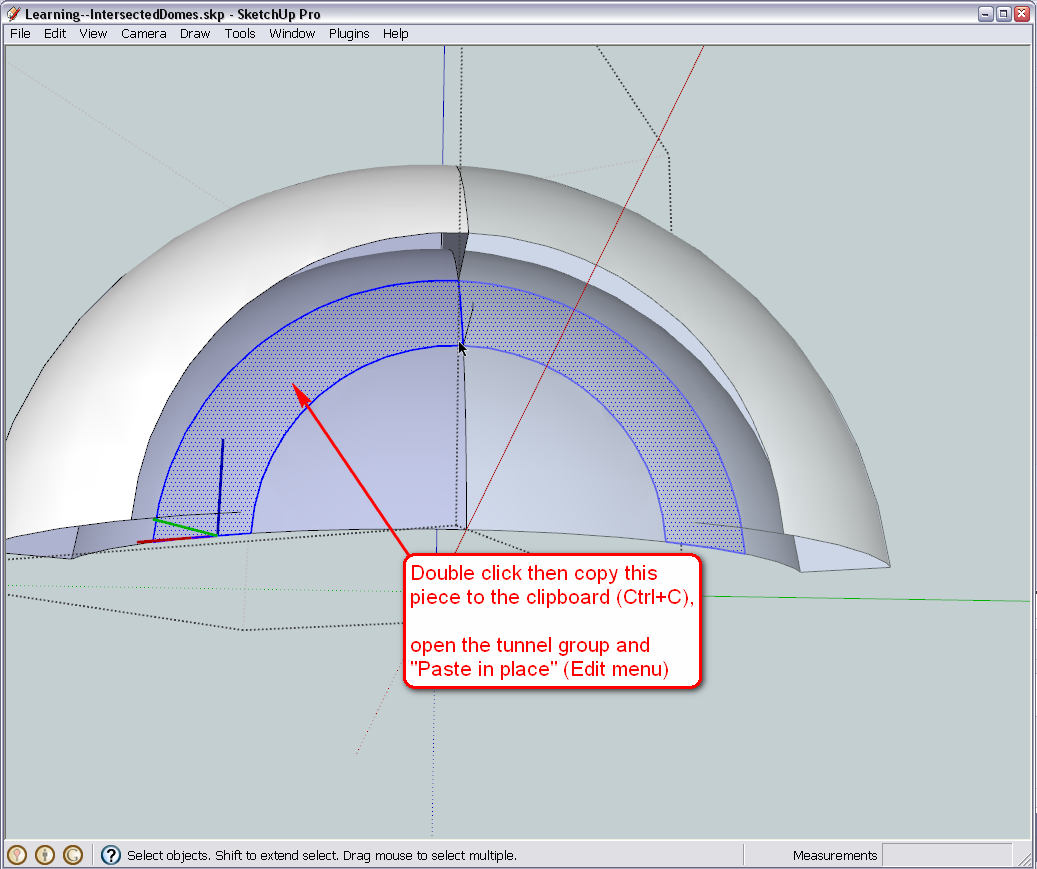
Do exactly the same with the inner components as you have done with the outer ones (use the "hide/unhide rest of model" - Ctrl+H - command to your needs again) Except one step - and this is extremely important! - Copy this piece I selected onto the clipboard before deleting its face then close the component, edit the tunnel (it's a group now), go to the Edit menu and "Paste in place". We need this little, curvy part later in this group. But if we get rid of it now, it will be hard to recover so therefore this extra step even before we deal with the tunnel.BTW you can assign a shortcut key to this very handy tool (Paste in place), too. I for instance have Shift+Ctrl+V (Ctrl+V is a general "Paste" shortcut in every app - just like Ctrl+C for copying or Ctrl+X for cutting)
And we end up with something like this.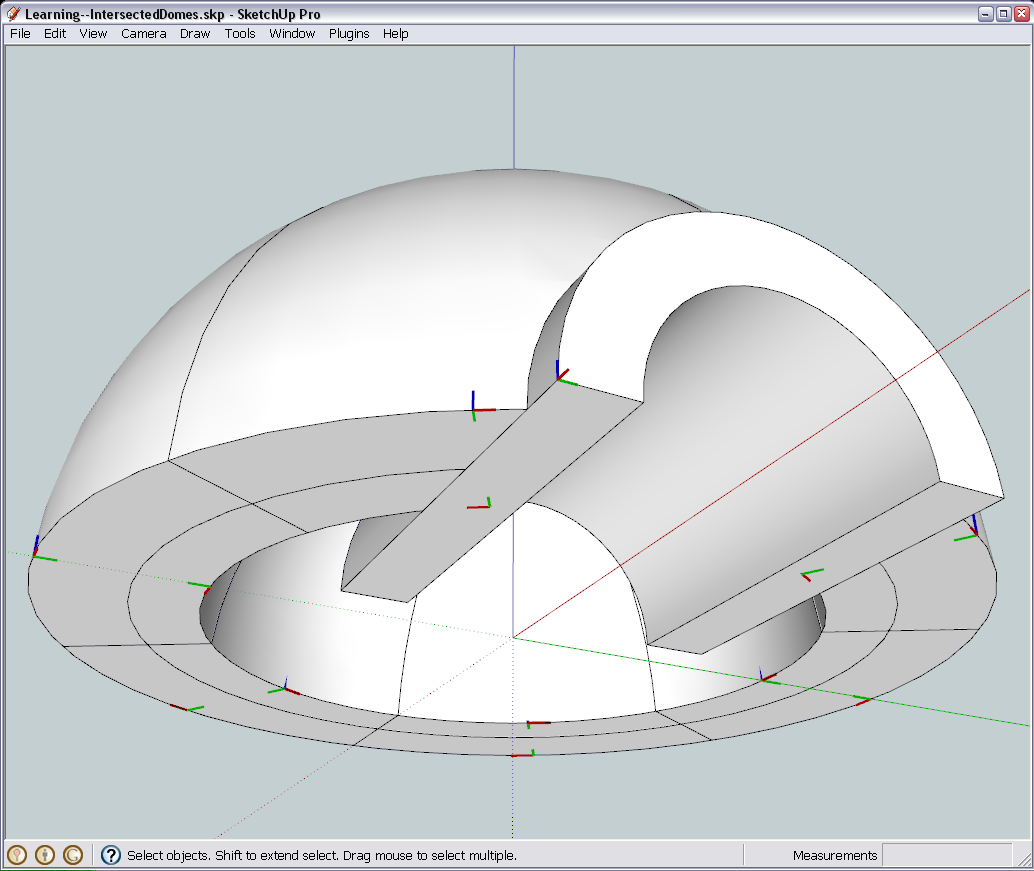
If you do not like those gaps in the domes where we intersected with the tunnel, we can deal with them later - as well as giving a final shape to the tunnel itself.(BTW the shape of the tunnel - I guess it is not bad to keep a flat front face in case you would like to apply some sort of "door" or such...)
-
Inline and on track, Sir.
I've done the cleanup as accurately as possible.@unknownuser said:
(BTW the shape of the tunnel - I guess it is not bad to keep a flat front face in case you would like to apply some sort of "door" or such...)
The way you have it seems fine although a door sounds good. Is it difficult to add or remove the protruding end at a later stage?
-
Well, if we didn't want to have something like that in the front, we wouldn't have needed to give thickness to the whole tunnel actually. I was also thinking about other solutions (maybe even simpler) but of course, we can replace that piece any time "borrowed" from an existing, untouched component from the outer dome.
BTW - the copy > paste in place was fine just you did not paste it inside the tunnel group but outside of everything. Not a big deal, we can always put it back later (the same way).
If we did the outside with the same technique, it could be without that flat face. (If you have a backup copy of the previous version, save it somewhere and we can go along that way, too). But we will also need to texture the whole thing. I'll look some good, similar examples up if you wish.
-
Hi Gai
@unknownuser said:
If we did the outside with the same technique, it could be without that flat face. (If you have a backup copy of the previous version, save it somewhere and we can go along that way, too). But we will also need to texture the whole thing. I'll look some good, similar examples up if you wish.
No Need to change the course of action at this time. What I would do is when i am doing the exam, I would make this change at this stage. I will need your help though at that time.
For now I think we continue as is.
-
How about now acting completely on your own?

The task would be to- enter the tunnel group (i.e. edit it),
- select all by triple clicking,
- intersect the selection with the model and
- clean up the mess.
Nothing that we haven't done so far - even with much more complex geometry.
I am pretty sure you could do it but of course, if you need help in the course of the steps, I will chime in.
One thing only - there is that little piece we copied and pasted in place. It only covers half of the surface needed - don't worry about that, we can deal with it later.
-
Wow feels good to actually do it alone eventhough it was a small step and all thanks to you. Im sure these little small steps will lead up to larger ones.
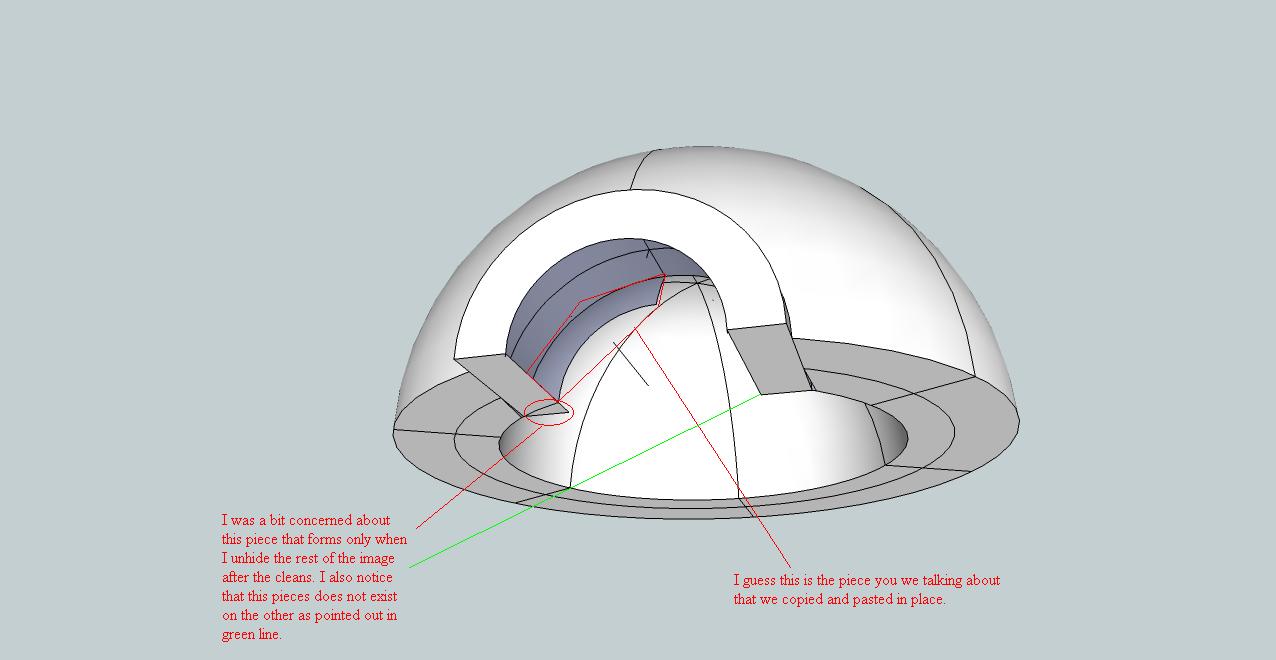
I have attached a Jpeg image of what I have now as well as the SKP for inspection to see if I am on track.
-
Well, those little pieces are easy to get rid - and yes, that other part is what we pasted in there however you managed to loose the whole inside of the tunnel! What happened there?
-
Hi Gai
@unknownuser said:
However you managed to loose the whole inside of the tunnel! What happened there?
I really done know what happened here. It seems I may have removed it in error and I didn't even realise my mistake. Sorry for that. Is there any way to recover this?
If not I have downloaded the version I uploaded in the following post. http://forums.sketchucation.com/posting.php?mode=reply&f=79&t=24930&sid=5acadaddbf65b132aad43f66c186234d#pr215930
I'm going to retry this. Will have it back to you in a few minutes for inspection, -
You can always undo unwanted changes (even after a save) but only until you close SU - so not in this case.
It could be "hand stitched" back but with a 24 segment arc, redoing the whole thing seems to be more straightforward.
-
Hi Gai
I'm having a totaly blank moment right now.
I've reopened the model before making my mess up and looked for areas to clean up but I don't know where.So I've done the following
- Double clicked tunnel to edit the group
- Tripple clicked it there after to get into the geomatary.
- Right clicked and selected intersect with model
- ctrl+H to hide rest of model
- Right click on the smaller arch of the opening and deleted it. ( Something dosent feel right with this step)
Please may I ask for some direction.
Thanks
-
Damn, you are right!
What an idiot I am! We removed those parts of the domes that should now intersect the inner surface of the tunnel! And I leave you alone with the job at this stupid mistake of mine - no wonder you cannot make it!
Sorry - I will post a corrected version soon.
OK, so the case is that when we have intersected the dome pieces, we should have intersected the tunnel as well before we start cleaning up by deleting the unnecessary parts of the dome pieces.
Now I went back a couple of steps, did both intersections and cleaned up the dome pieces but also left that part which is covered by the tunnel's thickness in (we'll do some magic with those later).
So now the tunnel is intersected already properly and you can try if you can clean this version up without any problem.
Sorry again for the hassle - it seems that I was rather pompous and big-headed when suggested you to always think ahead.

-
Hi Gai
No problem. I will try now to clean. -
Hi Gai
I've completed the cleanup. I hope I didn't take away something that was supposed to be there.
Thanks
Regards
D0me
-
Well, it seems to me that you did not delete what should have been deleted but really "cleaned up" the model only - deleting the intersection lines.
I coloured whatever needs to be deleted red (note that there are also red edges)
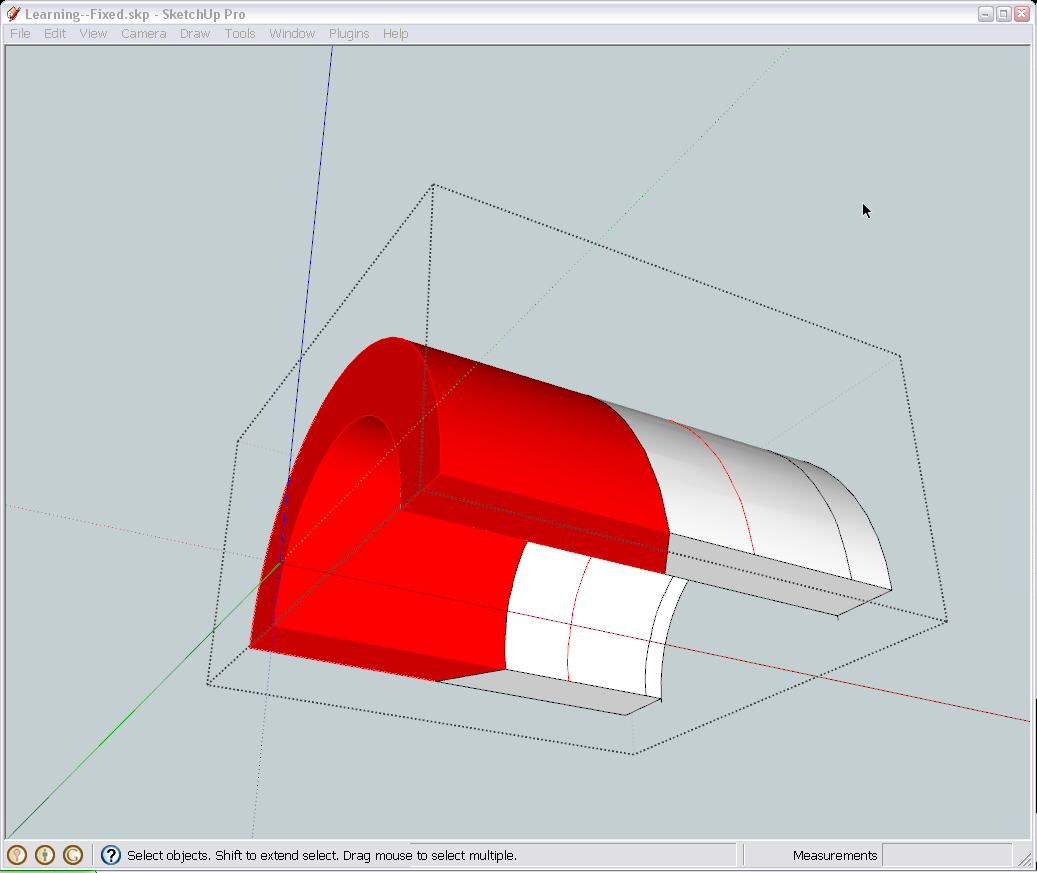
And the end result should look something like this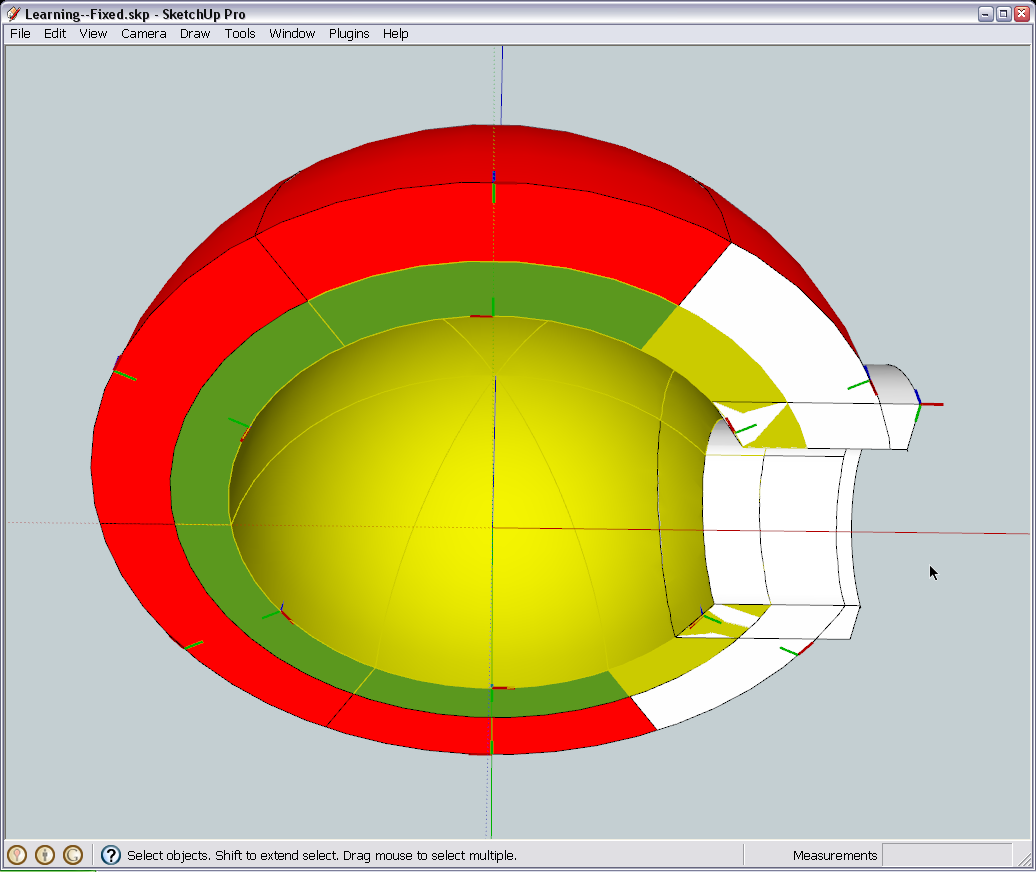
(Don't worry with Z fighting now)
-
Hi Gai
I have been a terrible student.
You leave me with a small task and I screw things up. Really sorry for that.I've uploaded the latest one.
Thanks for being patient with me.
Regards
D0me
-
Okay, nice job.

Now open this file and see what's new in there (look at the top left of the model window).
-
Cool. Didn't expect that.
Atleast now I can have the option of having the opening with the lip or without.Just one thing I noticed and I may be wrong as I may have used the dimension tool incorrectly.
The opening needed to be 9 Inches high. If you look at the Image I have attached, it is only 6 Inches high. Have I measured correctl?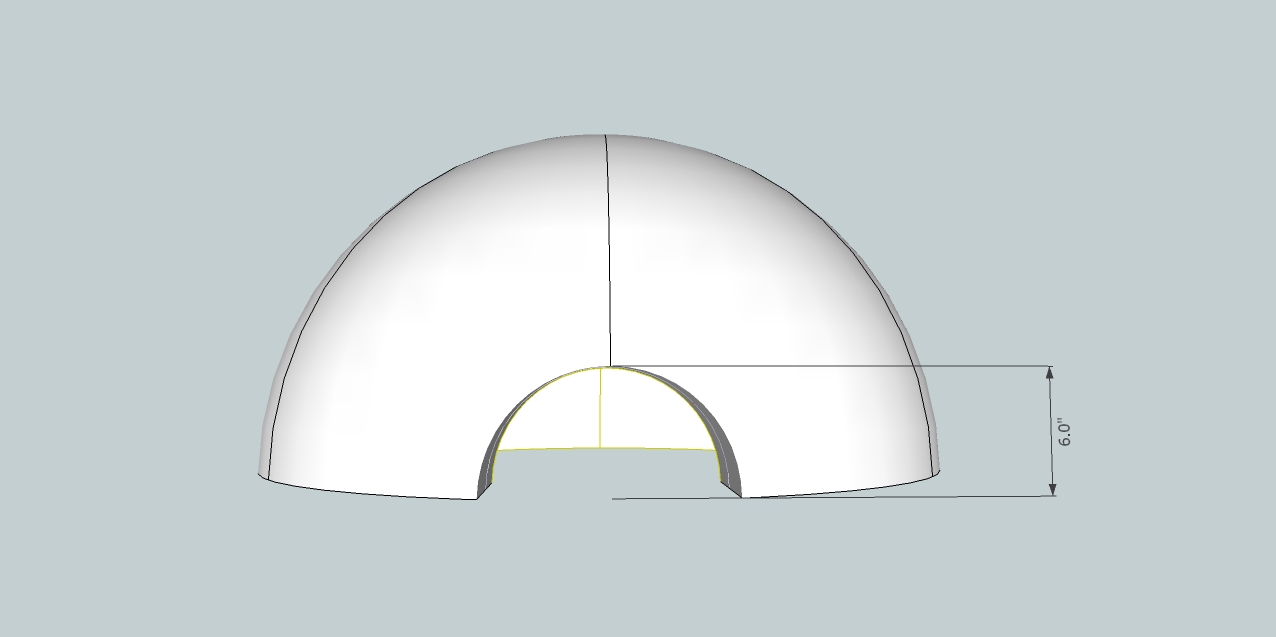
Thanks
Regards
D0me -
Well, you measured correct but remember that we had a 3" thickness for the whole opening and 9-3=6.
So what now? Redo? We can - it's already easy now - or we can progress with the model as it is now and you can change it when you redo the whole thing to practise (I - or anyone else I believe - will be here in case you get stuck in any case)

-
Hi Gai
@unknownuser said:
you can change it when you redo the whole thing to practise
Thats perfect.
The model actually seems complete to me. Really curious to see whats next.
Thanks
Regards
D0me -
That base part you mentioned somewhere above? Texturing? Putting some elements on hidden layers (according to what and when we want to display - just open your layers dialog from the window menu and see what and how changes when you change the scene tabs!)
Making sections and printing to scale? There are so many things you can do with a ready model - presentation, printed material... Exporting the whole model to a 3D PDF document so that anyone can see, rotate and such...
But of course, practising the modelling part is always the first step (otherwise you do not have anything to present)

Advertisement


