Transparent gradients
-
Is it possible to overlay a transparent gradient fill over a texture or to simulate this effect? I believe that if this were possible one would be able to simulate a "rendered" effect in a normal Sketchup view. For example I am able to take a material such as reflective metal and manipulate the texture position to create window glass that is reflecting the sky. It looks fairly convincing. It would be nice if I could do something similar to a texture such as brick or concrete.
I tried creating a plane 1/16" in front of the textured surface and then giving it a gradient texture and a transparency setting but this is pretty clumsy and leaves a hazy look to the underlying texture.
Just wondering. -
-
Yes, just like that.
I opened your file and the gradient fill is a png. Is it an image? Do you need to use only a png? How did you get it to be transparent? I guess if it's an image then it's not editable in Sketchup except for scalabilty. Where did you get a transparent image like that?
I am impressed!
-
Yes, it's a png image. PNG's and TIFF's (usable in SU) can have a transparency channel which can also be gradient. I made the image in GIMP with a very basic gradient fill between black and transparency (so this is rather an image editing trick than modelling - and to tell the truth, I really s*ck at it and in fact this is my first, successful gradient transparent image)

What I noticed a while ago is that when you place an image (imported as such) onto a textured face, they do not cause Z-fighting as before (I don't know since when it is like that) but it can be utilised for such purposes.
-
Thanks, very much
I will do some experimenting with this technique. I think it will allow me to add a bit of realism to SU models without having to render them. If you use a very subtle gradient over a texture it will simulate the effect of light falling off into the distance. I found it useful to sometimes create 3 variations of a concrete texture (light, medium and dark) and then use them in different but contiguous locations to simulate the effect of light and shadow. SU does this to some extent but not always where you need it. Now I will be able to give some perspective depth to lit and shadowed textures at least when viewed from a particular location.
To me, this new technique is revolutionary. Sometimes I look at a SU scene I have created and compare it to the simple rendered version of it (Podium, Renditioner, NXT, LightUp etc.) and see little difference other than the gradient effect of light on a plane. It would be so much easier to use only SU for presentation.
I wonder if it would be possible to write a ruby that would automatically apply a stock fill to a plane? -
With SU 7 now,on top of all, you can always right click on a face and make the texture (no matter it is tiled or not) "unique" then again, from the context menu > Texture item, you can select to edit in an external editor and give whatever effect you wish to only that face (but the whole face).
Quite handy IMO.
-
Gai, Good to know, Thanks
-
Yes that works much better.
Question: How do I change the default texture image editor in SU? It currently defaults to Microsoft Windows Picture Manager and I would like it to default to Photoshop.Thanks for your help- you've made my day.
Dave

-
I think it simply opens the image with the program that usually opens such images in Windows. Try this: right click on a JPG, choose "open with..." and when choosing the program to open be sure to mark the checkbox that says "always use this program to open this filetype".
-
There is a setting in Preferences (Window menu - or SketchUp on Mac) > Applications.
-
Thanks again
I had already found the preference setting but thought it was only for images and not textures. Also couldn't find the correct file to make the program open. But I tried .....photoshp.exe and that worked. -
Textures, images, materials... Unless it's a simple colour, all the same (as long as it's not an image entity in SU which wouldn't appear in the Material browser either)..

-
@gaieus said:
With SU 7 now,on top of all, you can always right click on a face and make the texture (no matter it is tiled or not) "unique" then again, from the context menu > Texture item, you can select to edit in an external editor and give whatever effect you wish to only that face (but the whole face).
Quite handy IMO.
2 Gaieus: Can i ask u, how this "make unique texture" affects the filesize or how it works? I am not only one who is having LARGER filesize after using this feature...Thx in advance
-
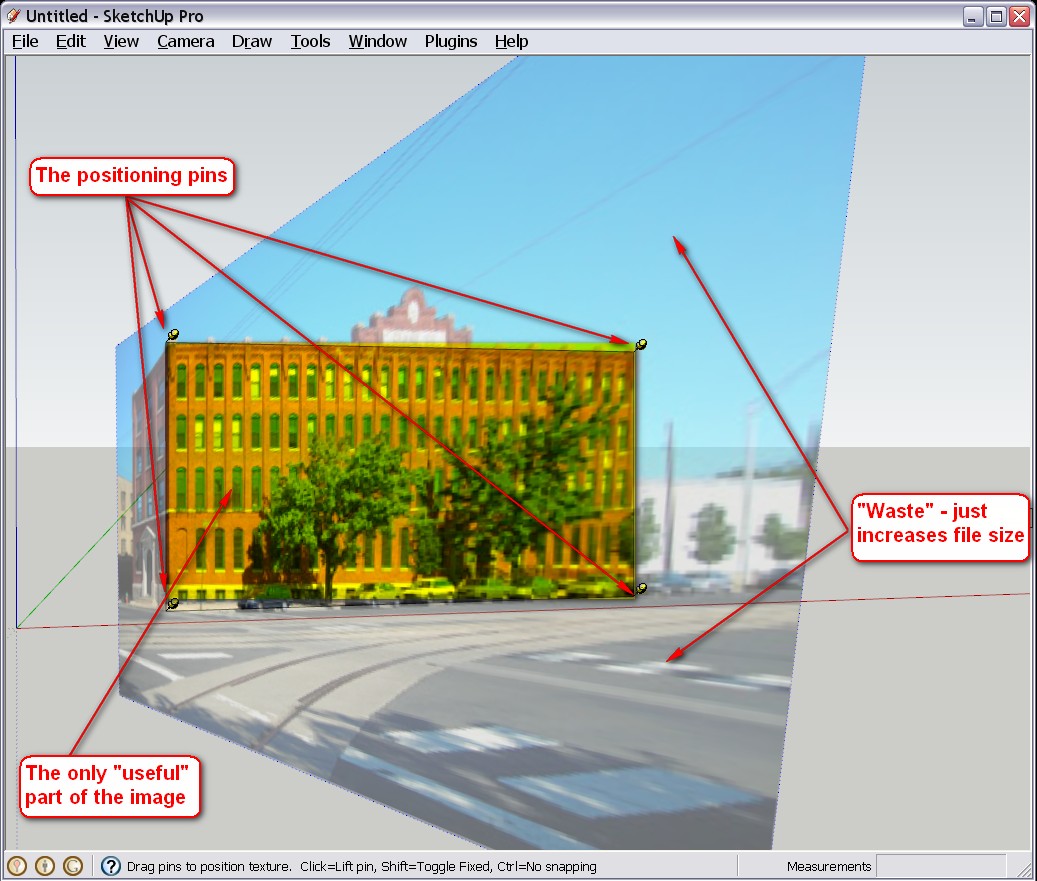
Imagine you place and position a photo texture (say a photo of a building when you are modelling for GE) on a face. Obviously, there are some parts of the image that will be "off" the face, no matter how precisely you attempted to crop it before importing. Here is an example with an image I grabbed from the net (first page in Google image search for the term "building)
Now if you make that part which is on the face unique, SU will crop the image and will only use what's on the face.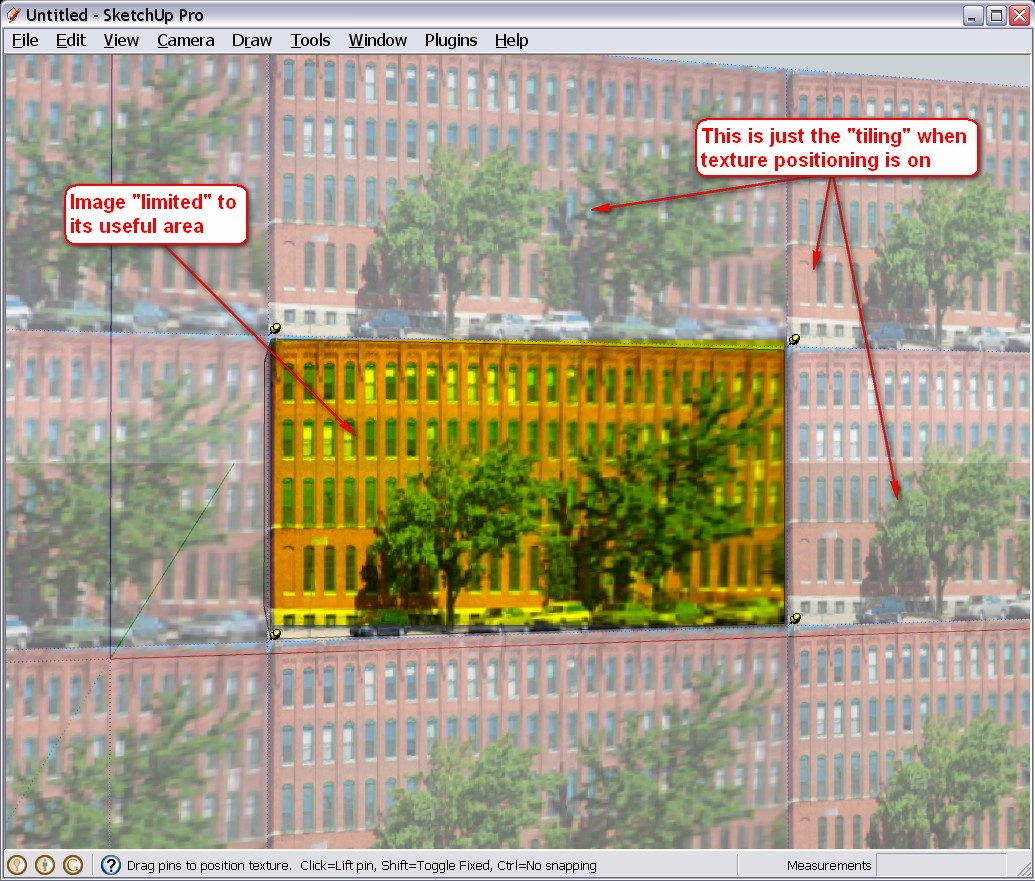
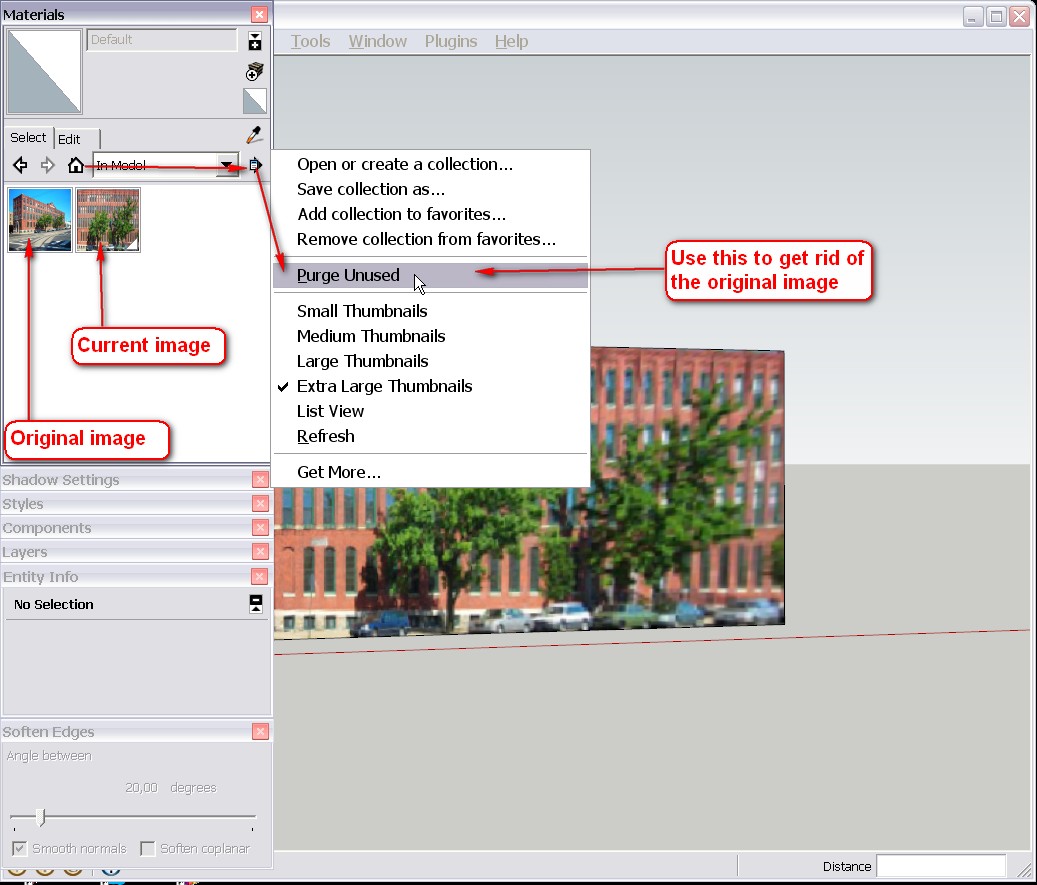
However, the original image remains in the model as you can see with the Model info > In model folder open - i.e. up to now, we have only increased the file size.If you purge your unused materials however, the original image, which is no longer in use, will be deleted and it's easy to understand that a part of an image is always smaller in file size than the whole image.
Note however that if you either applied the original image onto a back face or group accidentally (or it is shared by another face, too) you cannot purge it, so precise and accurate modelling is needed to achieve smaller file sizes as well beside different tricks that this technique enables us.
Then of course, if you make an (otherwise) tilable texture unique on a face (say when it would be repeating many times otherwise) like this one below
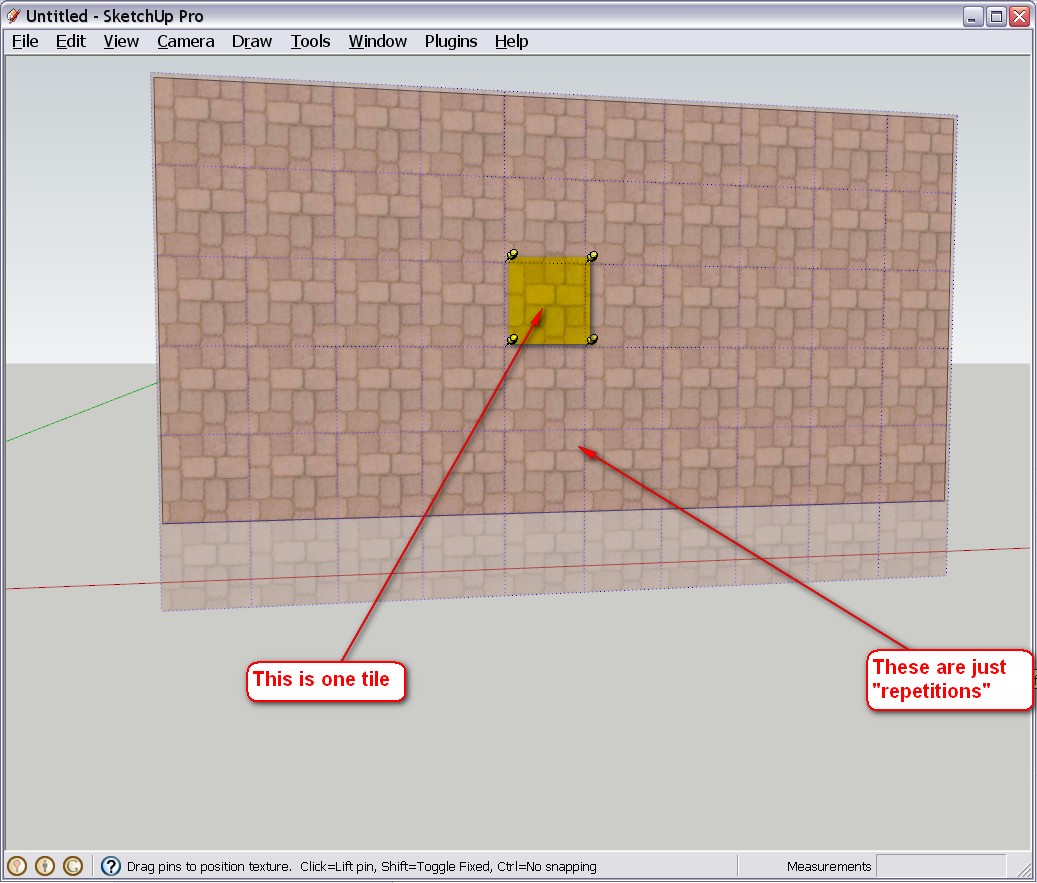
I's again, easy to see that one big image is bigger than a small one (since the small one is only present in the file size once - just repeating)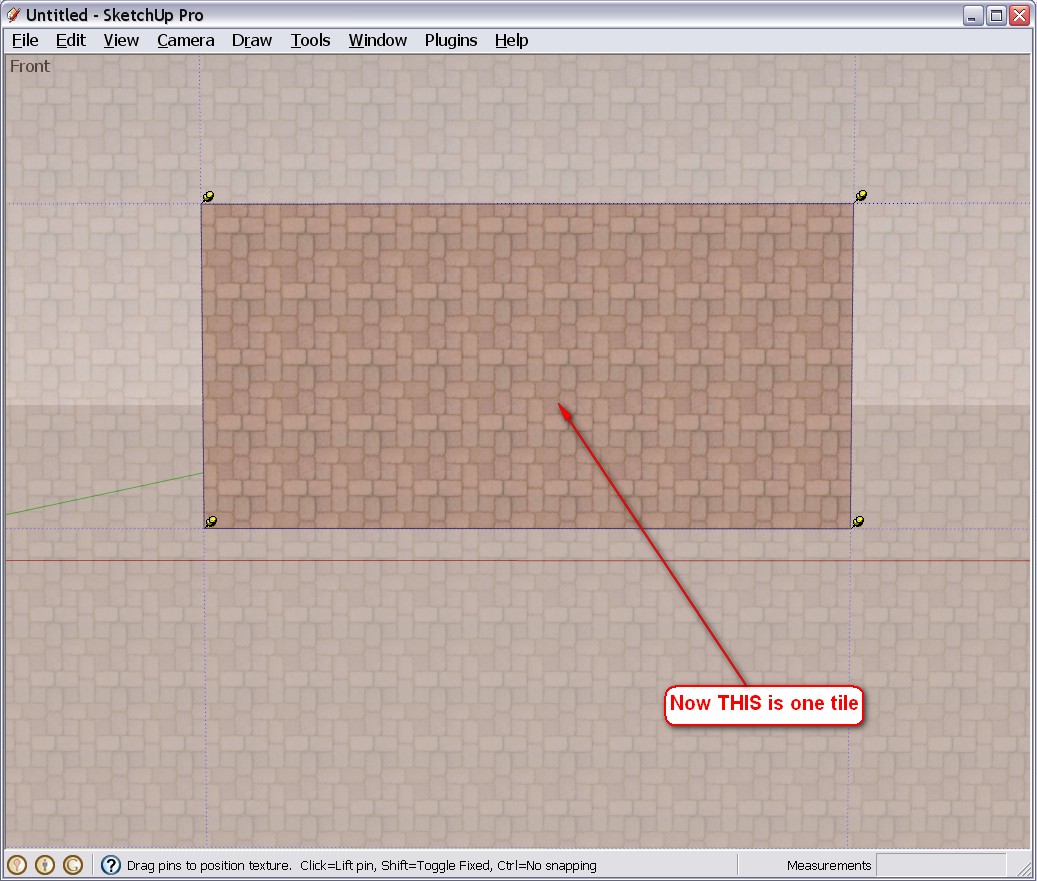
So why would one want to do this? There may be several reasons. Maybe you want to create a bump map of it for a whole face where you will eventually use a different diffuse map in a rendering application and you want to make sure that the two UV Maps are identical.Or you want to use a dirt map of a sort, like in this example
-
Thank you so much for complete description how it works, your help is much apprecieted!!
-
Oh wow! Can we please put the knowledge in this thread together with this incredible video, to simulate artificial lighting directly in SketchUp!?
-
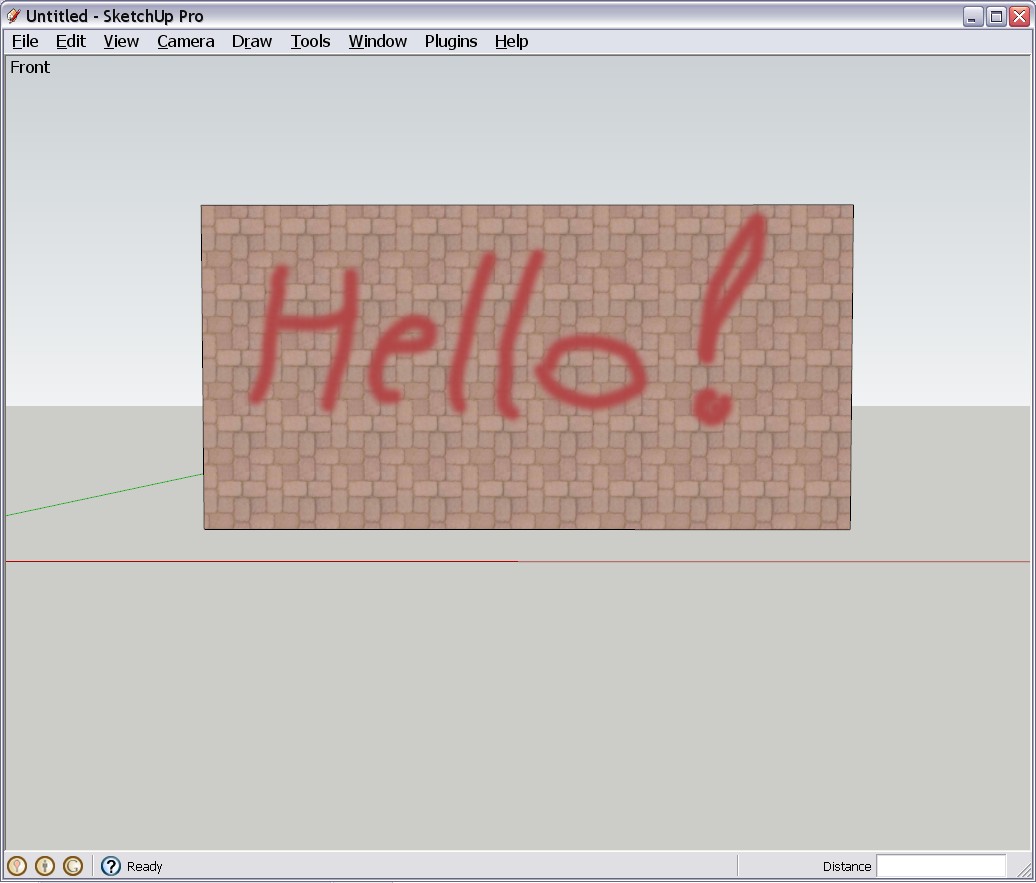
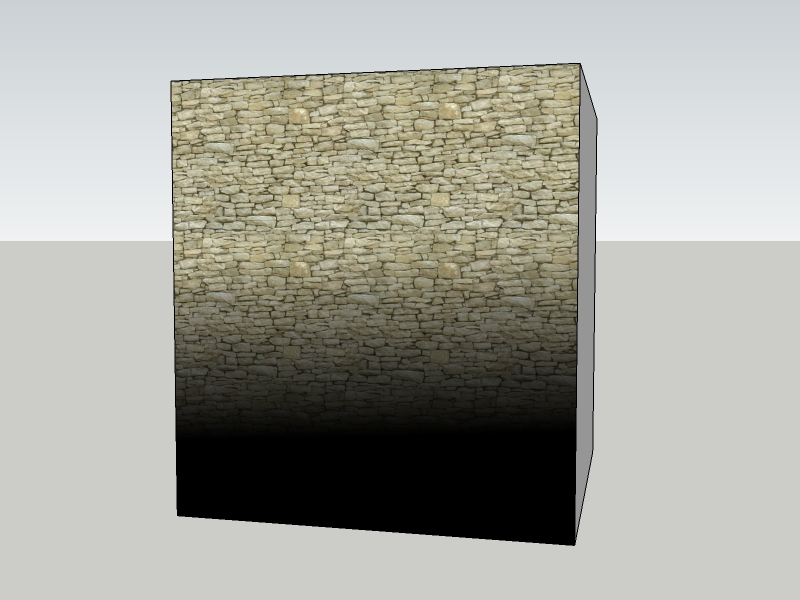
Yeah! I just created a (very rudimentary) light spot using this trick!

(Of course it is 3D)
This is done using a white PNG with a linear gradient transparency!

-
@dave1954-2 said:
I think it will allow me to add a bit of realism to SU models without having to render them.
To me, this new technique is revolutionary. Sometimes I look at a SU scene I have created and compare it to the simple rendered version of it (Podium, Renditioner, NXT, LightUp etc.) and see little difference other than the gradient effect of light on a plane. It would be so much easier to use only SU for presentation.
C'mon, no comments guys?

This IS revolutionary

-
I like your light trick.
One thing I have done, not wanting to push the render button (cause for me that is sometimes a rabbit hole of time)... for quick "sketches" model views to clients or builders. I take two different shadow version exports, overlay in GIMP, choose a transparency and with a layer mask, run a big fuzzy brush over some areas to change transparency. It can suggest light gradients and even reflection. If you want to geek out you can add ambient occlusion by another overlay or burn tool. I often add a favorite filter to enliven the colors. I think it's faster than adjusting textures.
For example I will overlay an interior scene with shadows and one without. I choose setting in the shadow window for each to get the brightness settings I want. If I do it right the process is not technical or time consuming , just some quick adjustments and brush strokes for a better output.
Now there's the Ambient Occlusion plug-in that may be a good quick fix for SU output.

Hello! It looks like you're interested in this conversation, but you don't have an account yet.
Getting fed up of having to scroll through the same posts each visit? When you register for an account, you'll always come back to exactly where you were before, and choose to be notified of new replies (either via email, or push notification). You'll also be able to save bookmarks and upvote posts to show your appreciation to other community members.
With your input, this post could be even better 💗
Register Login


Advertisement