Sean Headrick's Web Site
-
Hi Guys,
I had a look at Sean Headrick's Web Site, Sean is a Member
here. http://www.headrickdesigngroup.comI was very impressed with his work and in particular his
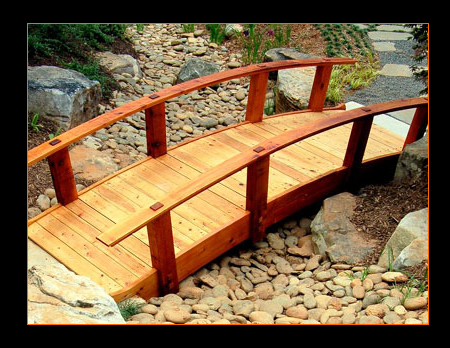
design for an arched Foot Bridge. The detail is really
ingenious.Mike


-
Wow Mike, that is unique!!! great bit of thinking....
Cheers!
-
Great stuff ,I love the design.
-
Hi Guys,
I wonder did Sean design this in SketchUp. If he did I would
be interested in learning how he approched things ... must PM
him and ask.Mike
-
...good design,good details,thanks Mike///

-
I've emailed Sean, hopefully he will have time to comment
and enlighten us
-
Hey Guys,
I really appreciate your interest in this design. I remember when I built it I had just started using SU because I had dragged my laptop out to the job site to show the contractor the awesome new 3D modeling software I had found. So I was still relying on pencil and paper for most of my idea development. I will sit down this weekend and do a model of the bridge.
-
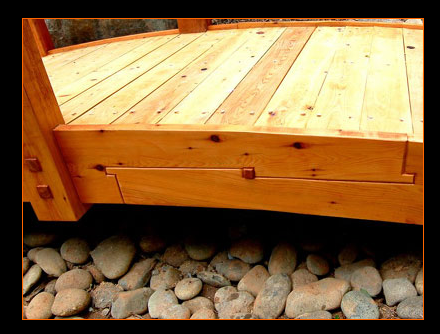
I'll be looking foreword to seeing how you built that bridge Sean. I'm especially interested in why you used that stepped scarf joint on the side facia/beam? Was that for looks only?? Very nice detail

-
Hey Guys,
Here is a model of the bridge. The slide show demonstrates generally how I put it together. I built it almost entirely at my shop. I built forms at my shop that had sockets for the structural beams. The bottom of the sockets were sloped to allow for drainage. The bottom edge of the arch is a 23' radius. All the decking was screwed and plugged. The decorative joinery served a couple solutions. I couldn't make the fascia with a single piece of wood given the height of the arch, and I didn't want a butt joint that would inevitably separate. I also wanted to have the decking captured between the fascias so the end grains were not exposed.
I had wanted to add some labels that were only visible in the present scene, but the labels didn't disappear when the scene changed. How do you do that?
-
Thanks for going to the trouble Sean. Boy that bridge has some nice strong beams! Did you use redwood, or wr cedar for the laminations?
sorry, but I can't answer your question about those labels.
-
Hi Sean,
Well done, I've d/l the model and have check out the construction.
You have some nice design ideas / details there, food for thought!I note that you have 'built up' the whole presentation by adding
more and more to the basic model (foundations). In order to be
able to attach tags (descriptions) to each scene I would copy the
model to a new scene and then add the tag. If you make components
and groups it keeps the overall file small. I'm sure there are
other ways of doing this but it works for me.Mike
-
For models where I have shown the progression from the existing building, showing demolition and then showing the new work, i have put the tags on separate layers - note#1, Note#2 etc. and turn them off for the next scene. Seems to work ok for me.
-
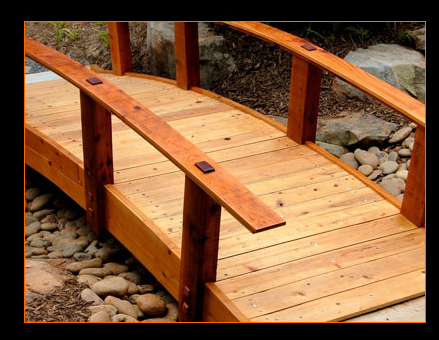
I built this back in Atlanta where redwood is a little harder to find. I used pressure treated yellow pine for the beams, redwood for the fascias and railing posts, and cypress on the treads and railings. I didn't model it but my railings were actually two layers of 5/4 x 6. the first layer I screwed to the shoulders of the tenons on the posts, and then the second layer I screwed from underneath so there weren't any visible fasteners.
I appreciate the suggestion on the labels.I should have thought of that.
Advertisement


