[Tutorial > Modeling] carbon nanotube
-
Playing with this problem some more, I did some arithmetic and figured out how to make a tube of hexagons of a specific size from two circles (actually four, by cloning the first two).
I don't know how to set up scenes yet, so I drew the steps along the red axis. Here's the text that would go with the skp:
To make a nanotube with hexagons of ~12" radius:
Draw a circle of 46" radius.
Drag/copy the circle 10 3/8".
Rotate the copy 7.5 degrees.
Group the two circles, and drag/copy the group 20 3/4".
Ungroup everything, and break the curves.
Hand stitch the hexagon pattern.
Delete the excess lines.
Elongate to taste.
Note: For a circle of 24 sides, the length of a side is the radius divided by 3.8333. For a given side, multiply by 3.8333 to get the radius.
-
Thanks very much Teezer. This was so similar to my own method I have run with your hint about scene creation and made a tutorial from your original file and posted text - hope you don't mind. Very nice solution.
-
Yes, nice solution Teezer! And nice tut Simon. Teezer, please define "simple minimum solution". Is this a math term? A physics term?
It really makes sense to think of the hexagon vertices lying on a series of circles.
How about this refinement of your process.
- Instead of drawing circles, draw polygons. In this case a polygon with 24 sides.
- The "hand-stitching" process can be mechanized. Just draw two adjacent zigzags up the stack of polygons and multiple rotate/copy them around the perimeter(use rotate and control to get the + sign, click on the centre of the polygon which SU will find for you, start the rotation process, enter the relevant angle, then enter 6x)
Who would have thought a roll of chicken wire would be so absorbing
I couldn't help doing the math.
This method works because the distance from vertex to vertex across a hexagon equals twice the length of the side.
For a nanotube with N repeat units, we need a polygon with 3N sides.
The angle at the centre of this polygon is A = 360/3N
Using trigomometry,
So the point is that we can now build a nanotube with any number of repeat units, with a side of any length.Of course the work is not over. What about the other types of nanotube? Armchair for example!
-
Nice tut Simon! No, I don't mind at all.
And apologies to caddict for hijacking the thread. I just got engrossed in trying to find a simple solution, since the object is made of a very basic set of components that repeat in a simple pattern. My "simple minimum" comment meant that the small section that I isolated in the first model was all the construction that was needed -- the rest was copy and paste (in fact, what was shown was too much if copy, paste, rotate was used, and too little for just copy paste -- duh).
I had a trig reference around somewhere, but it's been fifty years. I'll take your word on the math.
Off to look up an "armchair nanotube"...
-
I don't think you hijacked the thread...it's a team effort! The great thing is that there's always more than one way to solve any problem.
-
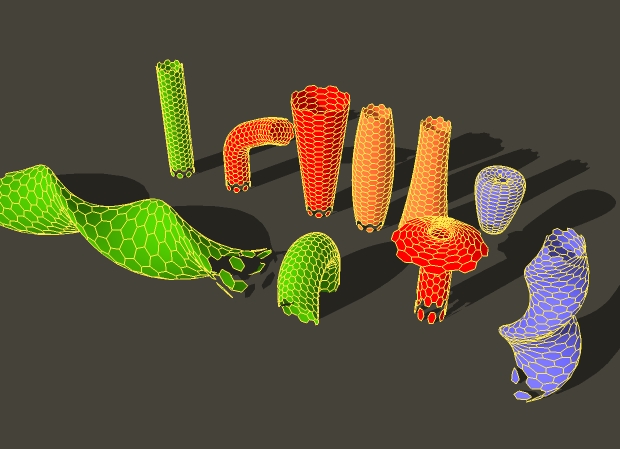
Ok, my obsession with carbon nanotubes is officially over. We had already created Armchair and Zigzag nanotubes in the earlier efforts, and all that remained to be done was to create a model of a Chiral nanotube. I finally managed it last night.
Here is a skp with all three models:
-
Nice Teezer! You have staying power
The chiral looks tasty. But you only gave us the briefest desciption of how you made it. Give us more details if you can face it! -
I was afraid you'd want to see how this sausage was made, so I saved some of the steps along the way. And I figured out the "scenes" thing and put together as a tut in the more-or-less traditional manner.
Doing it again would just be tedious. The fun part was figuring out how to get it done. I love to solve problems like this...
-
Thanks Teezer, I have never heard of chiral nanotubes
-
Yes very nice solution Teezer, And very thorough. Also nice tut. The rolling process you used is accurate but I can see tedious. I guess you know about the two methods of box selection: from the left and from the right. That could speed things up. You may get a job at MIT
-
@caddict said:
Yes very nice solution Teezer, And very thorough. Also nice tut. The rolling process you used is accurate but I can see tedious. I guess you know about the two methods of box selection: from the left and from the right. That could speed things up. You may get a job at MIT
I'm assuming that you meant I could have rolled it from both sides toward the center. Yes, that would probably make it easier. I was so glad to finally get a good result that I didn't even think about improving the process -- who would want to do this on purpose?
And I'm not looking for a job at all. I've (almost) retired from 45 years of computer programming, and I'm looking forward to just playing with computer graphics and building stuff...
-
I wasn't thinking you could improve your method. I was just wondering whether you know the various methods of selecting objects. See here:
http://download.sketchup.com/OnlineDoc/gsu6_win/gsuwin.html
I think your solution is great
If I think of any good problems I'll send them your way. -
The circle tool and the polygon tool are identical and the default size for the circle tool is 24 sides. Also the area calculation for circles is not based on the area of a circle of a given radius, it is based on a polygon with the number of sides specified in your circle tool.
@caddict said:
Yes, nice solution Teezer! And nice tut Simon. Teezer, please define "simple minimum solution". Is this a math term? A physics term?
It really makes sense to think of the hexagon vertices lying on a series of circles.
How about this refinement of your process.
- Instead of drawing circles, draw polygons. In this case a polygon with 24 sides.
- The "hand-stitching" process can be mechanized. Just draw two adjacent zigzags up the stack of polygons and multiple rotate/copy them around the perimeter(use rotate and control to get the + sign, click on the centre of the polygon which SU will find for you, start the rotation process, enter the relevant angle, then enter 6x)
Who would have thought a roll of chicken wire would be so absorbing
I couldn't help doing the math.
This method works because the distance from vertex to vertex across a hexagon equals twice the length of the side.
For a nanotube with N repeat units, we need a polygon with 3N sides.
The angle at the centre of this polygon is A = 360/3N
Using trigomometry,[attachment=0:12cafquj]<!-- ia0 -->nanotube the math.jpg<!-- ia0 -->[/attachment:12cafquj]
So the point is that we can now build a nanotube with any number of repeat units, with a side of any length.Of course the work is not over. What about the other types of nanotube? Armchair for example!
-
It still needs work imo.
I'm trying to figure out a neat way to produce a perfect model ie all bond lengths equal.
For a fixed bond length and number of repeat units, the variables are: bend angle of the hexagons, and radius of the nanotube. There is obviously a relationship between them.
And also it would be nice to model the other types of nanotube.
-
i guess, the reason for choosing polygon instead of circle is that one then has control over the number of vertices.
i am not sure why you are refering to area...i don't think area came into the discussion
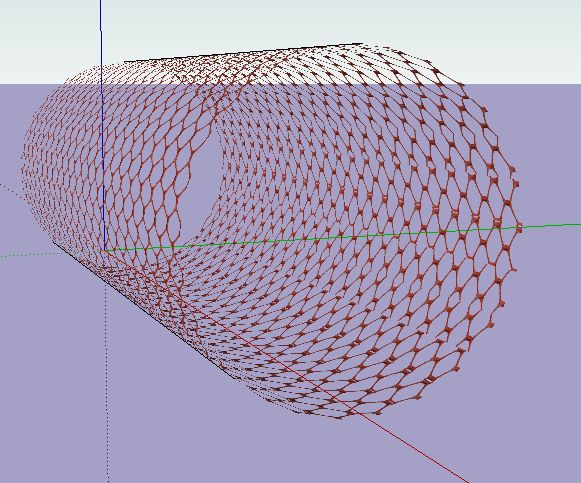
i find it amusing that the image at the start of this thread could also be generated by applying "diamond mesh" fencing material to a simple cylinder
-
Nice tutorial
thxsThis whas justs a experiment.
Using Freeform 2.0 Fredo6 and FFD From C. Phillips
-
very good!
It's amazing that it has been about a year since this thread was started...the abundance of scripts that have become available in that time!
-
@caddict said:
i guess, the reason for choosing polygon instead of circle is that one then has control over the number of vertices.
i am not sure why you are refering to area...i don't think area came into the discussion
i find it amusing that the image at the start of this thread could also be generated by applying "diamond mesh" fencing material to a simple cylinder
You do have control over vertices and sides with both tools. They are identical. If you click the circle tool and type in a number before moving the cursor, it will use that number to specify the number of vertices. So you can build three sided "circles" and 60 sided "circles." If you type in nothing it will default to 24.
The reason I mentioned area was that I expected the circle tool to at least pretend to be a circle. Let's say you you were trying to keep your drawing very low poly so you drew a 6 sided circle but you wanted an accurate estimation of area for painting or labor based on square ft. Or maybe you need to know the amount of chicken wire needed to build a nanotube of a given size. If you are going to call something a circle then its area should be calculated with pi x radius squared. But sketchup (in its info box)does the calculation based on polygons so a low poly circle has less area than a high poly circle even if both have the same radius.
You know you can do material takeoffs of surface area using SketchUp? My point is that it is accurate for polygons but not for circles. This means that the internal workings of Sketchup do not even recognize circles when it comes to doing the area or volume calculations.
-
This problem has been discussed from time to time on this and other forums, not only in relation to area and volume calculation but also in geometric constructions where circles intersect other objects.
The usual solution is to set the number of vertices to a large number, the size depending on the circle radius and the precision required.
-
I've wanted to create a hex mesh for a while in blender,this might help and it's nice to see I can do it in sketchup. Thanks. BTW do I need and rubies for this?
Advertisement