[Tutorial > Modeling] Curved Roof, Curved Rafters
-
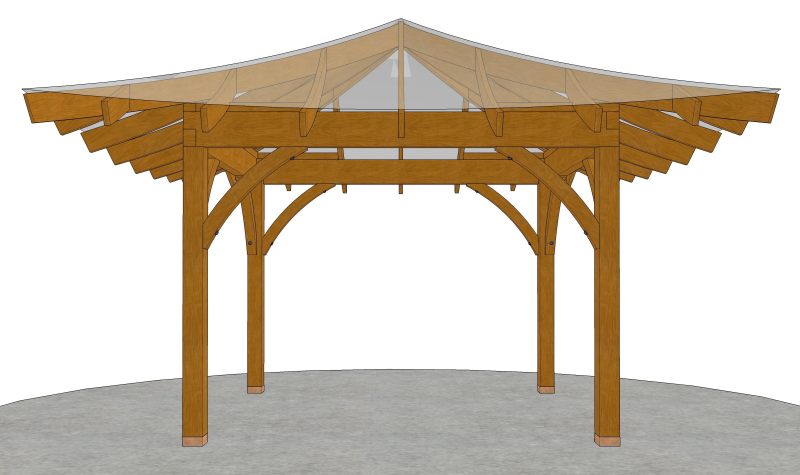
So, I made two Tuts on how to model a draped (curving in 3 dimensions)hip roof, and be able to get all your different rafters made accuractly so that you'll be able to actually build the roof. The whole key is to accurately create your curved roof plane first, then Intersect the top edges of all the rafters and jacks into it.
The first tut is how to model your curved roof plane, and the second one, how to create and cut the curved rafters.
In the real world you can't be beveling any of the top rafter edges either (too much work, and the bevels would constantly change!), so the tops of each rafter gets marked on the low side of the curving sheathing plane, so that the roof sheathing planes up the curve, hitting only the low edge of each rafter, and the hips get dropped.
Click either of those 3D Models I posted at the bottom of the Page (the html version is much better than the pdf) and you can see how I solved the issue of a few of the Jacks, and the Hips, actually ending up above the beam tops. I just added a 4x4 in the corners on top of the beams. When you zoom in you'll see that the Hips only end up with a very small seat cut.
Tutorials
http://woodsshop.com/Gazebo_Kits/How_Build_Gazebo/SKP-TEST.htmI also modeled a cute little draped Dutch-hip roof.
http://woodsshop.com/Gazebo_Kits/Draped%2010x10/Draped10x10_.htm
-
Nice one joe, a great example of real world modelling for woodworkers.
I could only find the second tut though.
baz -
Darn, I know I went in and added that first Tut to the page a few days ago, but you're right Baz, it wasn't there (add some Twilight Zone music).. so I just went and added it again.
thanks for pointing it out to me!
-
Got it, thanks, I notice you didnt use the sandbox from contours to fill in the roof?
Also dont want to get picky but the hip and some of the jacks dont seat, is this just a matter of using wider boards?
baz -
Don't want to get picky hey?
")
like i said, Click either of those 3D Models I posted at the bottom of the Page (the html version is much better than the pdf) and you can see how I solved the issue of a few of the Jacks, and the Hips, actually ending up above the beam tops. I just added two 4x4s in the corners on top of the beams. When you zoom in you'll see that the Hips only end up with a very small seat cut. All the rafters end up with different height seatcuts I found out, if you're limited to your widest boards being 2x12s.
Haven't ever used the sandbox tools. Isn't that in ver 6? I couldn't ever feel comfortable with 6 so I stayed with 5, does everything I need to do.
How would you use the sandbox to get that roof shape? Would it make better planes for the rafter top intersections?
-
ok I see how you did that. imho I think it spoils the look a bit, how about laminating the offcut from the top to the bottom?
I use the sandbox a lot and its so much quicker than stitching.
As you can see from below, I used your roof contours, although your version is probably lighter in polygons,(I havent counted, I'm supposed to be working
baz


-
That's a good idea! Wouldn't be too difficult at all.
Maybe if I ever build one I might consider that!
-
I wouldnt mind having a go myself, good luck and wishing you clear skies and amenable clients
Hello! It looks like you're interested in this conversation, but you don't have an account yet.
Getting fed up of having to scroll through the same posts each visit? When you register for an account, you'll always come back to exactly where you were before, and choose to be notified of new replies (either via email, or push notification). You'll also be able to save bookmarks and upvote posts to show your appreciation to other community members.
With your input, this post could be even better 💗
Register Login


Advertisement