New SketchUp Tutorials Available for Woodworkers
-
Hi Folks,
I have been using SketchUp for about three months now (though 3D drawing for about 15 years). I know what it is like for a newbie to come up the curve. To help others, especially woodworkers, I have posted the first two parts of a six part tutorial on the how to draw a bedside table on my blog. Part three will go up today. It is intended for beginners. I am also using this material to teach a class in my local area. So check it out. If you use it please send me feedback, the kind I can use to make it better. I have a thick skin and small ego, so you won't hurt my feelings. My blog is http://www.srww.com/blog and my contact information is on my website.
-
Hi Joe,
From a first reading of your article on drawing a bedside table I can see that my approach is very different from yours. I'm not saying it's better, it's just different.
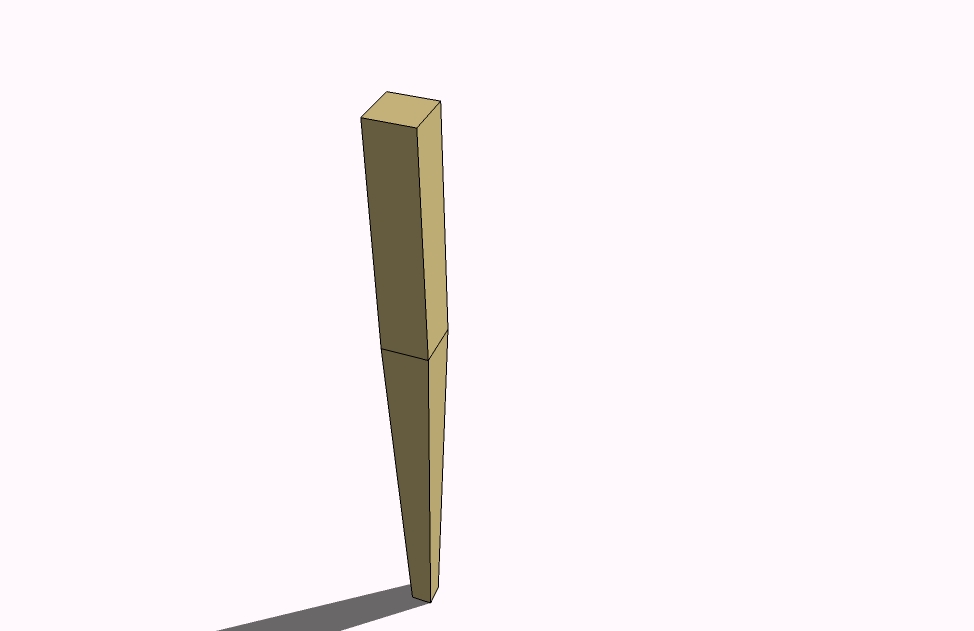
Take the part about drawing the tapered leg, for example. I always model in SU as I would build in a workshop. That means starting off with a piece of wood the size of the leg. Your approach was to create the tapered part first and then extrude the straight part from the top. Seeing as you can't streach a piece of wood that way, I don't model that way.This is how I'd go about modeling the leg.

-
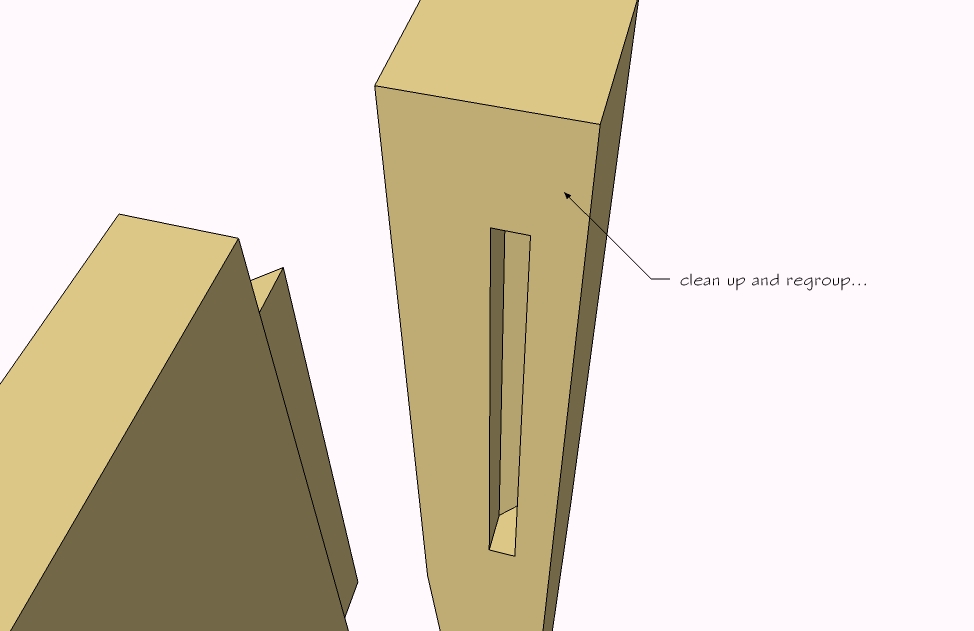
I also find modeling using the transparent view difficult so my method of modeling tennons, for example, relies on the 'intersect with model' tool.
I think this tool is the one woodworkers should use whenever possible. It makes modeling joinery a snap.Here's another tut. to illustrate.

-
Hi Gidon,
Thanks for reviewing the tutorials and providing feedback, especially so well animated. On drawing the tapered leg I find it faster to start at the bottom and work up, though as you say, not the way we would build it in the shop. The taper dimensions I usually use are never a problem calculating in my head. They are usually 1/2, 2/3 or 5/8. But I agree that if they are difficult to calculate I would do it as you suggested.
On using 'intersect with model' I agree 100%. However, I developed this material to teach a live class in my neighborhood and because this is a course for beginners i.e. people who have never used SketchUp before, I am introducing the basic tools first and the more advanced tools later. But you are correct. I almost always use 'intersect with model' for this procedure when I do my own drawing, and I will take your advice and introduce it to my students at the beginning of the next class. Also, with your permission, I will put up your tutorials on my blog for people who have been following my tutorials. I will certainly give you the appropriate attribution as well. So let me know if that is ok with you.
Thanks again,
-
@chiefwoodworker said:
Also, with your permission, I will put up your tutorials on my blog for people who have been following my tutorials.
Joe, I'd be honored.

-
Dear woodworkers,
Chiefwoodworker, nice Blog and very detailed explanations. Beginners will be delighted for sure.
I'd like to put also my two cents there. As SketchUp is a graphical tool I consider better to give the explanations with short graphical tuts as Gidon did instead of using words. Means IMHO less text. Too much words can give the idea that SketchUp is complicated tu use, which is not. But this is not a critic just a question of taste.Gidon, I use the same method as you for the tapered legs. For modeling tenons, I use both methods. In some cases I use the transparent view. Dave Richards is using this method very often in all his videos.
-
Hi Folks,
Gidon, I have posted your tutorials. Much thanks.
Jean-Franco, thanks for the feedback. I went the route of detailed instructions for beginners because it filled a void I found when I was trying to learn (still am) SketchUp.
If you already understand the basics you can follow an instruction like "Use the Intersect With Model tool to form the tenon". But if you don't know how to use the Push/Pull tool yet, that instruction isn't very helpful. Similarly, the videos help for some people, but to many they are too quick - and it is frustrating to stop and start them and relocate windows on the screen to keep up.
I conscientiously decided to fill a void I felt was there for beginners who need detailed instructions. So far I have gotten significant interests. As I proceed beyond the beginner tutorial I will use more abstracted and graphical methods, especially like that Gidon uses. Having gotten beyond the beginner stage myself I like Gidon's method and the tutorials you find on the Fine Woodworking Blog.
I am also finding that the hook of a single project (a bedside table) from beginning to end, tends to keep people interested and wanting the next installment.
I hope this explanation didn't sound too defensive because I really value people's feedback. I just felt it important to explain why I went the route I did.
Thanks for the interest and feedback.
Joe.... -
Joe don't missunderstand me, the route you did is OK for me too. I just wanted to encourage you to integrate some tuts like Gidon did. You can group a sequence of SUp actions on one image to confirm the text description. It's just a matter of balancing text and images.
I like also the Fine Woodworking forum. Really great.As you know each person is different from another and the way you learn things could be very, very different. I've started with SuP a year ago or so. Could you believe me, I've never used the documentation ? But I ran a lot the videos with some personal trials on my computer. Then I asked question on some forums and Dave Richards helped me to understand a method of drawing with SketchUp for woodworking. I'm really not a specialist but I'm selfsufficient for my needs. Before using SUp I've never used any CAD software. So I wasn't badly contaminated

So keep ongoing your good job.I already posted some few things you can see there:
http://www.sketchucation.com/forums/scf/viewtopic.php?f=40&t=3562
http://www.sketchucation.com/forums/scf/viewtopic.php?f=40&t=3466 -
Jean-Franco,
I understand your point and after laboring all day on Part 4 of the tutorial I think I am ready to find some shortcuts. More graphics may be the solution now that I have covered the basics. I'll try to integrate it into Part 5 and see how it goes.
The chairs are really great. Do you use layers when you want to make shop drawings with all dimensions and need to show each part in detail? If not, how do you handle that.
The detail in the hinges are unbelievable. I could of used a few of these for the drawings of a hutch I just finished.
Thanks again for the feedback.
-
Joe, are you familiar with a program called Wink? I think it is ideally siuted for creating tutorials. I highly recommend it.
-
Gidon,
I was not aware of it. I just downloaded it and will play with it tonight. I need to get into the shop today. There is an unfinished table project waiting for me.
Thanks for the tip.
-
Hi Folks,
Joe, to answer your question concerning the use of layers, I don't. My projects are not so complex to have this need. Maybe for huge architectural projects but for woodworking I doubt. Except if you want to animate a bit your models like Dave Richards did in one of his video animating a door.Here is my way to have my shop drawings.
When my project is complete with all parts made as components I create my cutting list with the script "CutListAndMaterials.rb".
Then I copy and drag each piece lets say 2 or 3 meters from the original. I orbit like I want put the dimensions on it and create a scene. And so on for all components. For small or simple elements I group them on the same scene.
Now it might happen you have a complicate piece with a lot of dimensions. In this case I orbit my piece in two or three different positions and I create 2 or 3 scenes. Then I put dimensions on each scene. This might result in a big mess but without the help of "PageHide.rb" script. In fact you can select on each scene the dimensions you want to see only on the selected scene. I like this script very much ! Look at my attached file a simple example I did for you with a door.
At the end I print each scene for the shop.I hope my explanation are enough clear, if not please tell me. I'm more at ease in my native tongue

-
Jean-Franco,
Thanks very much for the explanation and the model. Both were very clear. Your written english is as good, or better, than mine and I can't speak a word of a second language. You have my admiration.
But I am still not convinced of the advantage of doing everything on one layer, which I can imagine gets very large and messy, not to mention difficult to find your way around a complex model. Though I must admit, it seems the experienced and knowledgeable SketchUp veterans all seem to do it that way. I guess I will have to give it a try for myself and see.
I don't know what PageHide.rb does, but I will download it and give it a try. Thanks for the tip off on that too.
-
Joe, I'd like to clarify something about layers, if I may.
Layer "0" is for modeling and displaying. In other words, it is the 'main' layer where all the action takes place. When you draw something that you wish to group or which you want to turn into a component, you do so on layer "0". After your group or component is done you can assigne it to a different layer.
To illustrate:
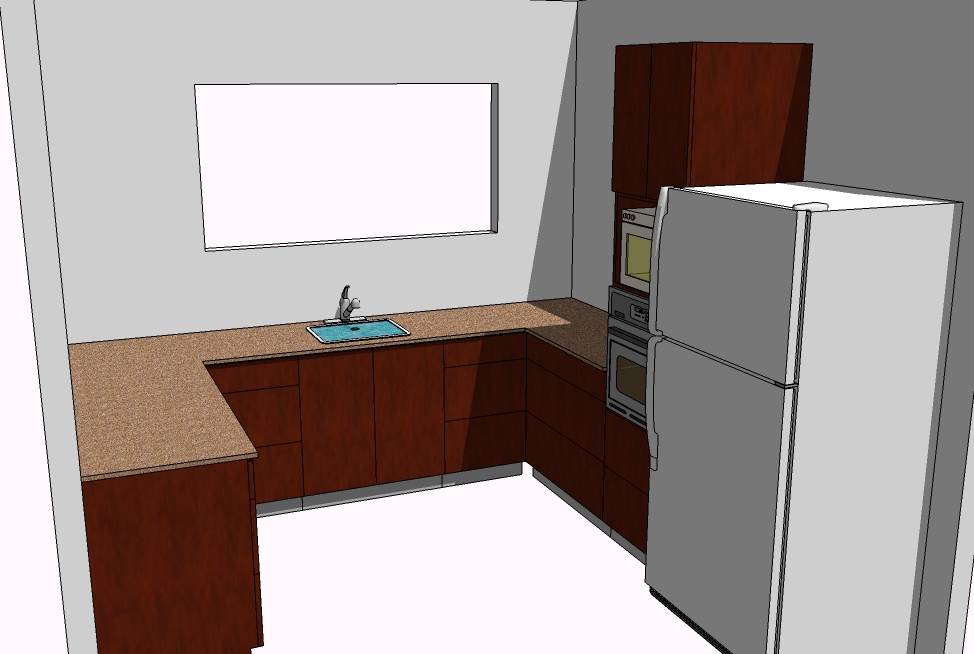
Say I'm planning out a kitchen.
I'll start off by drawing the walls. Once I've got my walls (each one a group) I create a layer called "walls" and assign the walls to that layer.
Back to layer "0".
I now begin to model my kitchen. I'll model the units that will go along wall 'A'. Just the units mind you. Not the counter top, just the units. When I'm done I create a layer called "units wall A" and assigne those units to that layer.
Back to layer "0".
And so on.
Now I can easily choose what is visible and what isn't without having to mess about with hide and unhide.
Take a look at this little model I slapped together.

Layers Illustration.skp
Everything has it's own layer.
If I want to change something in any given ellement in the model I can turn off the visibility of anything that gets in my way.
I don't really know why but I do know that it is important to do your modeling on layer "0".I hope this clears up the layers issue a bit.
-
Gidon (and anyone else whos interested), you should always model on layer 0 because if you dont you inevitably end up with stray geometry al over the place and it takes forever to try and get it on to the right layers.
-
Hi Folks,
Gidon, thanks for the quite complete demo model. This is exactly the way I draw. Every part part or appliance starts on layer0 until I decide to make it a component or group. I ten immediately assign it a layer. It may share a layer with other parts if that makes logical sense. I try never to have more than one part in construction on layer0 at the same time lest the get mingled and then life gets difficult.
But I have found that a lot of experienced SketchUp people tend to shy away from layers, choosing to draw everything on layer0, and leaving it there even after making group or components of things. I am wondering why and is there some intrinsic value to doing that which I don't understand.
And remus is correct. If yo dare to draw a part on another lay you are bound to get in trouble sooner or later. The first drawing I did in SketchUp I tried to draw things on the layer they would eventually occupy and all hell broke loose because of the sticky nature of SketchUp primitives. I almost gave up on SketchUp. Glad I didn't.
-
thanks for that tip Gidon. up until now i had created the layers first and than drew the corresponding groups and components on the named layer. sometimes i forget which layer im on and end up with bits of geometry all scattered about but your method makes sense and keeps the modeling time productive. thanks.
-
@chiefwoodworker said:
But I have found that a lot of experienced SketchUp people tend to shy away from layers,
That's news to me. I know that I create layers at a later stage of my model, in other words I create the layers as the need for them arises and not as a srarting point. The model I attached was for illustration purposes only. I'm not saying I would always use that many layers. I have found that using a specific layer for the units of specific walls or plan views is very helpful for the later stage of compiling the hard copy project plans for the craftsmen together with the optimisation output. I use the Cutlist Plus program from Bridgewood Design which I find to be one of the most cost effective optimisation programs available.
Being able to 'switch off' as it were entire sections of the kitchen makes printing out shop drawing a breeze and the same applies to inputting optimisation data.
It could also have something to do with my Austro-Hungarian genes.
I have this 'thing' about everything having to have a place of it's own so that order can be maintained. (the word 'order' here has to said with a thick German accent )
) -
Gidon,
I have Dutch & German genes, which I guess explains why we have the same need for "order", hence layers.
-
my heritage is English but my jeans are all Levis.
Advertisement


