MSPhysics 1.0.3 (16 October 2017)
-
Thanks Anton! That does the trick. Is there a way to re-enable orbit control (middle mouse button) and zoom (mouse wheel) while in game mode?
-
Charles,
For now, there isn't a way other than modifying the simulation code, so that it only disables the pick & drag and not the user input. I may need to add a Ruby function for that in the future versions.
Anton
-
Hello nice article,
one question. Is it possible to create an outstanding moving camera crane while using MS Physics in SketchUp?
-
Nothing could be easier. Examples of camera simulations with MSphysics can be found here: http://sketchucation.com/forums/viewtopic.php?f=323&t=68975
You can connect the moving parts of the crane with MSPhysics Joints, place the crane on rails and control everything with sliders, keyboard or scripts. -
I may be a little slow of late but, can someone suggest how I can make a table cloth or bedding in simple terms? Sorry to bug you folks.
-
@ Mike: Anton_S is currently working on an easy-to-use plugin for this purpose.
-
Hello everyone

I'm new here. I found this plugin yesterday and try to use it to simulate the equilibrium of a wooden product I'm designing.
The structure is in wood, and it supports heavy objects by their side with big screws (so they are not resting on the wood structure). If I group all of these or make a component, it feels like the mass of these heavy objects is lost, and so playing the simulation gives very strange (and false ) results, as the structure doesn't fall on the ground as it should.
The fact is I don't understand how to keep the different masses AND attach the objects between them. I tried with the fixed joint but it fixes everything and nothing at all moves

Could you help me please ?
Thanks
-
Hello mickaellemickael,
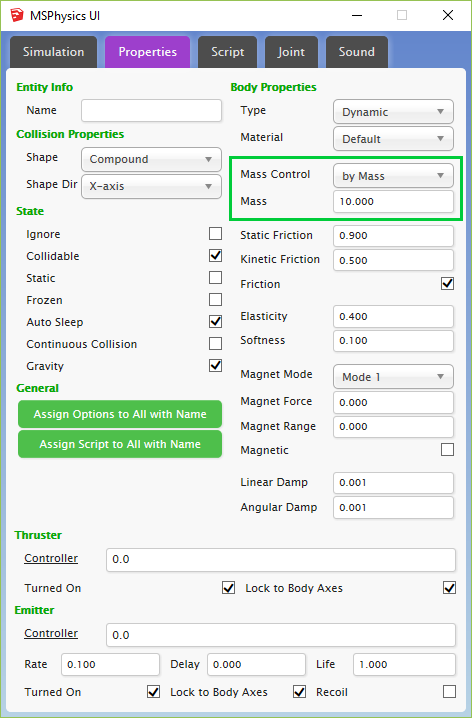
The collision generated for objects is convex and thus doesn't reflect the real object. Your group must be made up of convex items for the mass to be reflected. You can also assign the mass manually, via the MSPhysics UI by changing the Mass Control mode to Mass and assigning the right mass (in kg).

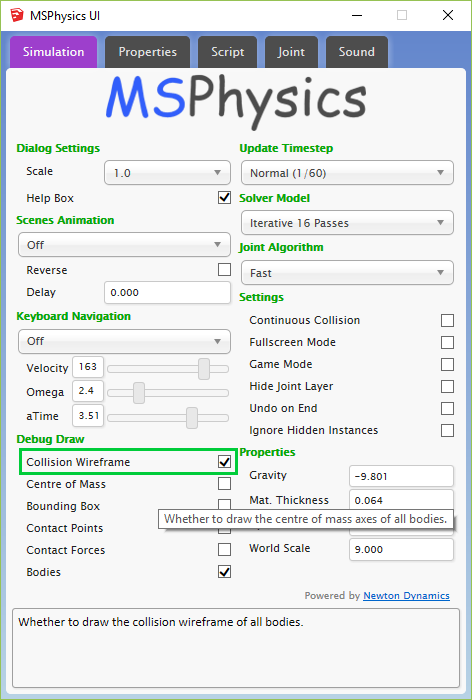
You can enable collision wireframe for all objects in simulation, which can be found in Debug Draw section of the simulation tab in the MSPhysics UI. This draws the actual collision wireframe generated for the object. You may have to divide the object into convex sub-groups for the most realistic effects (assuming the top-level group is assigned a compound collision).

In compound collision (which is assigned to objects by default), all sub-groups and sub-components are treated as convex sub-collisions.
By meaning convex collision, the collision is wrapped around a shape. Here is an image for example: http://newtondynamics.com/wiki/images/2/24/Convex_shape.jpg
So with compound collision, you can have many convex collisions clumped together to form a complex dynamic collision.
Anton
-
Hi Anton,
I understand your approach on the unreliable nature of "compound from cd" shape. However without it, there isn't a better way to make a front wheels of a car. You can't try to make sub groups of a car mesh, it's a lot of work and "compound" doesn't work as an alternative because in collision wireframe body of the car interferes with the rotating tires.
Can't you at least leave compound from cd in the selection list with a warning? It would be better if any demanding users should be able to use it.
Best regards.
-
Hello Anton !
Many thanks to you for both clothworks and MS Physics plugins, these are really nice to use and user friendly. MS physics can sometimes be a little tricky when it's about animating a model with a lot of groups but I guess there's always a way to make things work.
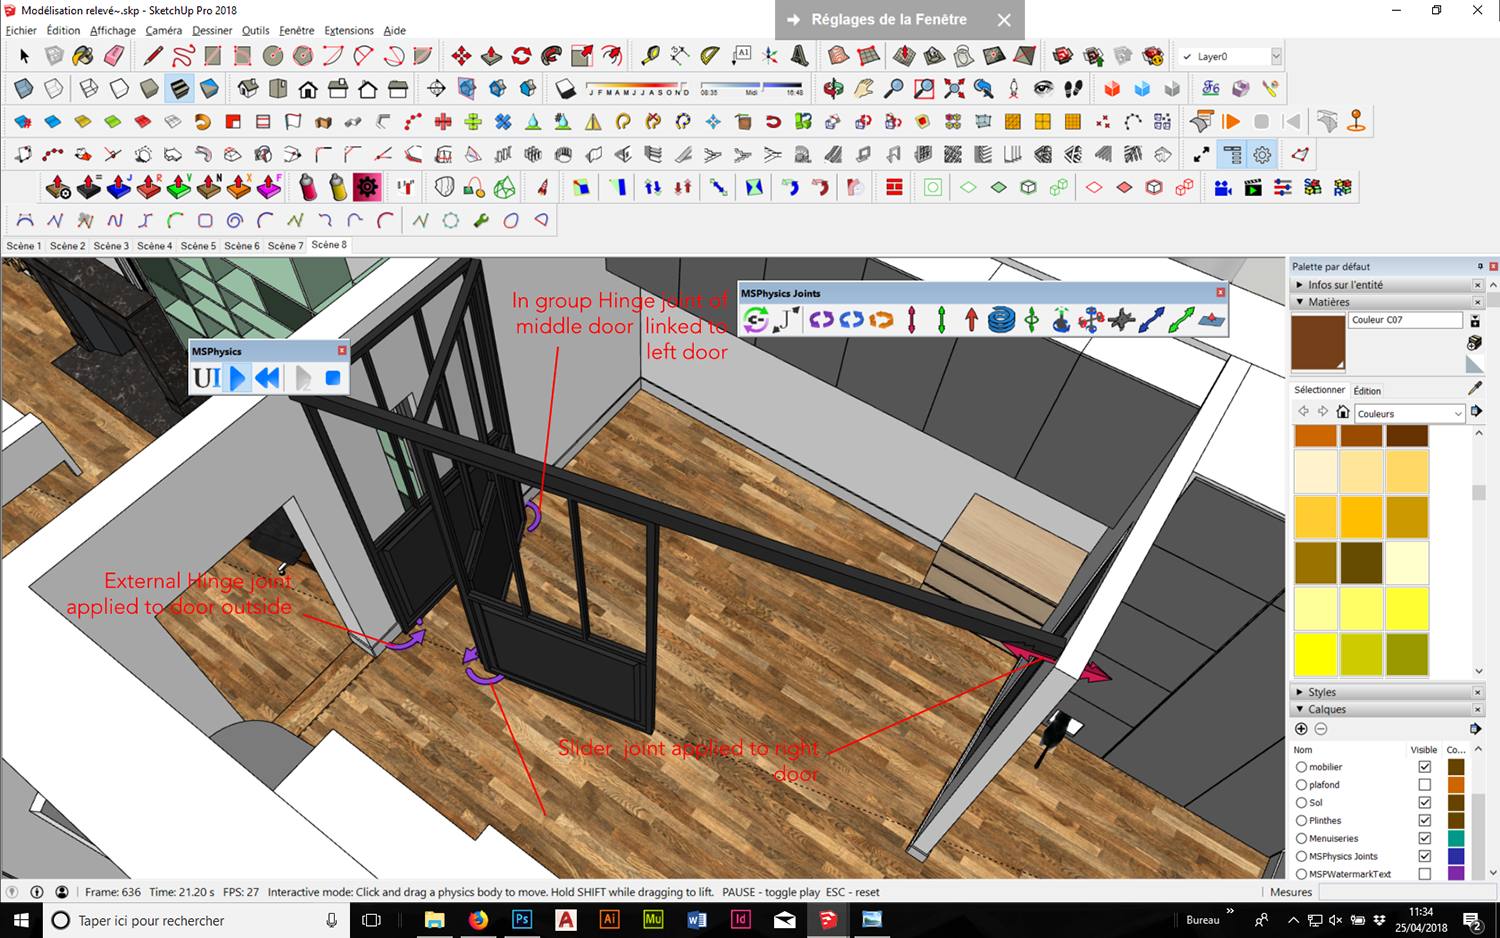
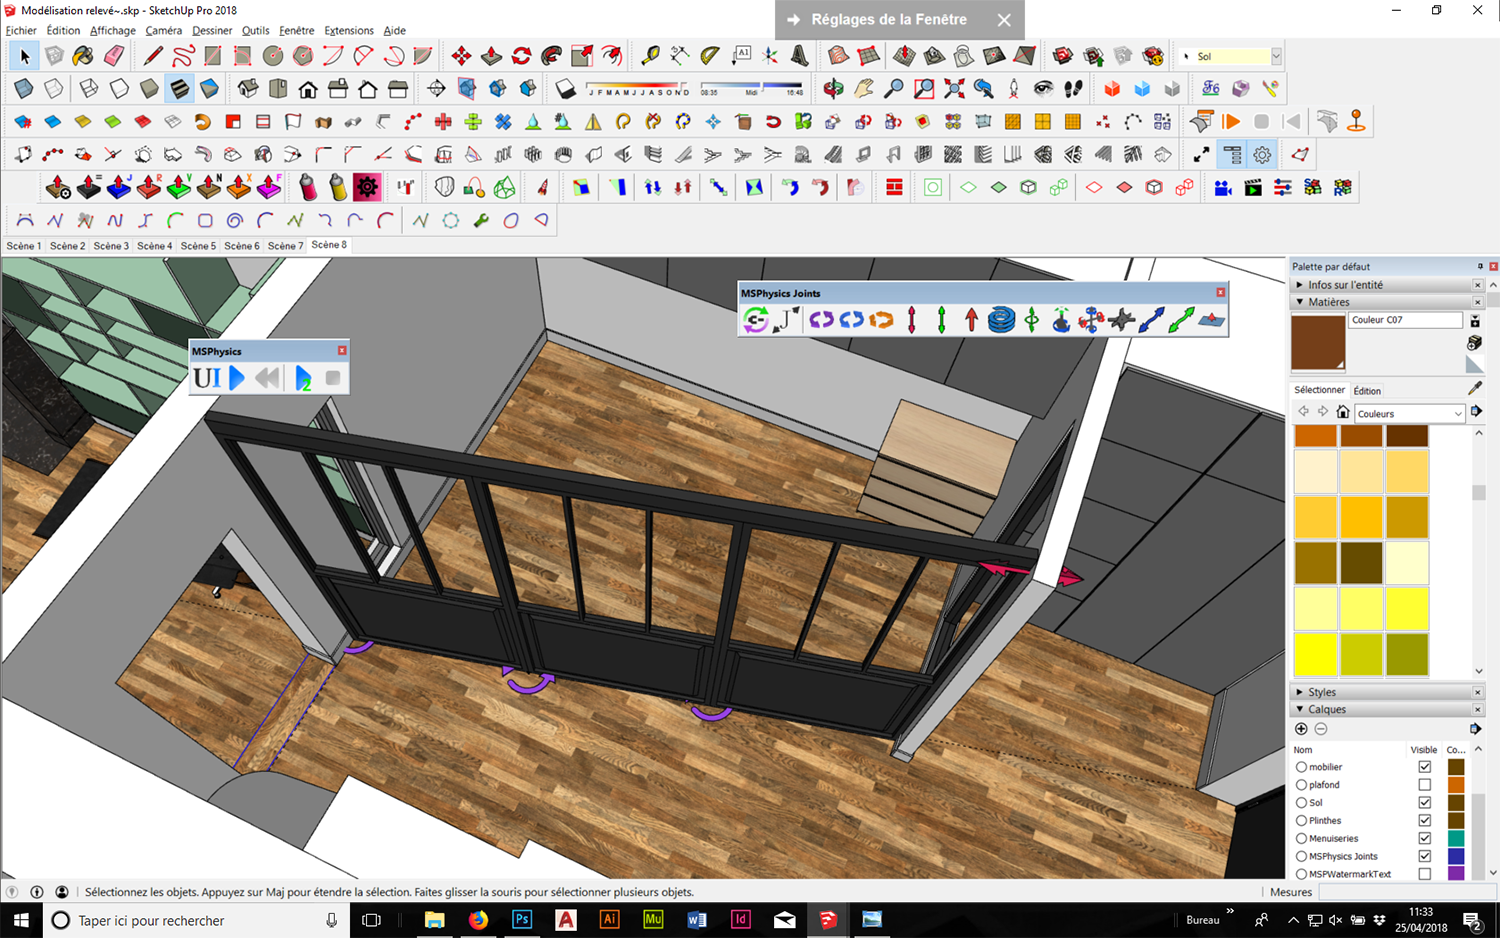
In a project I'm drawing for a client, I'm designing a sliding/folding door which is made of hinge between the panels. I found pretty easily how to achieve the folding action with rotation limits and for the moment it's possible to slide it but I had to reduce the slider joint stiffness in order to be able to fold panels completely (don't know why it's not possible when stiffness is set to one).
But my biggest concern is to be able to keep the sliding action on one panel (the others linked by hinges are following) without applying a straight constraint on the whole panel. I'd like only the hinge part of this panel to follow a straight way (a railing)In the end, it should rotate freely and slide at the same time... If my problem isn't clear, I can always copy paste the concerned model in a new file if that's easier to understand.
Thanks for your help,


-
Hello Baumard,
What you're trying to achieve here is nested joints. There should be a top level slider joint, as you already have. There should also be temporary boxes with hinges inside them; one box per each hinge, located at each axis. The boxes should be set noncollidable. Then the slider is supposed to be connected to the boxes and each hinge to the door. That way the boxes will slide and the doors will rotate.
Another thing to consider in that case is to user Acurate Joint Solver model or Iterative 64 passes. These options can be adjusted in UI. That way joints will be stiffer.
Anton
-
@cgltkn said:
Hi Anton,
I understand your approach on the unreliable nature of "compound from cd" shape. However without it, there isn't a better way to make a front wheels of a car. You can't try to make sub groups of a car mesh, it's a lot of work and "compound" doesn't work as an alternative because in collision wireframe body of the car interferes with the rotating tires.
Can't you at least leave compound from cd in the selection list with a warning? It would be better if any demanding users should be able to use it.
Best regards.
For wheels, use sphere/cylinder shape. Have the parts intersecting the wheel be assigned a non-collidable state. Generally, it is a bad and performance consuming to rely on collision detection. If you examine SketchyPhysics car making tutorials at youtube, you can apply same techniques to MSPhysics.
-
Thanks for this help, that makes sense now. I knew there was something missing in the parents/children hierarchy but didn't know what. I may bother you with another question if you don't mind.
Can the plugin keep the starting point (considered to be 0 and with a defined value as maximum sliding lenght) of a slider joint applied to 3 sliding doors at the same level? Let's say I would launch the simulation and move them at different lenghts. In the end, I would stop the simulation and keep them at these various positions. But when launching the simulation again, it would consider the initial starting point as a limit for the three of them, no matter how far from it they are.
I don't know if i'm very clear, that's quite hard to explain but I can provide pictures if that does not make sense.
To simplify my question : Once simulation is stopped with objects moved, is it obliged that the reference point of the slider joint is changed according to each new position of the objects ?
I swear, that's my last one

-
@traxxx said:
To simplify my question : Once simulation is stopped with objects moved, is it obliged that the reference point of the slider joint is changed according to each new position of the objects ?
Yes, reference point is changed. In MSPhysics, stop simulation option is only when your aim is to have a final view; otherwise, use reset.
-
That's what I thought but I just wanted to be sure I wasn't missing anything ! Thanks !

-
Hello
My model is a bit complex and the frame rate becomes to low, I'm down to 6 frames/sec.
My graphic card is a AMD Radeon HD 7870, OS Win 10-64 bit, Processor Intel(R) Core(TM) i7-3770 CPU @ 3.40GHz, 3401 Mhz, 8 gig ram.What kind of hardware is recomended to speed things up?
I will appreciate your suggestions, thanks.
-
Hello Clue,
Your hardware is fine. It is MSPhysics plugin that needs succinct improvement and the model you configured for MSPhysics.
Anton
-
Can I use this plugin to simulate nails in wood? I can't figure out which joint to use.
-
Hi. Great thanks for an excellent tool


I have an issue with floathing items. I work as a professional with floating docks, and the MSP simulation in water is something I would really love to use; actually a perfect tool for me. But.. when making a pontoon with several materials, the simulation will give strange results. I believe there is a some kind of bug.
As attached is a simplified concrete pontoon of two parts: a shell of concrete and a float of styrofoam. When dropped to float, you see four different scenarios happen and none of them is accurate. From my point of view it would be easy if the simulation could work without calculation; just simply specifying the parts density, group them and let them float.
Thanks for your attention in advance!
-
@oheimala said:
I have an issue with floathing items. I work as a professional with floating docks, and the MSP simulation in water is something I would really love to use; actually a perfect tool for me. But.. when making a pontoon with several materials, the simulation will give strange results. I believe there is a some kind of bug.
As attached is a simplified concrete pontoon of two parts: a shell of concrete and a float of styrofoam. When dropped to float, you see four different scenarios happen and none of them is accurate. From my point of view it would be easy if the simulation could work without calculation; just simply specifying the parts density, group them and let them float.
The shell must consist from five separate subgroups, that is from four wall groups and one base/ceiling group. The top level group should be assigned Compound shape. That way, the collision shape generated will reflect the actual one. If you enable collision wireframe in simulation, you will see what is going on. So if you convexify subgroups, your resulting simulation would be realistic and the density you assign will reflect the density of material properly.
Advertisement


