Deck build. SU to real.
-
Don't build many decks, but this was an interesting challenge for a friend.
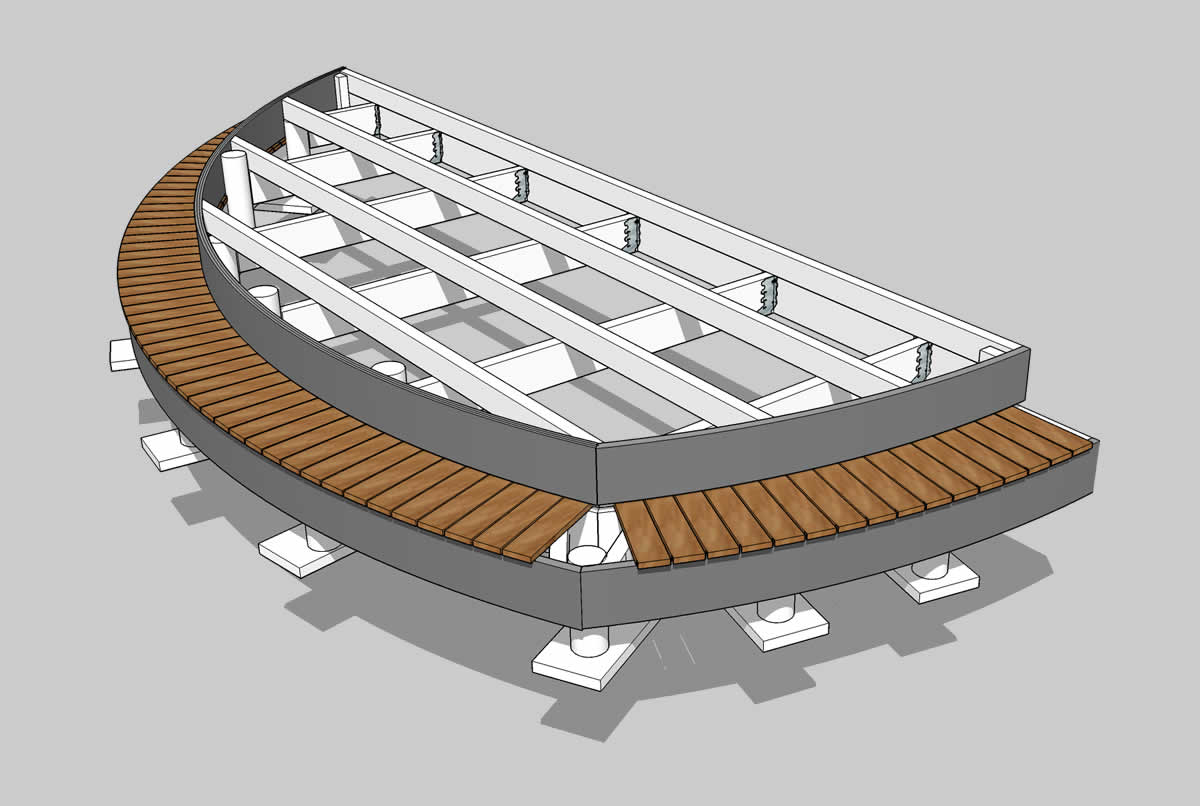
Normally with curved decks you can lay out the curves on site pragmatically. But in this case the ends of both radii were inside the building.
So SU to the rescue.
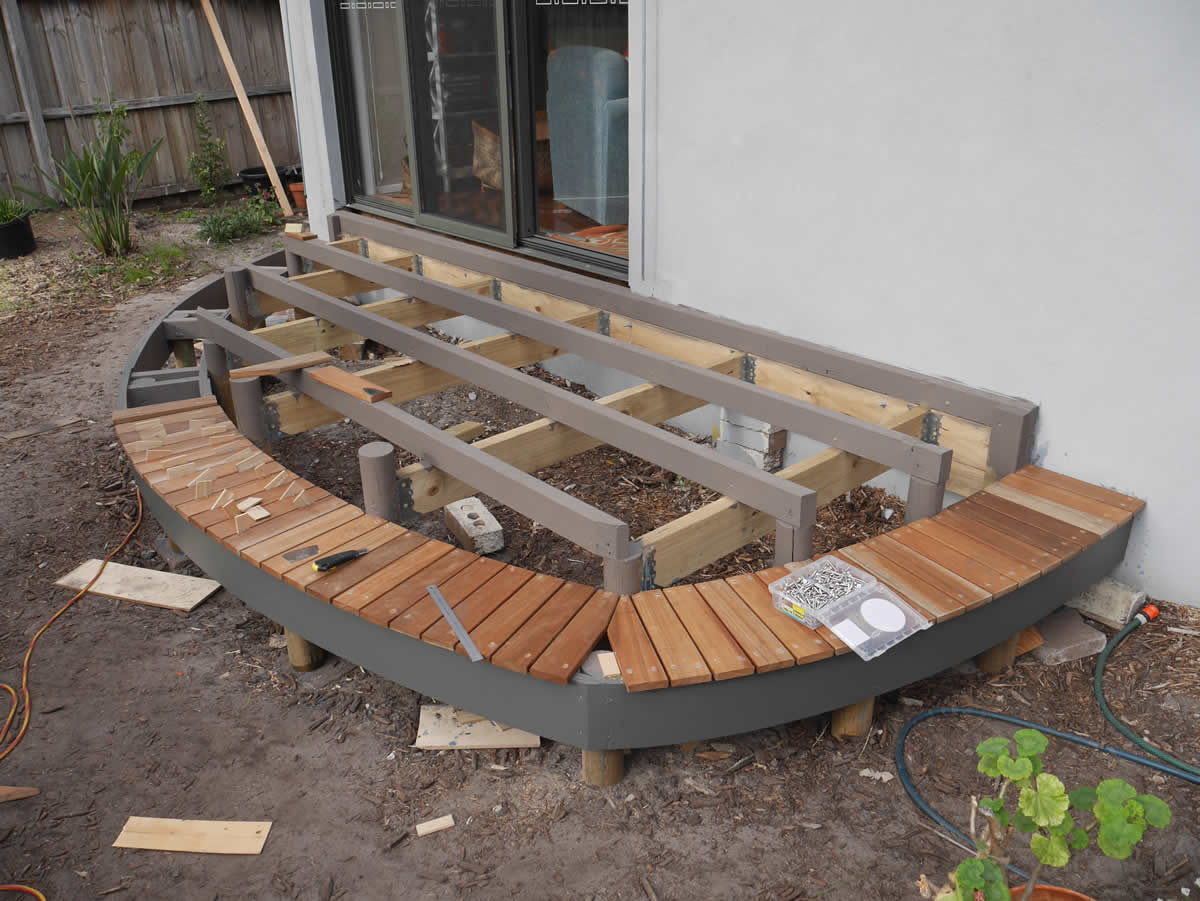
And the great advantage to this, I was able to pre-fab almost everything in the workshop and simply assemble on site. The posts sit on pavers which in turn are on packed sand.Went together like a bum in a bucket

-
Excellent work, baz. Both the model and the real deck look great.
-
-
Boy that's the craziest way to frame a deck I've ever seen! Are those round poles standard for the posts down there? How are they attached to the footing?
Then those 4 big joists over the 6 beams is way different then anything I've seen.
how did you build the curved gray rims? Full length laminated, or shorter segmented pieces?
How tall will that top step be? That's some nice looking decking!
I love seeing different methods of building, looking foreword to seeing it complete!
-
@joe wood said:
Boy that's the craziest way to frame a deck I've ever seen! Are those round poles standard for the posts down there? How are they attached to the footing?
Then those 4 big joists over the 6 beams is way different then anything I've seen.
how did you build the curved gray rims? Full length laminated, or shorter segmented pieces?
How tall will that top step be? That's some nice looking decking!
I love seeing different methods of building, looking foreword to seeing it complete!
Hey Joe, not sure whether 'crazy' is a compliment, I fear not.
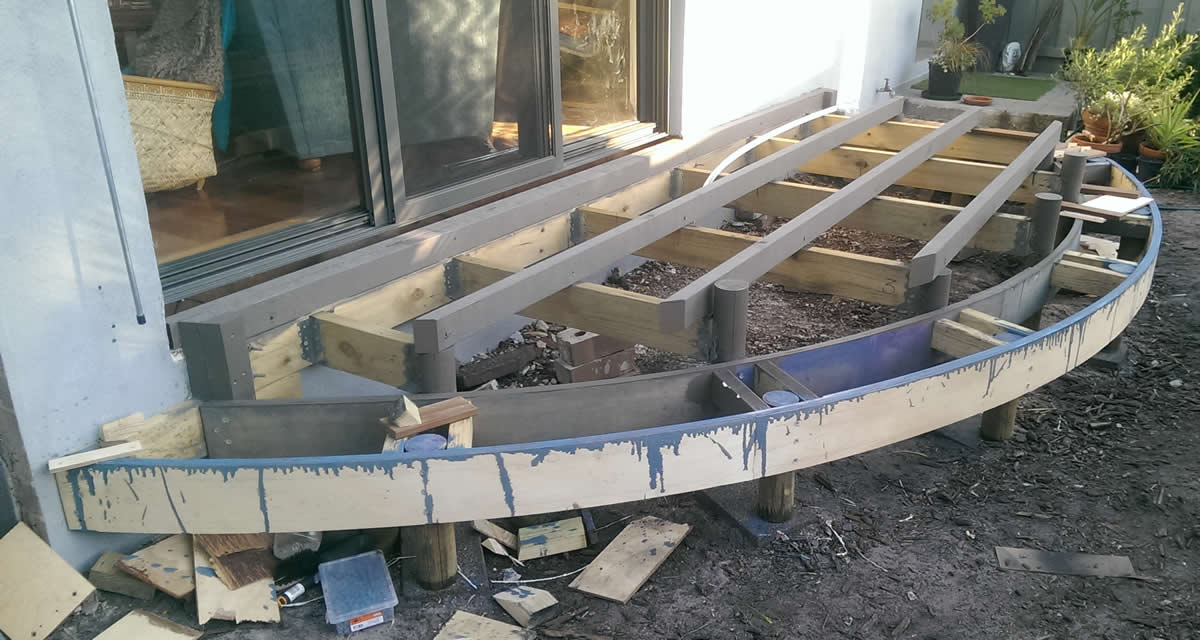
Funnily enuf I almost contacted you about the design in the early stages but was happy that I'd nutted it out.No - round posts not standard but here they provide good bearing surfaces for the lams.
The beams are positioned that way to support the posts laterally.
Rims are 2.4mtr strips of 9mm ply x 3 lams screwed and glued.
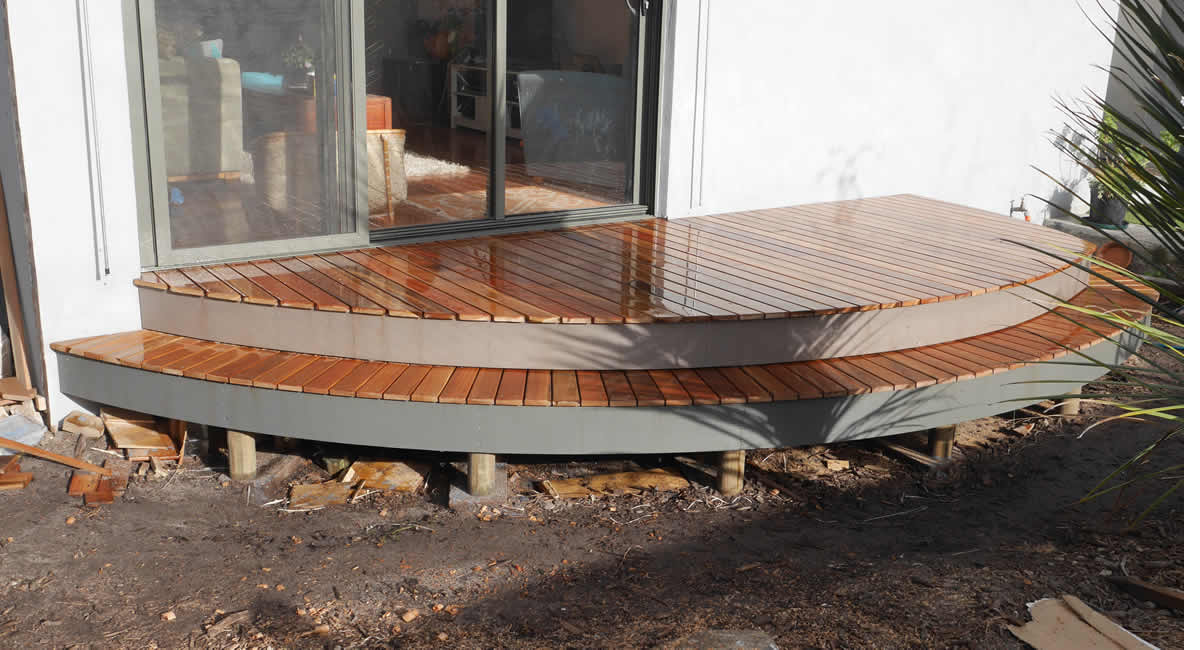
Step is standard 180mm high. Decking is 70 x 19 Spotted Gum, (Corymbia maculata).
Posts are sitting on pavers which are on packed sand.For me it's just a big piece of furniture attached to a wall. With some extra 'legs' instead of the wall plate, you could move it around

-
Oh I Love crazy methods Baz, and man it turned out nice, great job!
-
@joe wood said:
Oh I Love crazy methods Baz, and man it turned out nice, great job!
Whew! Thought I was going to get blasted there.
If you have time, I would love to see how you would tackle this sort of thing... -
I always love those "from model to real" projects, especially when they are so appealing.

-
Nice work Barry.
-
Cool model, cool result.... only problem I see is you'd play hell getting the design past the inspectors in most of the places I've worked here in the states.
-
Thanks guys.
-
Real to SU!

-
Neat little project, Baz. How big was the bucket?

-
-
@baz said:
@utiler said:
Neat little project, Baz. How big was the bucket?

A Bees' dick larger than the bum.

although many places like my area, a structure less than 30" high doesn't need a permit. If however you built it with the house, they'd inspect the steps and all per code.
Nice looking deck. What are the deck boards?
-
@pbacot said:
although many places like my area, a structure less than 30" high doesn't need a permit. If however you built it with the house, they'd inspect the steps and all per code.
Nice looking deck. What are the deck boards?
Thanks. Step is standard 180mm high. Decking is 70 x 19 Spotted Gum, (Corymbia maculata).
-
Well, the way I usually get the curves is by keeping it simple, cantilevering the joists out over the beams, running them long, and then using a nice long flexible thin piece of hardwood that bends well (I have a 3/4 x 1" x 16' piece) we bend it around over the tops of the joists, into the curve we want, clamp it off to the joists, and run a 10" circular saw along it over the tops of the joists, trimming all the ends of the joists on a nice fare curve.
I buy 20' pressure treated 2x6s, and have my lumber yard split them in two on a big bandsaw, to 5/8 x 5.5", and bend those around the curve, usually three pieces, screwing the lams together, glued with a poly glue.
Then cover the Lamination with a finish facia, composite facia boards bend easy when they're warm.
This is a lot different then yours Baz but you see how to get some nice curves now and Crazy is one of my highest compliments

-
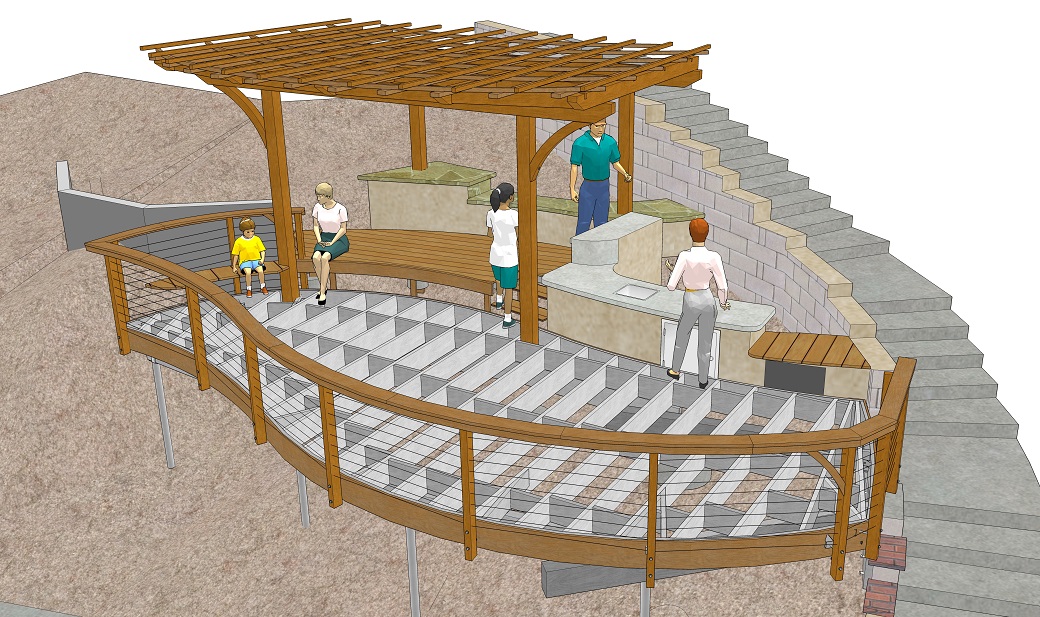
From SUp To Build

-
@joe wood said:
From SUp To Build

I see, thanks Joe. Bit hard to see how the beams are arranged, but I get the idea.
Though with my job the step complicated things muchly. -
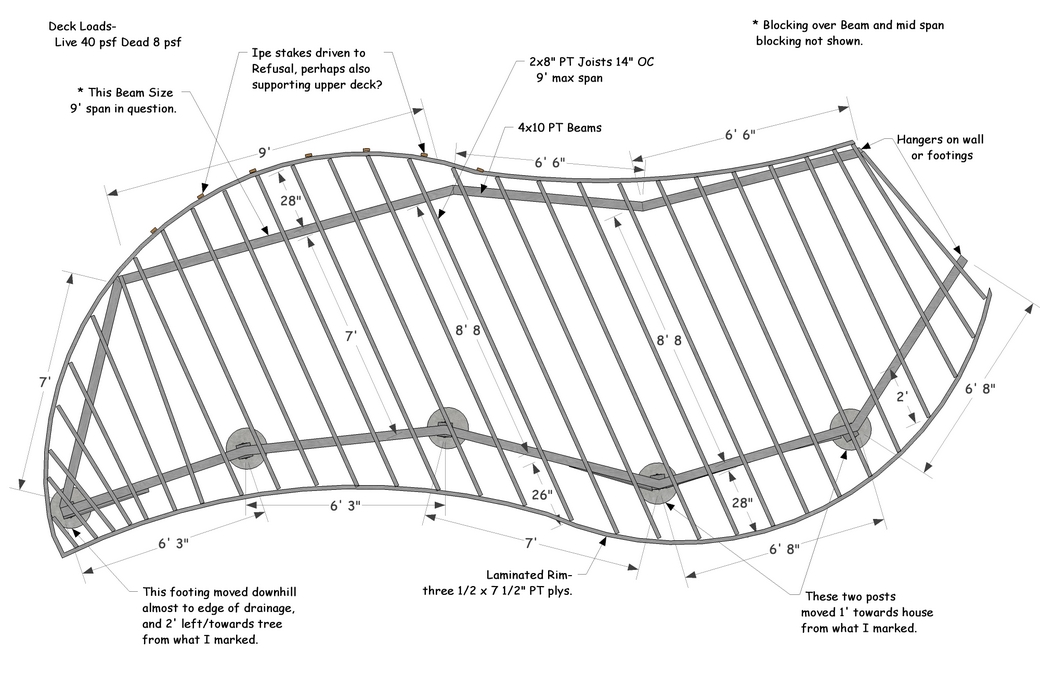
This is how the beams were laid out on that one, I've done two curved steps projects sort of like yours but can't find any pics, they both were so long ago.
Advertisement


