How to create complex roof and walls within?
-
I'm modelling a large house with a complicated roof with rooms within it. two problems!
- best way to create 47.5 degree roof cranked 45 degrees on plan with varying eaves heights and oblique intersecting roofs with valley (ie butterfly/W shape). roof has sprocketed eaves as well!
- best way of trimming walls within roof space to the roof angle as all rooms to have vaulted/ sloping ceilings following the pitch of the roof angle. gets very complicated at roof intersections with different eave heights!
Have tried solid modelling tools but some shapes won't form solids for some reason or another. seems to work on simple shapes but not complex ones.
Can post model if required.
Thanks in advance for suggestions and advice.
-
First of all have fun... it's going to be a process.
Second of all get Instant Roof and let it take some of the load off.I don't know your expertise or skill level, but interior vaults will not follow the angle of the exterior roof line. the vault will have an angle of it's own that scissors to the top as it's joint. Like this.
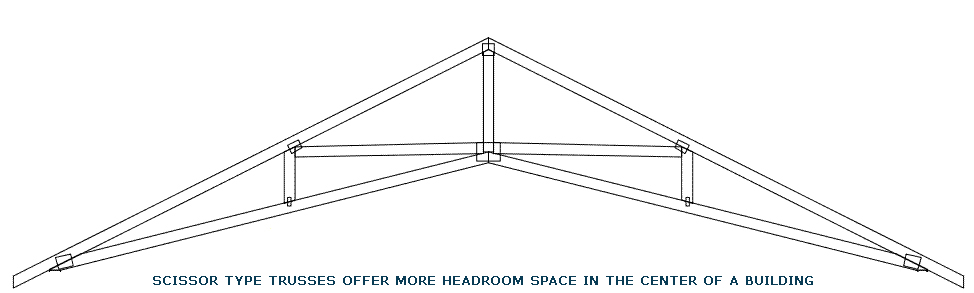
photo credit to http://www.keystonebarns.com/pole-barn-construction.htmIf you're going to build by hand, start with massing objects and then refine your shapes until you're happy with it. then move on to detailing the mass objects.
-
Posting the model would be helpful.
One thing that I've found useful is to create the roof planes, simple 2d faces that represent the top of the framing or the underside of the sheathing. The edges of these can be moved to aid in locating valleys, hips, peaks and so on.
As you may know, there are situations where pitch, wall height and overhangs cannot be uniform around a building. So, having different eaves may work to your advantage.SS

-
Hi Guys thanks for the replies. I'm attaching the working file so you can see my challenges!
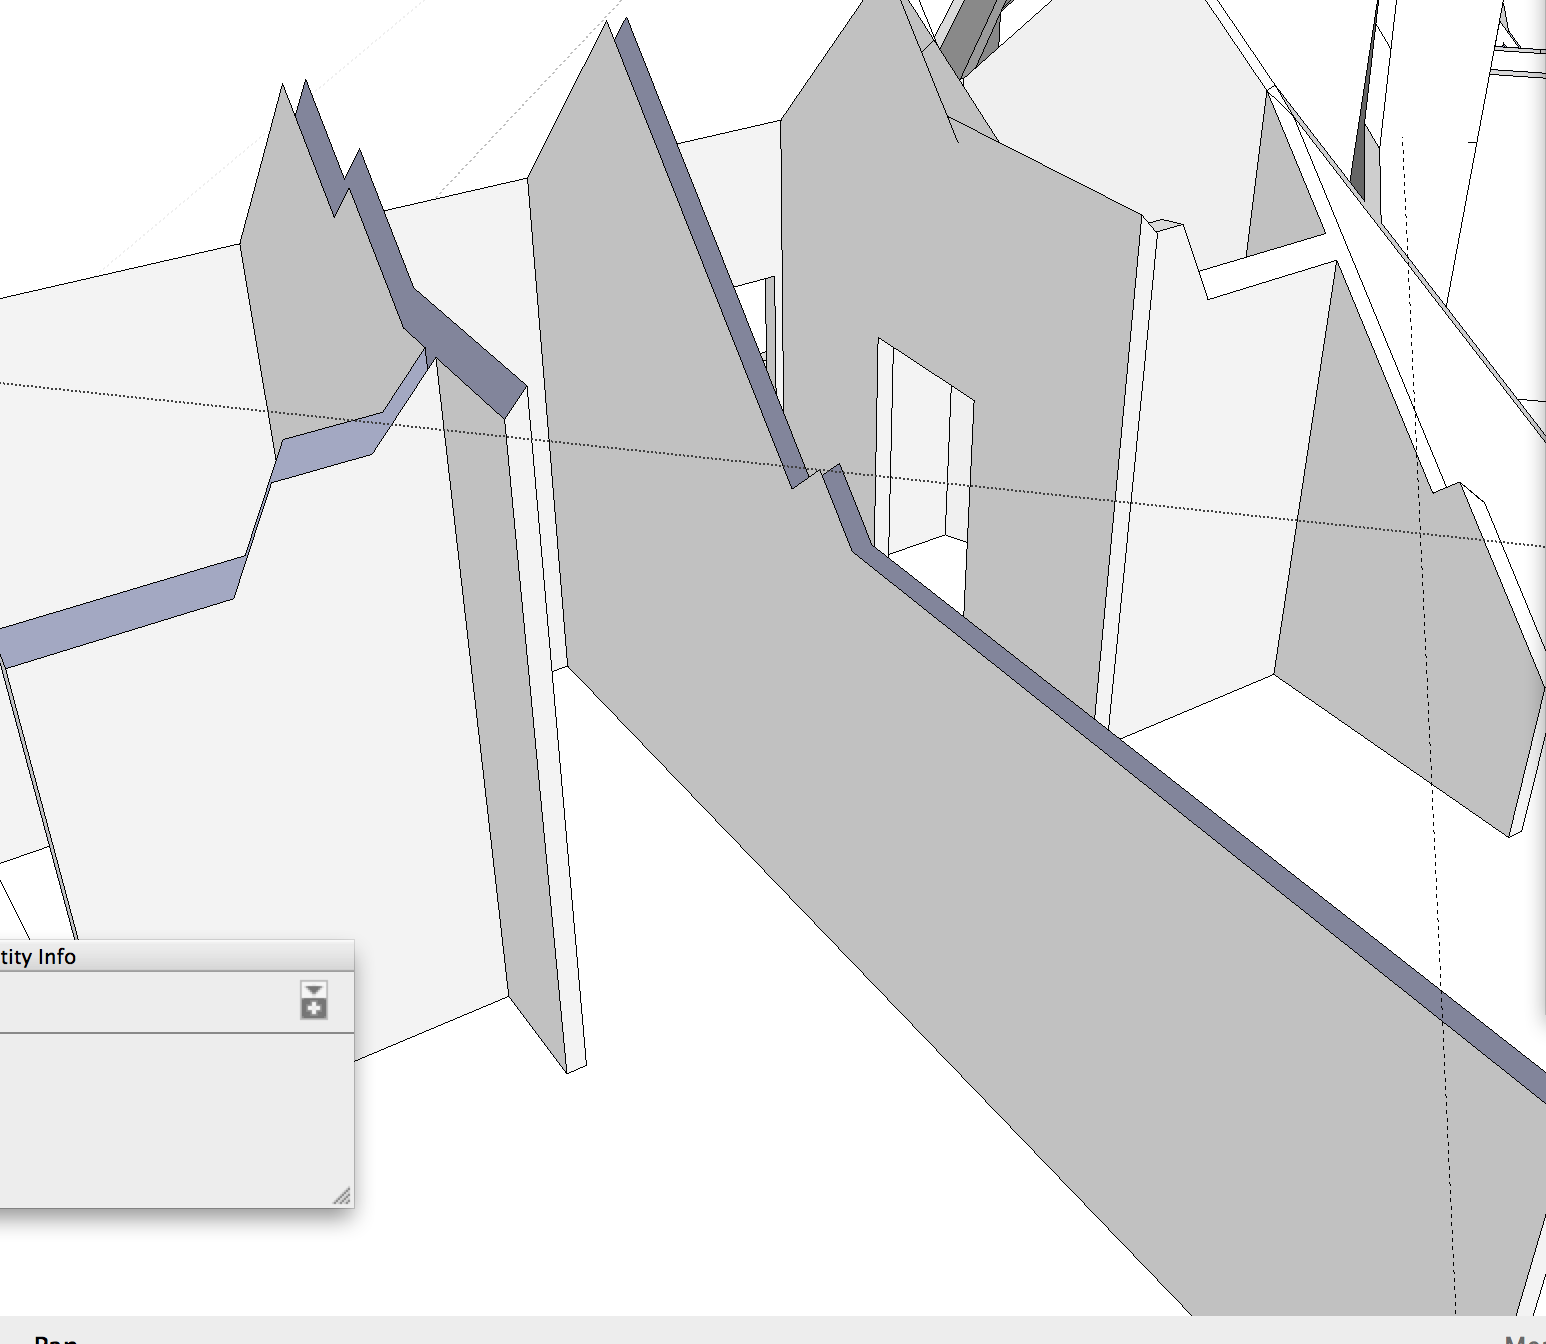
On first inspection the model looks OK but have a look at the first floor wall to roof abutments and roof interfaces.
Look forward to your feedback good or bad!
-
Hi,
I think I see what you are asking to do, but this is a complex model and there could be a lot more involved...
I am posting a picture of an area of walls that obviously are poking through your roof. I entered the wall group. I set component edit to "hide rest of model". I selected the wall faces in question (right to left selection box). I chose contextual menu/ "intersect faces/with model". I then positioned the view and selected the upper portions (left to right selection box)and grouped and deleted (I did this to two areas in succession).
Does this view represent what you are after? You can add faces to the top edge of these walls if you have reason to.As for solids, your model has a lot of work to clean up. You can't have extra edges and faces to make solids. You can't have internal faces partitioning the forms. You also have some extra faces occupying the same plane (that is where you see "flashing" as you orbit the model--in the roof). I would experiment with simple box shapes to learn how to use solids and solid functions then work up from there. I think it would be a feat, in any case, to use solids for all the walls and roofs in a house model like this. You should look at cleaning up all the extraneous edges and faces anyway to avoid pain, whether you use solids or not.
This house roof is built unlike anything I've seen built or modeled, but if that is how you are doing your house, so be it. I hope this intersect method works for you in chopping the walls off.
Note, the roof layer needs to be visible when you do this intersect. This is something about 2014 that I admit I did not know (I don't use it myself) and don't like. Of course the roof will hide when you choose component edit/ "hide rest of model".
-
On your first question, there are many ways to model things. What's the problem?
What's a "sprocketed" eave? -
The most frustrating thing about working with solids is finding those stray edges and faces, and getting rid of them. The Solid Inspector plugin helps you find them:
http://sketchucation.com/forums/viewtopic.php?t=30504Also, Cleanup plugin gets rid of those stray unwanted edges:
http://sketchucation.com/forums/viewtopic.php?t=22920Once you have those tools, I would do the following:
- Build the roof and make it solid
- From the plan, extrude the walls all the way up beyond the highest point. Remember to fill in walls above doors and windows. Use Solid Inspector to make sure the grouped walls are made solid
- use SolidTools to subtract the roof volume from the walls volume. You should be left with the upper walls (above the roof line) and the lower walls. Then you can delete the higher ones and you will be left with the walls that you need.
Good Luck!
-
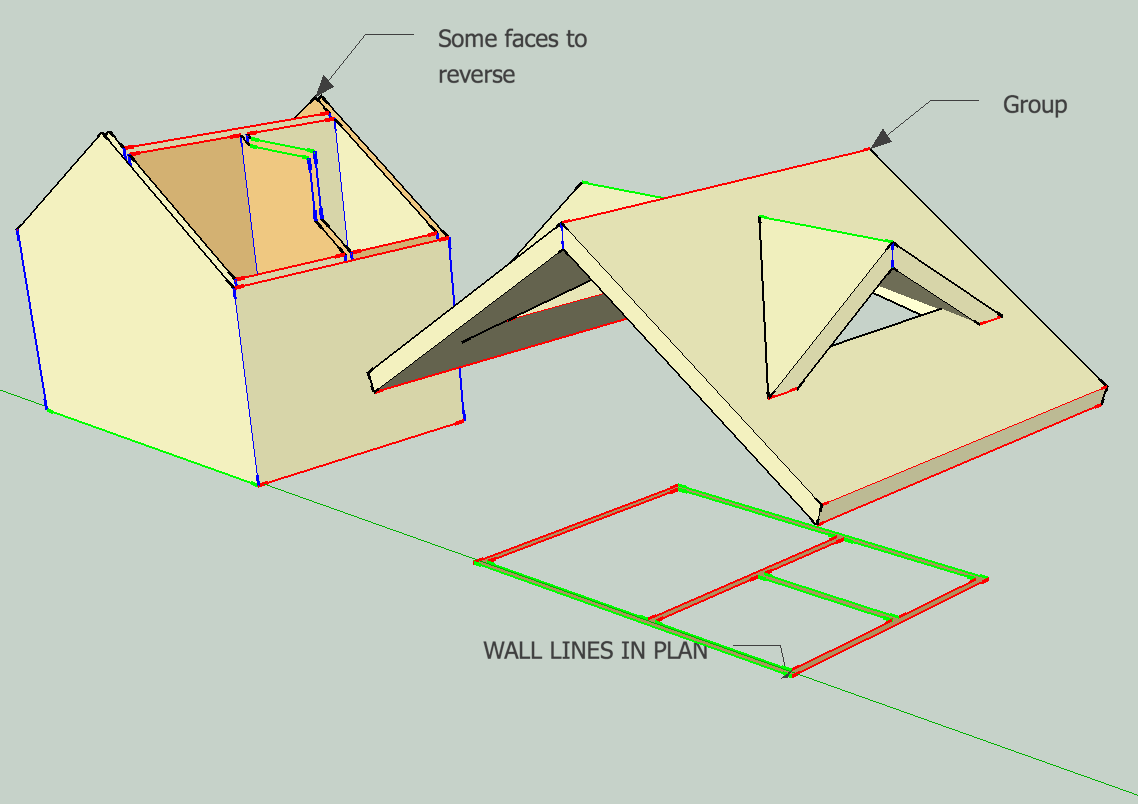
There's another approach. Here is a simple example. May be more difficult with a complex plan.
Using TIG's extrusion tools. Extrude edges by Vector to Object. Select all edgeds (faces selected OK) in the floor plan, extrude on blue vector, click highest point in the roof group or component. (Picture)
Hello! It looks like you're interested in this conversation, but you don't have an account yet.
Getting fed up of having to scroll through the same posts each visit? When you register for an account, you'll always come back to exactly where you were before, and choose to be notified of new replies (either via email, or push notification). You'll also be able to save bookmarks and upvote posts to show your appreciation to other community members.
With your input, this post could be even better 💗
Register Login


Advertisement