Skies and Domes issue...
-
I'm not sure where to post this, but I don't know where else to go.
I use Maxwell Render for by SU models. But one thing that would be really handy would be to have a starfield environment for a sky or dome for my model. I tried creating a starfield background (as a watermark) in SU but it doesn't render. I've tried downloading a star globe from the SU 3D Warehouse, but I find it cumbersome to work with given its size.
Does anyone know if there is any way to create or import a starfield sky into Maxwell to be used as an environment in place of its physical sky or constant dome?
-
Hey Warped9 just find a hi res image through google that you like. Then crop it 2x1 proportions. Then open it with MR and save it out as a HDR. You can use it in the any of the environment channels then.
-
@chedda said:
Hey Warped9 just find a hi res image through google that you like. Then crop it 2x1 proportions. Then open it with MR and save it out as a HDR. You can use it in the any of the environment channels then.
Doesn't it have to be in any particular format?
No, it doesn't work that way. The file also has to be in a HDR and .SKY format for Maxwell to import it. What I find odd is that all kinds of sky preset downloads are available and no one seems to have made any starfields or space scenes.
I did read of how to make starfields and such in Vue, but does that mean you have to export them from Vue into Maxwell?
There has to be a way to do this either in Maxwell or in SU, but when I search around the net I find next to nothing. I can (and have) easily create scenes in Photoshop, but it's pointless if I can't actually use them. As is I'm having to resort to the laborious method of rendering my models and then using Photoshop to basically cut-and-paste them into the scene I want. There has to be a better way.
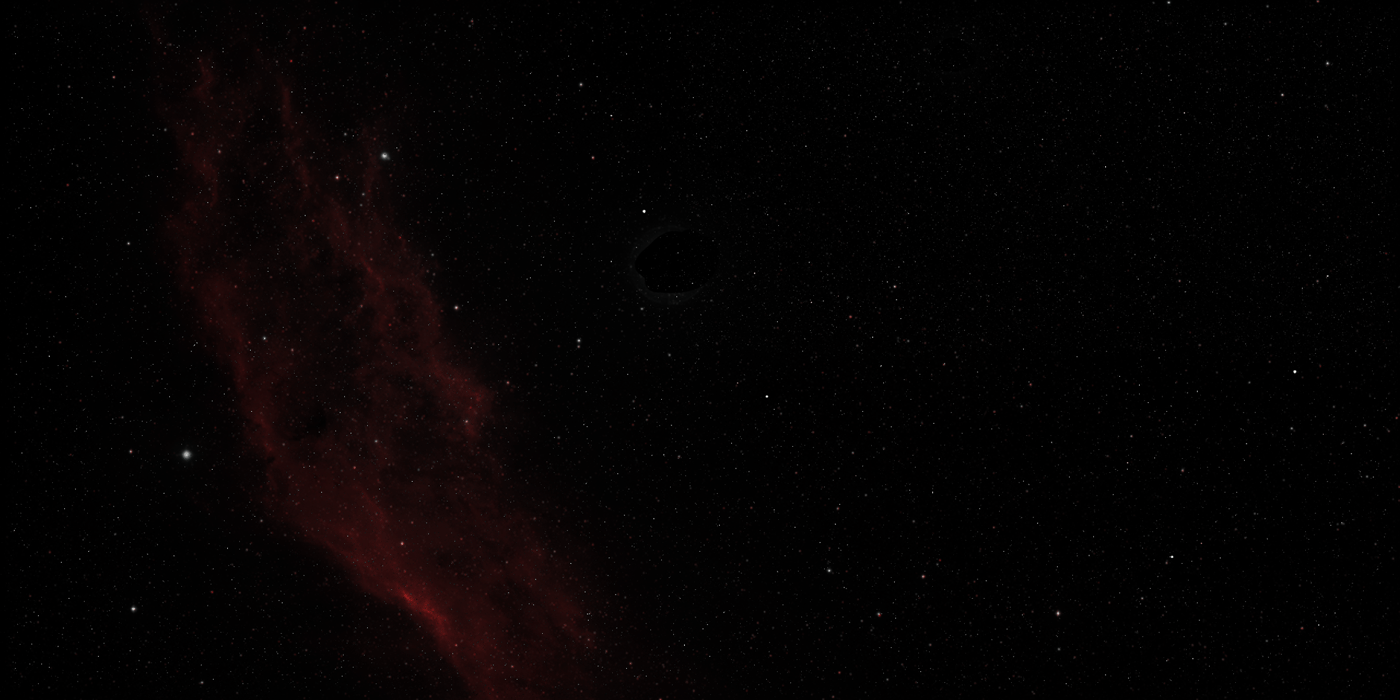
Here's a scene I created last night.

-
Perhaps you missed one important step i mentioned open the image in maxwell and save it as an HDR.File load image (choose jpeg), file save image (choose HDR). I can assure you it does work that way.Perhaps you used an image with very little information in it ? Another tip is to increase the intensity just in the illumination chanel that way the background doesn't get burn't out.I have a few HDR's i've created of space atmospheres i remember searching for milky way in google images and choosing larger than.You might also have to crank up the intensity to 100+. I tried to attach them here but zipped they are 55mb. If your still lost i can dropbox you them just PM me.

-
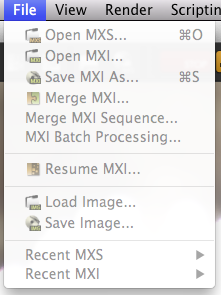
Okay, I must thick as cement or I'm missing something. I can't find anyway for Maxwell to open a file that way. Maxwell works within SketchUp and when I open Maxwell Render I can have two windows: Maxwell Fire (where my model is displayed) and Scene Manager (to manage the model and scene). I don't have a File menu telling me about loading and saving a file, unless I'm just not seeing where it is. I can't open Maxwell without having SketchUp running and then the file menu at the top is for SketchUp and not Maxwell.
I'm running a Mac so maybe it's different? I can't see where this menu is. It obviously isn't in the Scene Manager (from what I can see) because it just says I can't import the file because it's not a .sky image. I can't use Browse for MXM because then it says I's not an MXM file.
What am I missing?
-
Okay, I can load an image under Image Based Lighting setting in Environment. It doesn't ask me to load and save it, but just imports it directly as a JPEG. I understand playing with itensity settings, but it doesn't render anything like what it should look like.
-
Okay, I now feel like a complete doofus. But after persevering and trying different things on a whim I figured some things out.
You can make an HDR image in Photoshop (which I did) and merge the layers of a Photoshop file to create an HDR image. You can then save that image in EXR format which Maxwell is happy to accept. To load it (at least in the Mac setup) you don't have to tell it to load a particular type of file and to save it as HDR. You can simply load it as either JPEG or EXR and then begin playing with the settings. I found it how to adjust the intensity of the image as well as the scale and offset of the created screen map. I also figured that you can use the HDR image or the SketchUp appilcation or the Active Sky (physical sky or dome) for the illumination, reflection and refraction respectively.
Like a lot of things I kept banging my head against it until I stumbled into some understanding of how this works.
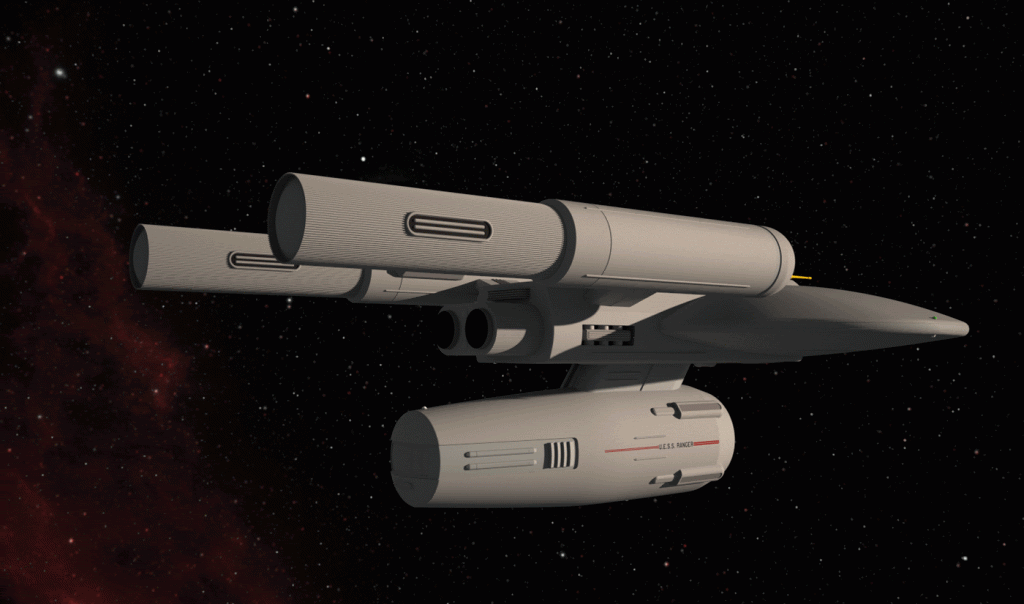
A different kind of update here. What's notable isn't the model, but the background.
Up to this point I would render my models and then Photoshop them onto a starfield or spacescape of some sort. It works, but it's basically a messy cut-and-paste method that doesn't always get the best results.
But over the past few days I've been learning how to do it more effectively. Essentially I create my starscapes in Photoshop and save them as HDR images as a .exr file. I can then load those right into my rendering program (Maxwell Render) and have my 3D model right in the scene. The end result is being able to render the model already set in the scene it's meant to be in eventually. This saves a lot of time and avoids the messiness of cut-and-pasting the rendered model's image onto another image.
I'm reasonably sure I'll get more proficient at it as I go forward, but posted here is my first effort at generating a space environment with the (unfinished) model already in it.
-
I am also on a mac Warped9. But i do have the full license for Maxwelll Render perhaps this is the difference. I have the applications Maxwell Render & Maxwell Studio. I'm glad you've figured some stuff out through trial and error. I think you can even adjust exposure in photoshop as well.
-
The free version of Maxwell only lets you do small images of your renders. I have a $99 upgrade that allows me to do large images. I'm not sure what Pro gives you.
Advertisement


