Modeling roads on a terrain
-
I have tried the istant road plugin, which my road requires to many closed in loops, and I was told that the plugin doesn't support as of yet. I also tried the drape tool, but then I could not push the surface down and it both curve paths where not equally the same. So I am wonder how would others make road paths on a terrain while also being able to push the road paths down to create the curb prior to the istant road plugin?
-
Hi, see my post, which is number 11 on this page http://forums.sketchucation.com/viewtopic.php?f=79&t=40331&start=15. I hope this helps
- Mick
-
Mick (or in fact anyone), you can always link to a specific post using this small icon in the post:

Eevn if the post is split off the topic and/or addd (merged) to (with) another topic, this link will still work.
http://forums.sketchucation.com/viewtopic.php?p=393786#p393786 -
Look at this PDF by DareDevil
it's in French but very illustrated!
And as he's using also Shape Bender by Chris Fullmer

[flash=520,315:lo5bgg9d]http://www.youtube.com/v/tGHTIOMm_34[/flash:lo5bgg9d]
-
@sketchymick said:
Hi, see my post, which is number 11 on this page http://forums.sketchucation.com/viewtopic.php?f=79&t=40331&start=15. I hope this helps
- Mick
Mick,
I looked at your file. How did you add the cut and fill strips? Nice demo.
Peter
-
@sketchymick said:
Hi, see my post, which is number 11 on this page http://forums.sketchucation.com/viewtopic.php?f=79&t=40331&start=15. I hope this helps
- Mick
Mick,
I almost had the same theory, well at least the stamp tool part, but at the time, I was having a problem with the stamp tool. However, updating Sketchup seemed to fix the probem hopefully.pbacot,
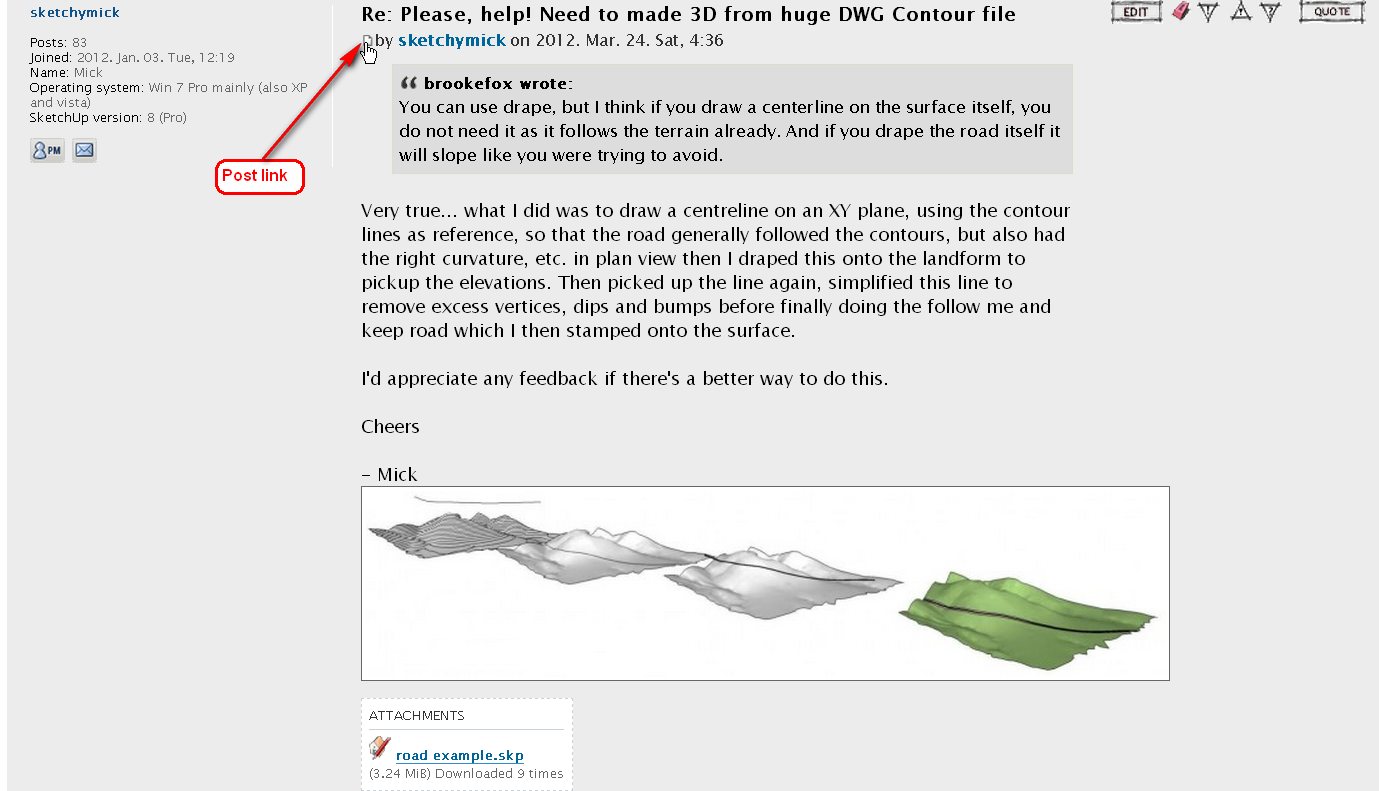
If I understand Mick correctly cutting the road out is done by, with the line tool, draw a line path in the center of the road path image. Next move the line path above the the terrain, and use the drape tool. This will create a duplicate of your line path, but following the contour of the terrain. Once the drape tool has finished, select the faces of the terrain and hide them to make it easier to select the path, as this line will be in pieces. The next thing and to make things easier, you can use the weld plugin, which welds all of the line segments into one polyline segement. Now move the polyline to one side of the road and duplicate the same polyline and move that to the other side of the road. With the 2 polylines created, I think it is possible to close them to make a face by drawing a line at each end, giving you 4 lines and a face in the middle. You can then tripple click this. -
Another thing to add is that the approach I took is very similar to the approach you would take in something like autocad civil3D, and the results aren't a whole lot different.
In autocad speak:
- definite a plan view alignment
- get the surface profile
- modify the profile to your specifications to get rid of dips and bumps
- define a road cross-section assembly
- combine the alignment, modified profile and assembly into a finished road corridor.
I'm not a road engineer by the way, but for some reason seem to have to draw the odd road or two!
Cheers
- Mick
-
Gaieus - thanks for the tip: I've always wondered about this !
Bntheman - very good. that's basically it, just a bit different towards the end.
Pilou - I didn't use shape bender, but this would work just fine in my example as well - just goes to show how versatile sketchup is !
I'll add a few more tips:
- use the top or bottom view with parallel projection to draw your road alignment, using your terrain contours as guidance to get a respectable alignment with the right radius on your road corners.
- make sure the terrain is in a separate group to the road alignment, so that when you drape it onto the terrain, it will still be separate
- after you lift the road alignment back off the terrain, you can inspect it for places where the vertical transitions are too steep. Swap to a side on view. Replace steep dips and humps using the pencil to get the right radius for all curves. (it will now approximate, but be a smoother version of the terrain profile)
- draw your road cross-section (including footpaths, etc. if desired) at one end of the alignment, make sure it is orientated exactly perpendicular to the alignment at this point. Now use the follow me and keep plug in to extrude the section along the full length of the alignment. This plug in stops the road section twisting as would occur with the normal follow me tool.
- finally stamp your completed road onto the terrain. Peter - the width of the batters is controlled by the horizontal "offset" that you type in as you use the stamp tool, and the elevation to which you stamp it. Unfortunately, there's no simple way that I know of to control the slope of the batters (e.g. to keep at a constant 1 in 3 grade), but it wouldn't take much to edit the really steep bits if needed.
Regards
- Mick
-
I just use instant road now...
Advertisement


