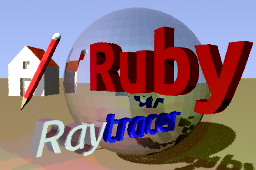
[plugin] Ruby Raytracer
-
And it seems to render a "built-in" model, not actually my SketchUp model (that's probably why it is called a "micro raytracer"). When I change the numbers in
G, the balls shift. -
There is a reason this is posted in the Developers section, not the Plugins section.

-
Guys, guys
Its a 100 lines of Ruby that manages to do image file writing, blurry depth of field, a point light and multiple materials!
How on earth do you think it would be a full raytracer!
However, if you're interested in raytracing, its very simple and you can play around with it to learn about this area of graphics.
The G[] array contains a Bitmap of 32x10 stored as 10 integers.
In function T(), I test the primary ray against an infinite plane and if hit return position+surface normal+materialID (Line 36).
I run through each bit of the bitmap and where this is '1' bits, I trace a reflective Sphere returning a surface position+normal+materiaID. (Line 54)The Scene function S(), traces the primary ray into the scene (Line 70) and colors the pixels depending on material m, and a single pointlight (Line 77). Try changing the position of the light.
The color for the infinite plane is chosen based on a mod function of position. Line 83 controls the scale of chequers.
The main function "raytrace" starts at line 93 and takes care of generating primary rays, and writing out an PPM image file.
Adam
-
Thanks for the breakdown Adam.

-
Thanks for the sample code and the explanation.
I wasn't aware that a Raytracer can be written in such a small piece of code!!
@adamb said:
Thea will be quaking in their boots.


-
I edited and reduced some lines. Hope nobody minds...
(it's just what I thought would work, I've not yet looked at other raytracing source codes)module RubyRaytracer class Geom;;Vector3d def sc(s) Geom;;Vector3d.new(x*s,y*s,z*s) end def sc!(s) self.x *= s self.y *= s self.z *= s self end end def self.v(x,y,z) Geom;;Vector3d.new(x,y,z) end # @lights; position, color, intensity, radius of light source @lights = [ [[1000,1000,1000],[255,255,255],300,10], [[-20,23,15],[255,0,0],50,0], [[-5.5,8,15],[0,0,255],50,0] ] @groundcolor = v(180,160,120) @skycolor = v(180,200,255) @skycolor2 = v(140,160,220) @rez = 256 @samples = 8 def self.cast_ray(o, d) hit = @model.raytest([o,d],false) return (d.z<0)? @groundcolor.sc(1+0.5*d.z) ; @skycolor.sc(1-2*d.z)+@skycolor2.sc(2*d.z) if hit == nil || (f = hit[1].last).class != Sketchup;;Face p = hit[0] n = f.normal rd = (d - n.sc( 2*(d%n)/(n.length**2) )).normalize # reflected ray on face m = (d%n<0)? f.material ; (f.back_material||f.material) a = (m!=nil)? m.alpha ; 1 # opacity; I use this parameter for reflectivity lc = v(0,0,0) # light color @lights.each{|lt| # loop over all light sources l = Geom;;Point3d.new(lt[0].collect{|x| x+lt[3]*rand()}) # light position +/- light radius for smooth shadows ld = (p.vector_to(l)).normalize # vector to light source s = ( x=@model.raytest([p,ld]); x!=nil && x[0].on_line?([p,l]) )? 0.5 ; 1 # occlusion test for shadows i = lt[2]/(4*Math;;PI*ld.length)**2 # light intensity decreases with distance h = 0.25+0.75*[(1 - 2*Math.acos( n%ld )/Math;;PI),0].max # shading lc += v(*lt[1]).sc(i*s*h) } c = (m!=nil)? v( *((m.materialType>0)? m.texture.average_color ; m.color).to_a.slice(0,3) ) ; v(255,255,255) # color of face new_color = (lc - v(255,255,255) + c).sc(a) # new_color += self.cast_ray(p,d).sc(1-a) if a<1 # uncomment this for transparency new_color += self.cast_ray(p,rd).sc(1-a) if a<1 # reflectivity return new_color end #def cast_ray # credits to AdamB, http://forums.sketchucation.com/viewtopic.php?f=180&t=40989#p363271 def self.raytrace(filename=nil, width=@rez, samples=@samples) @model = Sketchup.active_model @lights[0] = [ @model.shadow_info["SunDirection"].sc(1000000).to_a, [255,255,255], 300, 100000] # SketchUp sun filename = UI.savepanel("Save Raytrace Image", "","output.ppm") unless filename File.open(filename, "wb") {|f| vw = Sketchup.active_model.active_view height = (width*vw.vpheight/vw.vpwidth).to_i f.printf("P6 #{width} #{height} 255\n") fov = vw.field_of_view.degrees e = vw.camera.eye o = v(e.x, e.y, e.z) t = vw.camera.target - e g = v(t.x, t.y, t.z).normalize a = (v(0,0,1).cross(g)).normalize.sc(fov / height) b = (g.cross(a)).normalize.sc(fov / height) c = a.sc(-width*0.5)+b.sc(-height*0.5)+g for y1 in 0...height y = height - 1 - y1 Sketchup.set_status_text "raytrace; line #{y1} of #{height}" for x1 in 0...width x = width - 1 - x1 p = v(0,0,0) for r in 1..samples p += self.cast_ray(Geom;;Point3d.new(o.to_a), (a.sc(x+rand())+b.sc(y+rand())+c)) end p = p.sc(1/samples.to_f) p = p.to_a.collect{|x| if x>255;255;elsif x<0;0;else;x.to_i;end} f.printf("%c%c%c", *p) end end Sketchup.set_status_text "Finished #{filename}" } end end #module RubyRaytracer if( not file_loaded?(__FILE__) ) menu=UI.menu("Plugins") menu.add_item("Raytrace the model!") { RubyRaytracer.raytrace } file_loaded(__FILE__) end #100
-
It renders the SketchUp scene?
-
Well, instead of the hard-coded materials and G-Bitmap, it does a raytest() in the model and takes the material of the face that the ray hits (+ shading from normal etc). That is all, but when it's repeated for every pixel, the result is impressive.
Nevertheless, it's still slow
-
Thats pretty cool. Its it it much slower?
Just FYI, I test LightUp raytests in a mode that gives realtime raytracing of your scene as you look around!
Adam
-
@unknownuser said:
Thanks for the sample code and the explanation.
I wasn't aware that a Raytracer can be written in such a small piece of code!!

Quite tiny indeed... there are others too, like
http://tog.acm.org/resources/GraphicsGems/gemsiv/minray/
Advertisement


