Cryengine 3 free finally available
-
The whole tutorial confused me a bit!

-
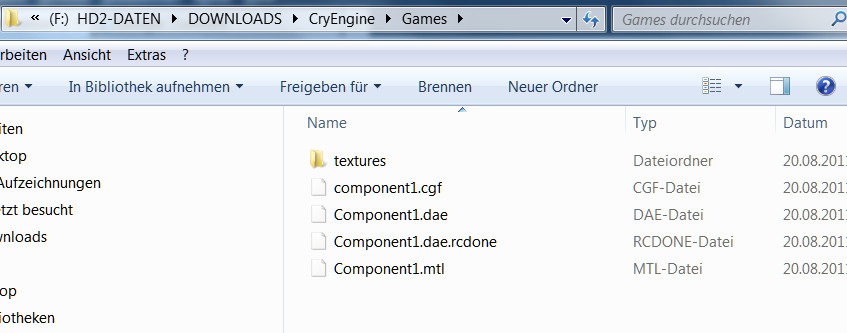
I did it again with another SKP model. Now the files were created as shown in the tutorial. In the Cryengine it does not appear anyway.


-
Charlie, I asked for help in the official Facebook page.
You should try:
<PATH TO CRYENGINE DIRECTORY>\Game\Levels\YourLevel\By the way, for technical help you should suscribe to PlayUp Tools facebook page:
http://www.facebook.com/playuptools
Ah, and new version available now.
-
@charly2008 said:
The whole tutorial confused me a bit!
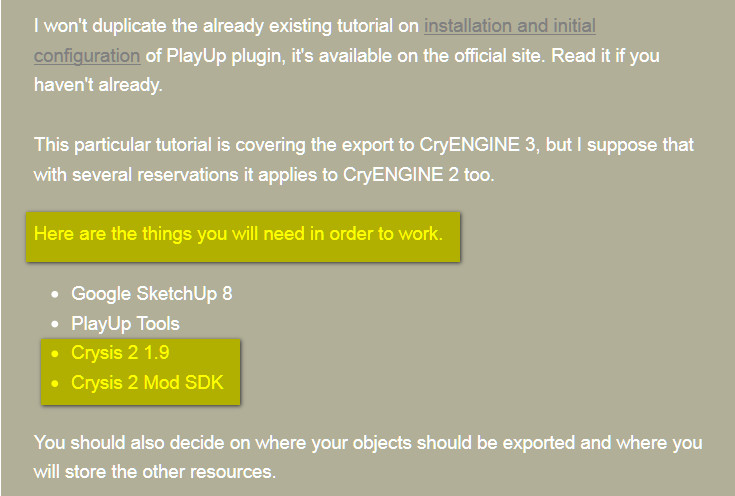
The tutorials were written for Crysis 2 SDK, not standalone SDK. These are basically two slightly different branches of the same engine and toolset, and while the workflow is 99% similar between them, some parts still differ. I mentioned that every time, check the gray notes.
Now that the CE3 SDK is released, the tutorials will be updated to match it, shortly.
Regarding terms of use of these two: basically, Crysis 2 toolset can be used for any non-commercial project (you just need to own Crysis 2 copy in order to be able to install the toolset); but it is slightly less flexible in some specific features (Flowgraph scripting, command line variables availability, etc.), so it's used primarily for modding. For standalone projects, from architectural visualizations to full-fledged games, new CryENGINE 3 SDK is a better choice. It will be regularly updated, it's featuring source code access, better tools and so on. At the moment in can be used only for non-commercial projects, but licensing options will arrive shortly and are believed to be similar to UDK (royalty-based licensing for small commercial projects).
Though I'd like to warn you that current release of standalone CE3 SDK is somewhat buggy, as it's only the first one. Over time all the errors should be fixed (just like it was with the UDK), but maybe it'll be better to wait a bit until more stable release arrives. If some of you own a Crysis 2 copy, and are willing to practice things irrelevant to toolset differencies, e.g. model export or simple mapping, I'd suggest to practice in Crysis 2 SDK for a while, as it is more stable at the moment.
Upd: I've updated the tutorials:
http://www.crydev.net/viewtopic.php?p=830043#p830043Be sure to download the latest version of PlayUp Tools.
-
I made a fast video:
As usual, I can't deal with the Flash tag, if someone wants to see it here, feel free to insert the video in your comment.
All the imported models in Cryengine 3 have the following limitations: 65.000 polygons and 32 textures per model. But you can import many of them to avoid these limits.
PlayUp exports different components as separate entities. I don't know if there is a way to put all together in their right position at once, doing it individually is not viable for me. So in the video I have placed two big elements of my model of the roman theatre of Orange by hand. No collisions yet, I am a ghost that can walk through the walls

bac9-flcl: Thanks for your work. I am sure that you know how to deal with my problems, but I am a newbie and I am learning

-
@unknownuser said:
At the moment in can be used only for non-commercial projects, but licensing options will arrive shortly and are believed to be similar to UDK (royalty-based licensing for small commercial projects).
Well that's a problem, most of what I do is commercial, unless I'm playing around, so what's the point in taking the time to learn this app if I cannot use it for a visualisation render/animation? Do I need to negotiate my fees with a percentage allocated to Cryengine?
-
@pichuneke said:
All the imported models in Cryengine 3 have the following limitations: 65.000 polygons
I'm sure it's rather 64.000 vertices. Polycount is rather irrelevant as it can vary from ~30.000 to ~120.000 depending on a mesh configuration.
@pichuneke said:
PlayUp exports different components as separate entities.
Yes, if your model is consisting of several components and groups on the top level of hierarchy, after using "Export All Components and Groups" action, you'll get several models. You can combine the whole model into the new parent component if you want to export it as the solid object. However, you should be careful with that due to risk of problems with vertex coordinates precision. If an object is huge and contains quite small details at the same time, it's recommended to split the model into several pieces. Check the tutorial section 6.4 for explanation on vertex precision and 3.3 for tips on the subject of proper component structure.
@pichuneke said:
I don't know if there is a way to put all together in their right position at once, doing it individually is not viable for me.
You should keep an eye on the position of pivot points (axes origin points) in each of the parent components you intend to export. Use Change Axes context menu action in SketchUp (available inside Edit Component mode) to relocate them properly.
If you want to assemble the building in the engine, all the pivots of used components should be located in the same area: this way the building can be easily assembled by specifying the same coordinates for each and every part. But well, you can have the same result by just combining the whole model into a single parent component.
However, in case of a huge object, having the same pivot position for all parts sometimes makes the 16-bit range of values extremely insufficient to properly describe all the vertex positions in the distant areas of the model. Not to mention that it's very inefficient to have a pivot positioned e.g. 50 meters away from some wall component, as in this case not even a half of possible values is available for vertex description.
In case of a huge object, if you think that you'll probably get damaged results with exporting the whole model at once, I recommend to use parts. Most importantly, you'll need a different pivot for each part, to make sure that vertex position precision is as best as possible for each of them. And in order to be able to reassemble the whole object in the editor, you'll need to place these pivots on some regular grid (for example, on the same height and with 1 meter snap). Draw a grid with Sandbox SketchUp tools, it'll be helpful when you'll use the Change Axes mode.
Then all you'll need in the engine Editor will be to switch on the snapping, grab the Move tool and assemble the model. With proper pivots, it'll be easy and precise.
-
@solo said:
@unknownuser said:
At the moment in can be used only for non-commercial projects, but licensing options will arrive shortly and are believed to be similar to UDK (royalty-based licensing for small commercial projects).
Well that's a problem, most of what I do is commercial, unless I'm playing around, so what's the point in taking the time to learn this app if I cannot use it for a visualisation render/animation? Do I need to negotiate my fees with a percentage allocated to Cryengine?
There is another good engine, UDK. You can use it free until 50.000 dollars, I believe.
But I have no too much experience with that engine. To me, the use is too complex. But as I do my models for free, I looked at Cryengine... (because it's a hobby).
Anyway if you try UDK, and you make progress with it, let us know, please.
-
@bac9-flcl said:
@pichuneke said:
All the imported models in Cryengine 3 have the following limitations: 65.000 polygons
I'm sure it's rather 64.000 vertices. Polycount is rather irrelevant as it can vary from ~30.000 to ~120.000 depending on a mesh configuration.
@pichuneke said:
PlayUp exports different components as separate entities.
Yes, if your model is consisting of several components and groups on the top level of hierarchy, after using "Export All Components and Groups" action, you'll get several models. You can combine the whole model into the new parent component if you want to export it as the solid object. However, you should be careful with that due to risk of problems with vertex coordinates precision. If an object is huge and contains quite small details at the same time, it's recommended to split the model into several pieces. Check the tutorial section 6.4 for explanation on vertex precision and 3.3 for tips on the subject of proper component structure.
@pichuneke said:
I don't know if there is a way to put all together in their right position at once, doing it individually is not viable for me.
You should keep an eye on the position of pivot points (axes origin points) in each of the parent components you intend to export. Use Change Axes context menu action in SketchUp (available inside Edit Component mode) to relocate them properly.
If you want to assemble the building in the engine, all the pivots of used components should be located in the same area: this way the building can be easily assembled by specifying the same coordinates for each and every part. But well, you can have the same result by just combining the whole model into a single parent component.
However, in case of a huge object, having the same pivot position for all parts sometimes makes the 16-bit range of values extremely insufficient to properly describe all the vertex positions in the distant areas of the model. Not to mention that it's very inefficient to have a pivot positioned e.g. 50 meters away from some wall component, as in this case not even a half of possible values is available for vertex description.
In case of a huge object, if you think that you'll probably get damaged results with exporting the whole model at once, I recommend to use parts. Most importantly, you'll need a different pivot for each part, to make sure that vertex position precision is as best as possible for each of them. And in order to be able to reassemble the whole object in the editor, you'll need to place these pivots on some regular grid (for example, on the same height and with 1 meter snap). Draw a grid with Sandbox SketchUp tools, it'll be helpful when you'll use the Change Axes mode.
Then all you'll need in the engine Editor will be to switch on the snapping, grab the Move tool and assemble the model. With proper pivots, it'll be easy and precise.
Thanks for your long answer. I'll try to use it as a reference to import some of my models next week. I'll let you know how I am doing it

-
@solo said:
@unknownuser said:
At the moment in can be used only for non-commercial projects, but licensing options will arrive shortly and are believed to be similar to UDK (royalty-based licensing for small commercial projects).
Well that's a problem, most of what I do is commercial, unless I'm playing around, so what's the point in taking the time to learn this app if I cannot use it for a visualisation render/animation? Do I need to negotiate my fees with a percentage allocated to Cryengine?
It is a difficult question, and first of all I'd suggest asking Crytek directly about the conditions of engine usage for commercial architectural visualization. Maybe they have already licensed the engine in the similar cases. Check mycryengine.com for contact details.
As about public licensing conditions and that new free SDK, I believe that licensing details for it are still being worked out. And I'm afraid that, as this SDK release is primarily targeted for indie game developers, licensing options for commercial architectural visualization won't be published as soon as ones for game developers. Perhaps that will have to wait.
The toolset is still in a very early stage of evolving comparing to UDK, but eventually that should be figured out. Here's the quote from UDK licensing conditions.
@unknownuser said:
An architecture firm uses UDK to create a live walk-through presentation for their customers. They charge their customers a fee of US$500 for each walk-through. Before they begin to charge customers for the walk-through, they would pay Epic US$99 for a royalty-bearing commercial UDK license. They sell walk-through presentations to 100 customers in the first quarter, bringing in US$50,000 in revenue. No royalty payment would be required to Epic for that first US$50,000. In the second quarter, they sell another 100 walk-through presentations, bringing in another US$50,000 in revenue. They are required to pay US$12,500 to Epic. On subsequent revenue, they are required to pay the 25% royalty.
Note that they do not charge royalties until revenue reached more than 50.000$, it's a general rule for all kinds of projects. Royalty conditions for commercial architectural visualization are even slightly easier then the ones for game developers.
I believe that, as Crytek wants to compete with UDK, they will eventually arrive to similar licensing conditions.
On the side note, UDK is more powerful at the moment as the game development toolset (that's quite natural as it's been around for more than two years), but I'm not so sure about visualization. UDK content pipeline is harder to learn than the one Crytek is utilizing, and the lighting system of CryENGINE 3 is for sure much more powerful than Unreal Engine one (availability of real-time Global Illumination, real-time screen space reflections, hundreds of light sources on screen with decent fps, LUT color correction, extremely powerful atmospheric lighting system, and so on).
-
PlayUp has had a great update!

New PlayUp Version Available with CryENGINE Fixes
SketchUp plugin that allows people to create and export content to a 3D game engines such as Unity 3D, Crytek CryENGINE, and Valve Source
(playuptools.blogspot.com)
This will make the process much more straightforward

@unknownuser said:
Now, whether you're in SB2, SB3 or the CE3 Standalone SDK, your material paths in the MTL files will be pointing to the right place. You should no longer have to reassign materials in the Material Editor. Also, if you apply SketchUp colors instead of textures, it will no longer look so washed out in CE3.
-
Hi Michael,
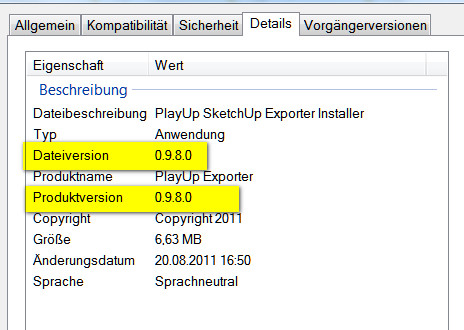
The new file shows still version 0.9.8.0?
Charly


-
Another video:
All the theatre exported, some glitches (I had to position some parts manually, and I made it all very fast). I prefer not to talk about textures, yet.
-
@unknownuser said:
@unknownuser said:
So, does one do a walk through with a shotgun/machine gun?


That doesn't take much effort to remove at all. Can't remember how but I worked it out in a minute or two the other day.
Also I'm not sure about the file still showing .0
Maybe playups dev forgot to change itPichuneke, cool video, you should throw on some textures I think it'd look cool
-
PlayUp update released!
version 0.9.8.2http://playuptools.blogspot.com/2011/08/first-pass-at-cryengine-3-level-export.html
Featuring level export and various improvements in other areas!Be sure to use it.

-
@solo said:
@unknownuser said:
At the moment in can be used only for non-commercial projects, but licensing options will arrive shortly and are believed to be similar to UDK (royalty-based licensing for small commercial projects).
Well that's a problem, most of what I do is commercial, unless I'm playing around, so what's the point in taking the time to learn this app if I cannot use it for a visualisation render/animation? Do I need to negotiate my fees with a percentage allocated to Cryengine?
solo, I believe this may interest you: http://www.udk.com/showcase-takenaka
@bac9-flcl said:
PlayUp update released!
version 0.9.8.2http://playuptools.blogspot.com/2011/08/first-pass-at-cryengine-3-level-export.html
Featuring level export and various improvements in other areas!Be sure to use it.

I believe that this week I will have exported the model of the roman theatre of Orange. I had some problems exporting textures. In sketchup I have deleted a material, imported it again with a new name, and retextured the model a lot of times to deal with that. But I think you'll see a definitive version soon.
By the way, if I release the 3D model with cryengine... Is there any legal problem as my model it's hosted in 3D Warehouse? I believe that when you upload your model there, Google acquires rights on that model. And another question: Is there any official hosting place to download it in crydev.net?
-
@pichuneke said:
By the way, if I release the 3D model with cryengine... Is there any legal problem as my model it's hosted in 3D Warehouse? I believe that when you upload your model there, Google acquires rights on that model. And another question: Is there any official hosting place to download it in crydev.net?
I believe that can help you. http://www.google.com/support/forum/p/sketchup/thread?tid=19eea65731770f92&hl=en
-
bac9-flcl, how different is Sandbox 3 from Sandbox 2? I spent some time getting familiar with exporting to 2 from SU and eventually found a pretty straight forward process (although playup never worked for me). The models were easy to get in (although most had to be brought in in several pieces, but that's not too difficult) and worked smoothly with the games.
The two areas I had trouble with (and I'm hoping you'll tell me they're fixed for the new version) are:-
Textures. Diffuse textures that were completely unmodified were fine, but adding (even a very small) reflection made the material look really odd (sorry, no examples to post at the moment) and adding a bump/normal was really bad. I'm pretty sure it's a mistake I was making, but I couldn't never find out what; in any case, it wasn't obvious at all.
Also, it would be nice to slowly save up a library of materials you've made, so when I model is brought it you could quickly add your materials. Again, there's probably a way but I couldn't find it. -
Where the above is likely me not understanding what to do correctly, adding doors and windows (moveable) seems like it might not have a good solution. Here it goes: when you export a model from SU it uses 0,0,0 as a pivot point, which makes sense and is useful. For doors and windows, though, I couldn't figure out how to snap the (door) pivot point in the correct place in the model. I just had to estimate it. Ideally I would export ALL the doors and windows with the same pivot as the model as a whole, and then adjust the pivot of each that the door/window would open around.
You don't have to try and answer the problems I listed, but have you encountered those in the newest Sandbox?
By the way, thanks so much for the tutorial -- it's great! -
-
@dsarchs said:
bac9-flcl, how different is Sandbox 3 from Sandbox 2? I spent some time getting familiar with exporting to 2 from SU and eventually found a pretty straight forward process (although playup never worked for me). The models were easy to get in (although most had to be brought in in several pieces, but that's not too difficult) and worked smoothly with the games.
Not much different in the basic areas. Most changes are really about simplification of work, reorganizing poorly designed UI areas like ToD, and integrating new features CE3 is known for. All the simple routine with exporting to .cgf and configuring materials is pretty much the same.
@dsarchs said:
- Textures. Diffuse textures that were completely unmodified were fine, but adding (even a very small) reflection made the material look really odd (sorry, no examples to post at the moment) and adding a bump/normal was really bad. I'm pretty sure it's a mistake I was making, but I couldn't never find out what; in any case, it wasn't obvious at all.
Sorry, I don't really know what your problem is about, I never had any problems with configuring reflectivity or using any additional texture maps. Can you explain what was wrong in a bit more detail?
Here are some examples of objects exported from SU, with perfectly working normal, specular, glow or some other maps. http://www.crydev.net/viewtopic.php?f=311&t=73297
The only thing I can add is that CE3 is featuring much more powerful and organized rendering pipeline with unified Illum shader. No more choosing between different alternative shaders and no more performance loss: Illum is allowing you to imitate practically any material, including quite complex surfaces with anisotropic reflections. And reflectivity effects greatly improved over the CE2 - for example, now you don't even need to create environment cubemaps to make your metal materials look great - you just set up an Environment Probe entity in the editor, and it's generating cubemap which is used on every glossy surface in a certain radius. Looks brilliant. Not to mention that surfaces with sharp reflections (high glossiness value) are even additionally utilizing Real-Time Local Reflections which are real ray-traced ones, - first time in game industry.
@dsarchs said:
Also, it would be nice to slowly save up a library of materials you've made, so when I model is brought it you could quickly add your materials. Again, there's probably a way but I couldn't find it.
I'm not sure what this question is about, but well, texture library is easily made. You just work on textures in Photoshop and save them with CryTif in a neatly organized folder structure somewhere in SDK\Game\Textures.
I also recommend to manually reconfigure all your texture maps in the exported models to use textures from your library, not the ones automatically converted with PlayUp export. It is very important to ensure that some assets with generic textures, e.g. buildings, aren't using tons of duplicated textures, - and save memory and performance this way.
@dsarchs said:
Where the above is likely me not understanding what to do correctly, adding doors and windows (moveable) seems like it might not have a good solution. Here it goes: when you export a model from SU it uses 0,0,0 as a pivot point, which makes sense and is useful. For doors and windows, though, I couldn't figure out how to snap the (door) pivot point in the correct place in the model. I just had to estimate it. Ideally I would export ALL the doors and windows with the same pivot as the model as a whole, and then adjust the pivot of each that the door/window would open around.
I'm not sure why would you need to export a door as a separate object - just combine it with the outdoor walls around, into a single parent component, and export it that way. There is no need to go to such an extremes to preserve detail with FP16, I'm sure nothing with happen if you'll use that door with the wall.
Still, if you need perfect aligning and easy assembly in Sandbox, use Change Axes context menu when editing component, to change 0,0,0 point position. It should be in the same place for near objects, or on some regular grid (that would allow to assemble buildings within Sandbox using the Snap option of Move tool).
By the way, I'm sure that almost all these questions were covered in my tutorials. Weren't they? )
-
I keep fighting with textures, but now you can see a draft without those red walls

Hello! It looks like you're interested in this conversation, but you don't have an account yet.
Getting fed up of having to scroll through the same posts each visit? When you register for an account, you'll always come back to exactly where you were before, and choose to be notified of new replies (either via email, or push notification). You'll also be able to save bookmarks and upvote posts to show your appreciation to other community members.
With your input, this post could be even better 💗
Register LoginAdvertisement


