Noob in need of some "Follow Me" help
-
Hi all,
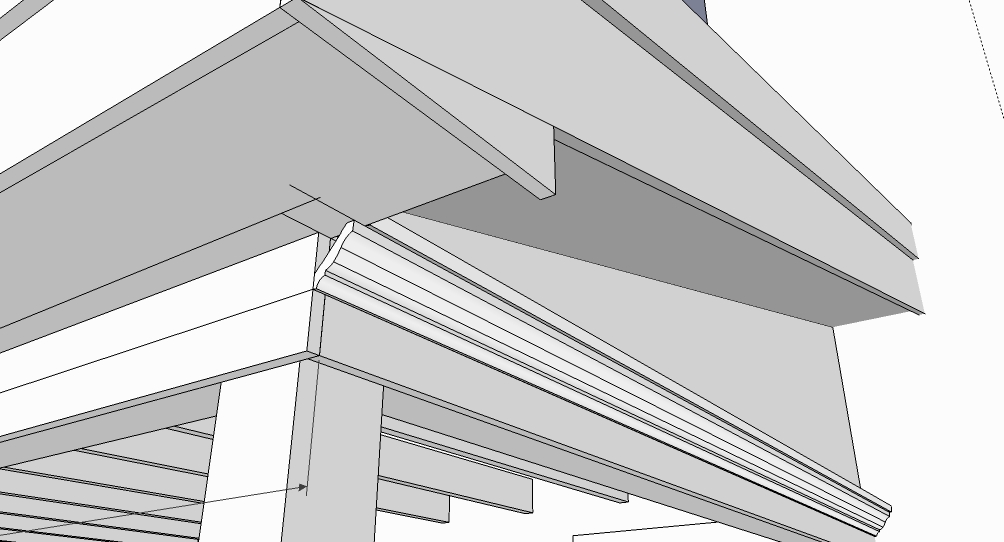
I have been using SU for some time now, basically for conceputal drawings of projects that i am involved in building. My problem is that I can't seem to get the hang of the follow me tool. Once I get the profile i want( in this case a crown molding)I can't seem to get it to follow the path that I want.
I usually end up with with some crazy thing happening(extra wall surrounding my model or some other strange result) I have watched a few Tut's on this, and I have had some(if little) sucess with wrapping the exterior of a box , or some other simple shape.
My problem seems to happen mainly when my molding is nested up under another plane or on the face of a wall, such as chair rail.
I took a screenshot to try and better explain my prob, but can't figure out how to post it. I Was able to attach the model for anyone interested in taking a look at the crown under the soffit.
You guys have a great forum here,with some unbelievable talent, and I've learned tons by just searching and reading.Thank you for any help you can give me.
WayneGot it

-
Hi Wayne,
You can attach a picture just like any other file. I will have a look at the skippy in the meanwhile.
-
Thank you Gaieus, I got the file attached. You'll have to excuse my computer ignorance, lumber and nails are my specialty(sp) not computers.
Thanks again
Wayne -
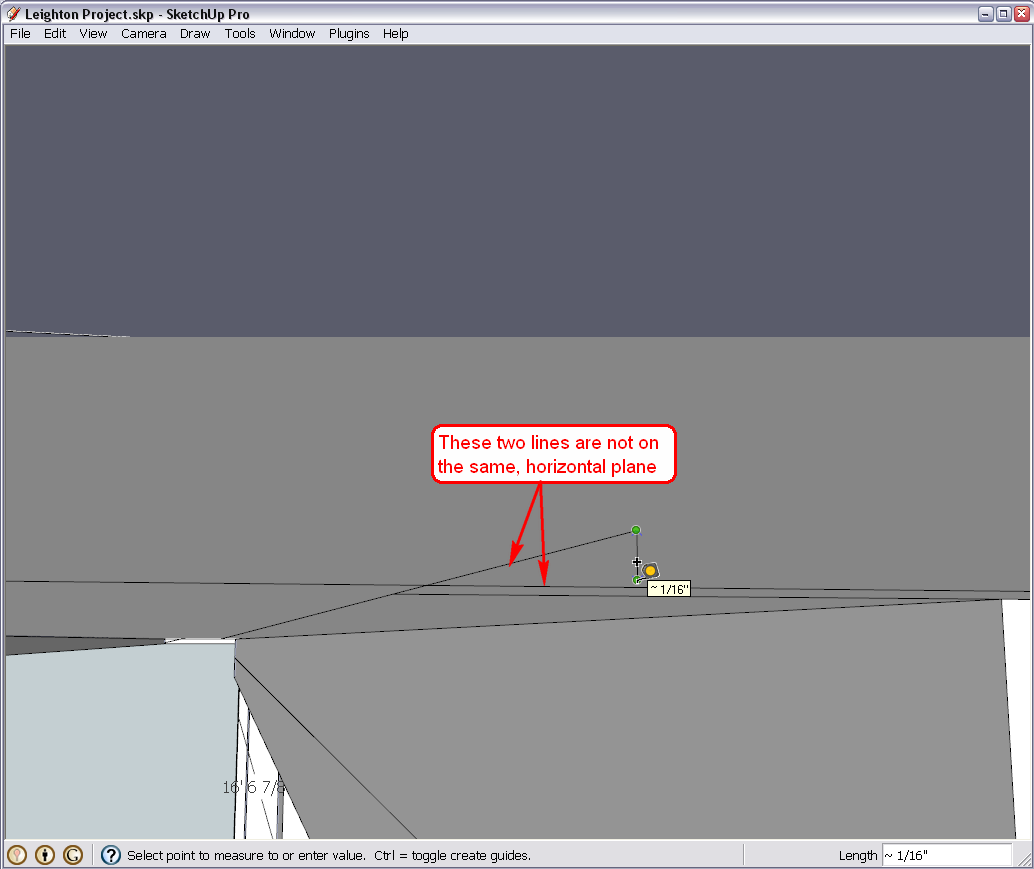
Okay, I can see a couple of flaws in here. I am not exactly sure which path you would have liked to choose for the profile to follow but there are a couple issues here. If you have a look "under the hood" here, you will see that these edges do not even meet. If they were to be followed, there would be some mess.

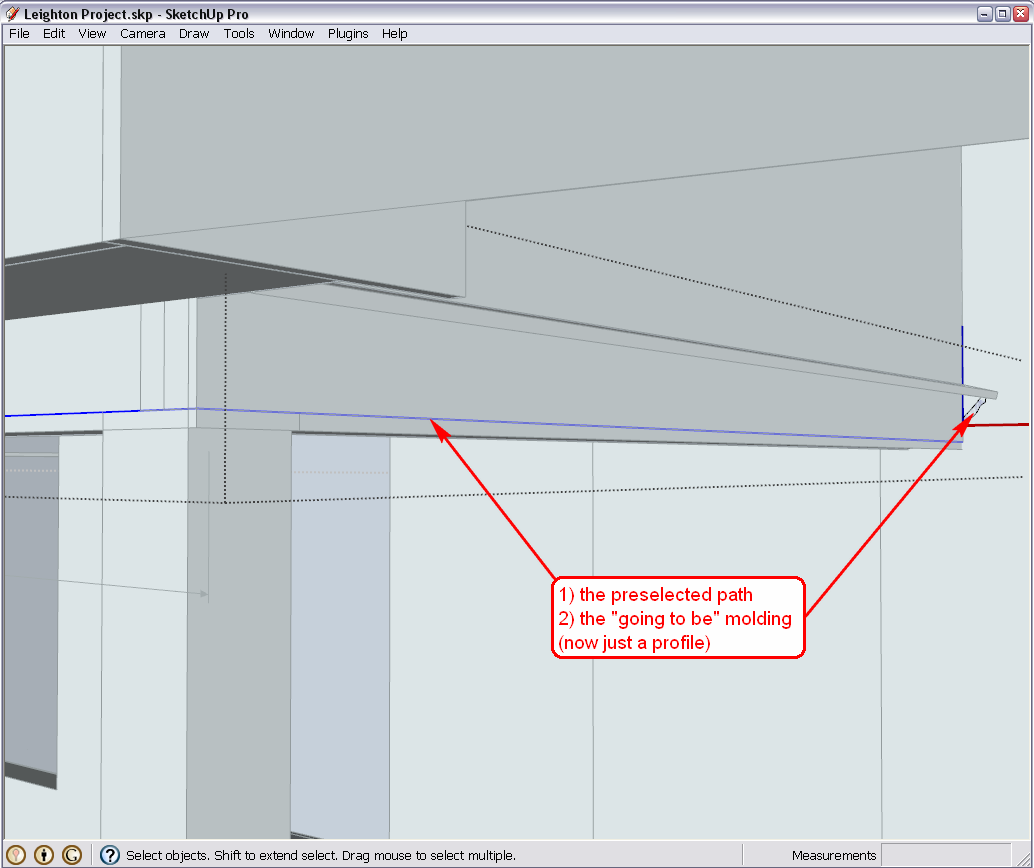
So I deleted the whole extrusion, placed the single profile to the end and (thinking that you would like to get it all around), drew a new path for it using the axis inference (green, red a,d green again).
At this point it is very important to understand that the easiest way for the follow me tool to work is to- draw the path first within the same editing context where the moulding profile is

- select the path second (here you can simply triple click)
- select the follow me tool and single click on the profile. All the rest is automatic.

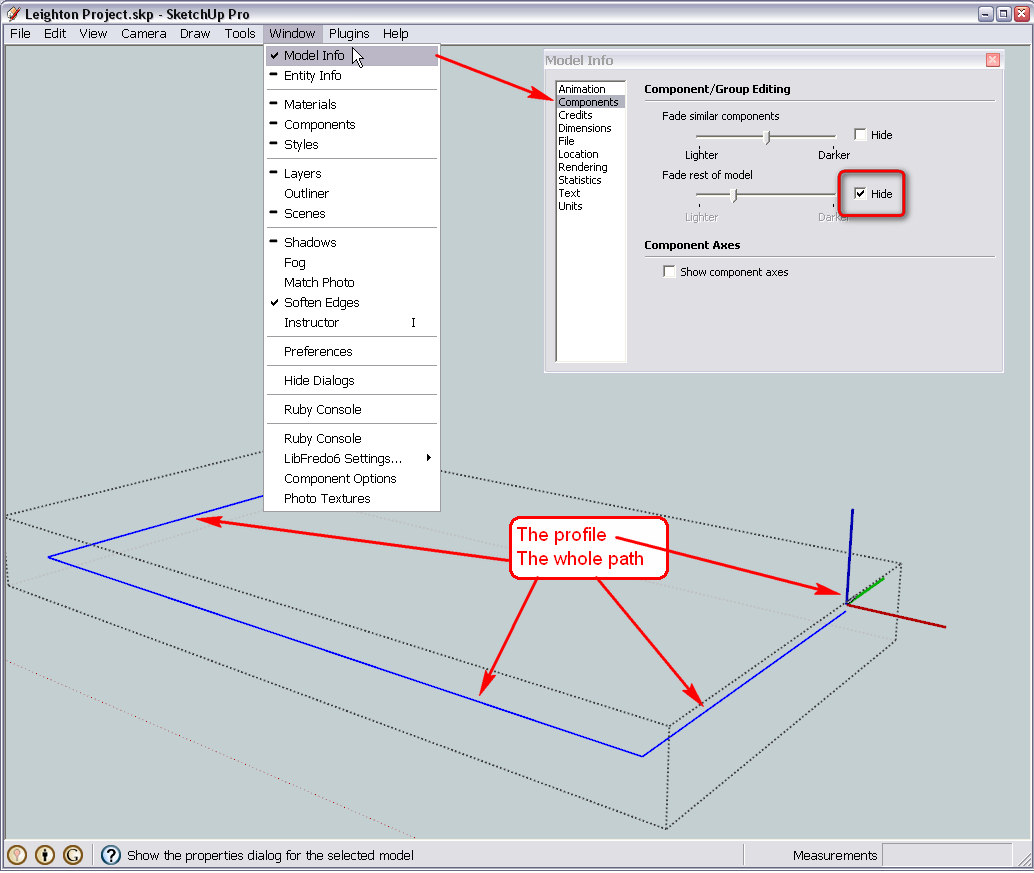
Here I hid the rest of the model (and when you open your file and double click the profile to start the follow me operation, it will look the same - see how you can disable it - but make the follow me this way so that you can see how it works)
And the file (I may have misplaced the moulding a bit - correct it as you wish first but the path should be valid for any placement)
- draw the path first within the same editing context where the moulding profile is
-
Thank you Gaieus, I now understand what I was doing wrong.
One more piece of knowledge in SU. I appreciate your help very much.
I love this program and this forum.Have A Great Evening
Wayne -
Cool. I never really know if I am explaining what needs to be explained or something else, trivial and well known thing.
Hello! It looks like you're interested in this conversation, but you don't have an account yet.
Getting fed up of having to scroll through the same posts each visit? When you register for an account, you'll always come back to exactly where you were before, and choose to be notified of new replies (either via email, or push notification). You'll also be able to save bookmarks and upvote posts to show your appreciation to other community members.
With your input, this post could be even better 💗
Register LoginAdvertisement


