Projecting a photo with perspective distortions?
-
Dear kind folks,
Greetings! I've only worked with SketchUp once for a project a year ago, but found that it was quite brilliant and intuitive. Now I've got a bit of a trickier need, and I'm wondering if someone out there can point me in the right direction.
I'm trying to figure out how to project some 2d photographic imagery onto the 3d model, but not just in the regular flat matching sort of way. The goal is to fragment and distort the image so that it only looks right from one particular vantage point, as if it had been projected onto the architecture from that exact spot.
For an example of what I'm talking about, see these architectural art installations:
http://www.2loop.com/3drooms.html
(I've forgotten the artist's name, but saw this piece with the blue rings while traveling:
http://www.2loop.com/3doutdoor.html
The effect of walking into the space was quite striking-> you rounded a corner and saw the image perfectly aligned, and then as you moved into the space it all disintegrated.At any rate, this artist was working with an overhead projector and some paint, but my goal is to make some photo murals. So ideally I'd like to be able to pick a 2d image and designate a viewing point, and from that, be able to output a series of distorted image fragments that, when put up on the wall in the architectural space, would recombine to create the image from the proper vantage point.
Any suggestions would be muchly appreciated. Thank you!
-jj
-
This is actually fairly easy to do.
Once you have the space modeled, crate a plane in front of the room which matches the overall size of the space.
File/Import your picture and put it on the plane. Right click and make it projected.
Sample this texture with the eyedropper, then you should be able to paint it on all the surfaces in the room.
Try it out, it works like a charm.
Hope this helps,
-
What Patrick says should do it. Note that once you apply a texture on a face and turn it into projected, after sampling it, that image will always be projected along the vertical lines to that face.
You can always combine this with exact camera placement (and even different FOV settings although a "normal" human eye should work the best) to go back to your scene whenever you wish.
Although even the Romans "experimented" with this, due to the lack of correct perspective painting until the Renaissance, it was not too "convincing".
Then Baroque mural painting "rediscovered" it and even exaggerated and over-exploited it but of course there are beautiful examples.Cool project; I love it. Please,let us know if the above "hints" do not help.
-
Hi there Patrick and Csaba- thanks for the responses!
So this seems like a good start... but I have a few more questions for you, some of which are just my lack of comfort with the interface.
First of all-> Any suggestions for placing the image? I find that when I import the file, it tends to want to snap to one of the axes, or to the surface of one of the shapes. I'm not very comfortable with the tools to rotate that image around... Ideally I'd like to be able to go to my chosen viewpoint (down, low at eye level relative to the building) and then import the image, flat relative to the screen and that perspective... does that make sense?
Once I get the image in there where I want it, the next question is with capturing the individual pieces... because my goal here isn't the 3d model... it's just the tool to get to an actual installation in the physical world. So I need to then actually generate images of the individual facets so as to print them out and install them on the building. Any suggestions for that?
Again, many thanks for your time!
-jj -
-
Cool, this is quite interesting. Here are a couple of screenshots how I'd probably approach the problem:
-
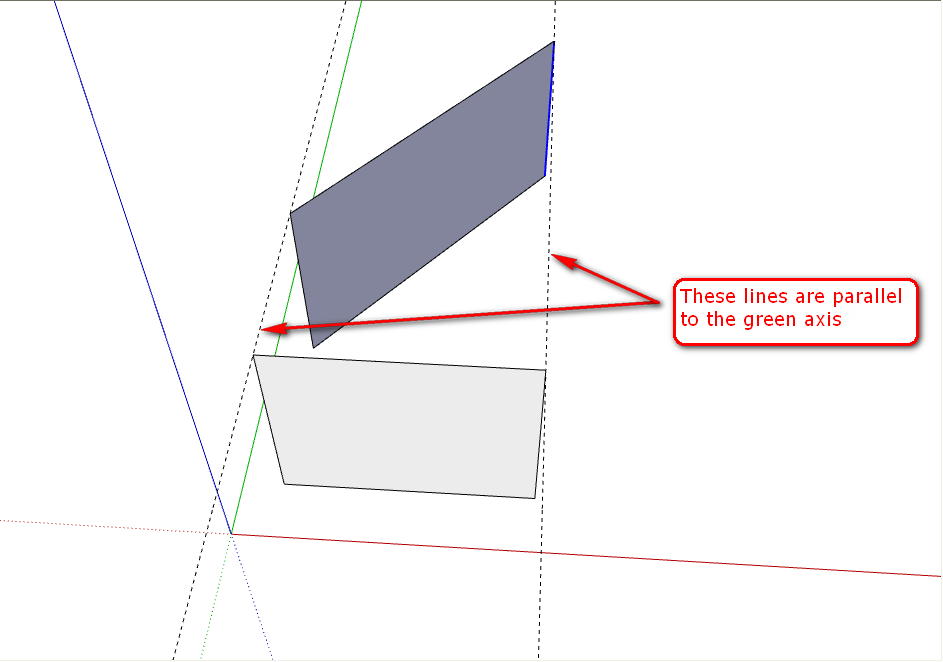
place you wall you want to project onto as you wish (this is the farther, slantwise one)
-
put in a face in the plane where you (later) wish the camera (in reality your eye) to be
and align it parallel to the direction you want to look. This will receive the texture/image (you need a face anyway because you cannot project an image imported as image but only a texture applied on a face)

Notice that here I made sure to align the two faces' edges parallel to the green axis while the closer face (which will receive the image) is perpendicular to the green axis. This is how you can make sure that the projection of both faces on the red/blue plane is exactly the same, the closer face is right on this plane so the image will be projected perpendicularly covering the slantwise face exactly.-
when you've set up your scene, apply the image as texture on this face (out of laziness, I have missed this step)
-
now right click > Texture > Projected > Sample this > Apply on farther face and you're done.
Since there's more than this in the game, here's how you can make sure to check what you could exactly see in real world:
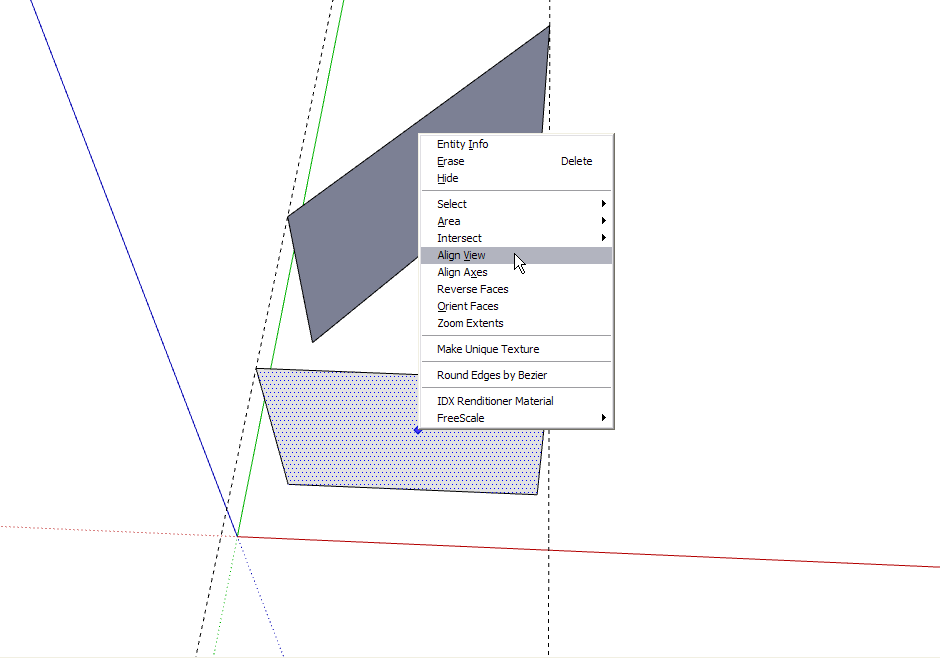
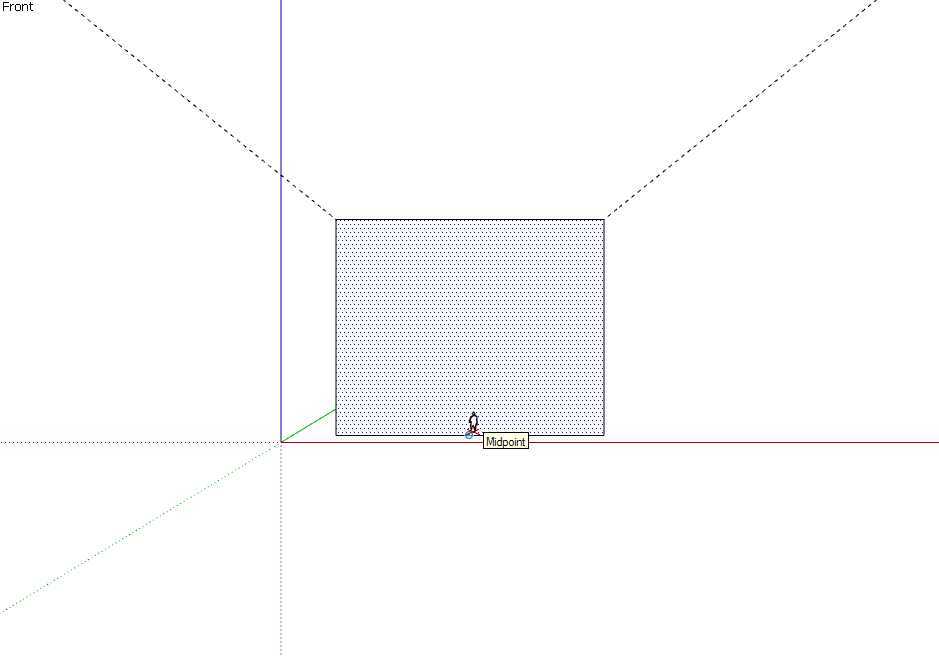
- right click the face again and "Align view" which will place your current camera somewhere perpendicularly looking at this face

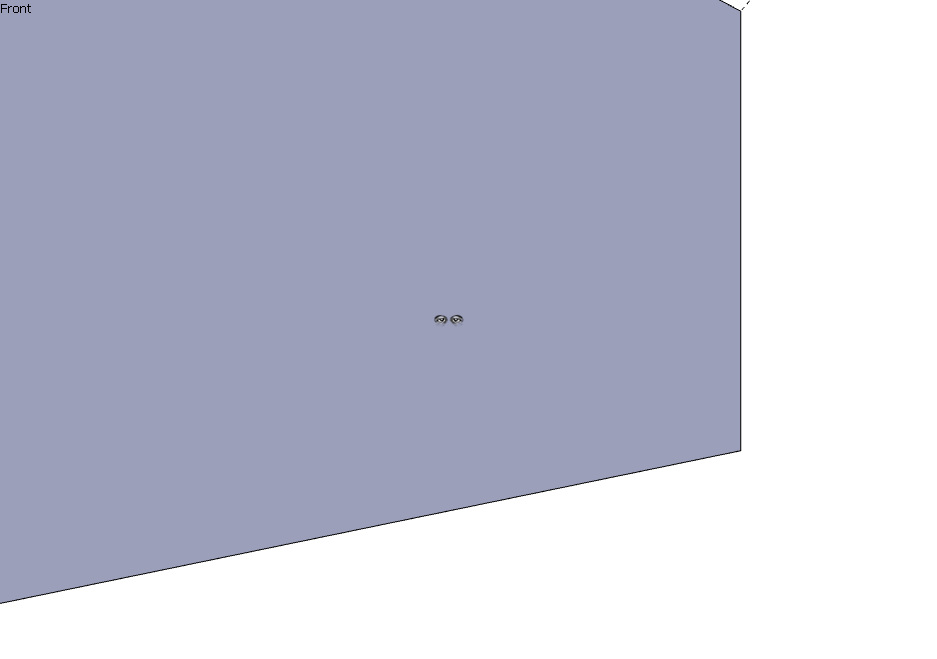
6) now go to the Walkthrough toolbar and select "Position camera" and choose the spot where you want to see the whole scene in reality
7) finally this is your view you'll see after making that mural.
-
-
@jjtiziou said:
...Once I get the image in there where I want it, the next question is with capturing the individual pieces... because my goal here isn't the 3d model... it's just the tool to get to an actual installation in the physical world. So I need to then actually generate images of the individual facets so as to print them out and install them on the building. Any suggestions for that?...
Almost forgot...
Get SU 7 for this because you'll have a lot easier job. No matter it's not the French version (may I suspect you are using it and therefore still version 6?).
So in SU 7, you just right click a face and > "Make unique texture". It will immediately produce a new material in your material browser with whatever distortion you can see it on the face.
Then right click again > Texture > "Edit texture image" (in an external application you set in your preferences when you install SU) and there you go with an image file open in your favourite image editor.On top of all this, in Preferences > OpenGL, you can even set "Use maximum texture size" which will allow you to use 2048x2048 pixel images instead of the 1024x1024 default OpenGL/SU resolution (this can be advantageous with distorted images as the pixelage may get "smeared" on the surface with smaller resolution).
SU 7 runs smoothly together with SU 6 on the same computer so you don't even risk anything.
-
@unknownuser said:
Try looking over this model, you may get some ideas.

Hi again Patrick, and right on.
So yes, that's kind of what I'm getting at.
Here's a question though:
In the example that you gave, the optimum viewing perspective is from far back, outside of the room/space. How would you do this if you wanted the image to line up from a viewing point within the room itself?Here's an example using the same space and texture - but trying to create that image from a specific vantage point within the surrounding:

(Mind you, I made this in photoshop, not Sketchup...)
again, thanks - and Gaieus, I've upgraded to v 7 - thanks for the reminder, and the tutorial!
-
It works the same way. Think of it as if using a a movie projector. Your sample image needs to be in the same plane that you want the illusion to be seen from. This could be either inside the room or inside.
Wherever it is placed the image will be "projected" straight out onto your wall surfaces. Study the model and Casaba's tut. It takes a bit of tinkering but you'll get it.
-
Hmm- so I think I'm getting the hang of how it works- But I don't think that it's working quite like a movie projector... It looks like the image is being projected in parallel rather than perspective, right?
I think I can manage that- but here's an interface question: is there an easy way to align the axes not with an existing face, but rather with the current screen position? Ideally, I'd like to be able to construct a rather elaborate model, and then navigate the space with the look around tool, and place the projections from there. But right now, I'm having trouble just creating that first plane that would be at arbitrary angles to the rest of my model, but perfectly parallel to my chosen viewpoint... Is there an easy trick for this?
Again, many thanks for your time and assistance..
-jj -
jj
You are right about it projecting parallel, it sounds like you are getting the ideas of things.
To draw the plane you want at an arbitrary angle you can stand where you want, then look down at the ground
draw a line which represents the angle of your plane projection.Now you can't extrude a line so draw a box around it making the line making a triangle with your line.
Pull up the triangle and delete what you don't need, make it a group and you can move as you see fit.
I am not sure if you use Ruby scripts yet, there is one called Rotated Rectangle http://download.sketchup.com/downloads/downloads/rubyscripts/rectangle.zip
It will do it in one step.
Keep going, you'll get it.
-
Ok - so I think I can deal with projecting parallel... although if there's a way of projecting from the point perspective, I'd love to find out about it...
Thanks also for the link to the rotated rectangle script... certainly useful.
Before I bog you down with more specific technical use questions, here's the broader one:
-> Can you, with your skill set, easily create a rectangle that precisely matches an arbitrarily given viewpoint, without having to move your vantage point from that view?
I'll admit that I have no clue as to what you meant when you said "Pull up the triangle and delete what you don't need, make it a group and you can move as you see fit." - so if you felt like elaborating, that'd be super rad- but even with the rotated rectangle script, I can make things generally on the right plane, but it involves orbiting around and moving it from other vantage points, vaguely guesstimating it, and then coming back around to the original viewpoint, and going back out to tweak it... certainly not practical for frequent manipulation.
Ideally I'd like to be able to make Sketchup temporarily "forget" that it is looking at a 3d scene, and just draw a rectangle flat on my screen, in whatever plane I happened to have oriented myself. But of course it keeps on trying to move into the depth of the scene, and put points on other objects in the background. (Very useful behavior in general, just not right here...)
Just you have a general idea why I'm asking, if you're at all curious... I'm a finalist for a mural commission that would span a few buildings in a tricky architectural space... and I'm a photographer, so most of my background is in straight 2d imaging and most of my images are displayed online, in print, or framed on a wall. I used sketchup for modeling another public art project that I was also a finalist for last year (but didn't get) - but for that one, everything was pretty straight images on the walls... where here I'm trying to do this playing with perspective stuff... ( Long story short, my expertise is in photo, not modeling, so if you ever have any random photo questions and I can return the advice favors, you can find me at http://www.jjtiziou.net )
Thanks again!
-jj -
This sounds cool and rather than get bogged down learning SU at the same time as you are trying to win the competition I'll help you out as much as I can.
I sent you a PM.
-
Hello JJ and Patrick,
did this project ever get up?
I'd love to see what you came up with.
Baz -
Hew won the competition with a little help from a SketchUp model, but mostly from his talent as a photographer!
See more at:
-
Congrats jjtiziou. I missed this topic back when it was active. After viewing the final winning result it looks that 'perspective distortions' will not be used? Am I reading this right?
-
congrats, looking good.
baz
Advertisement


