Re-apply texture / move UVs inside a component
-
Hello all,
this is the workflow in sketchup:
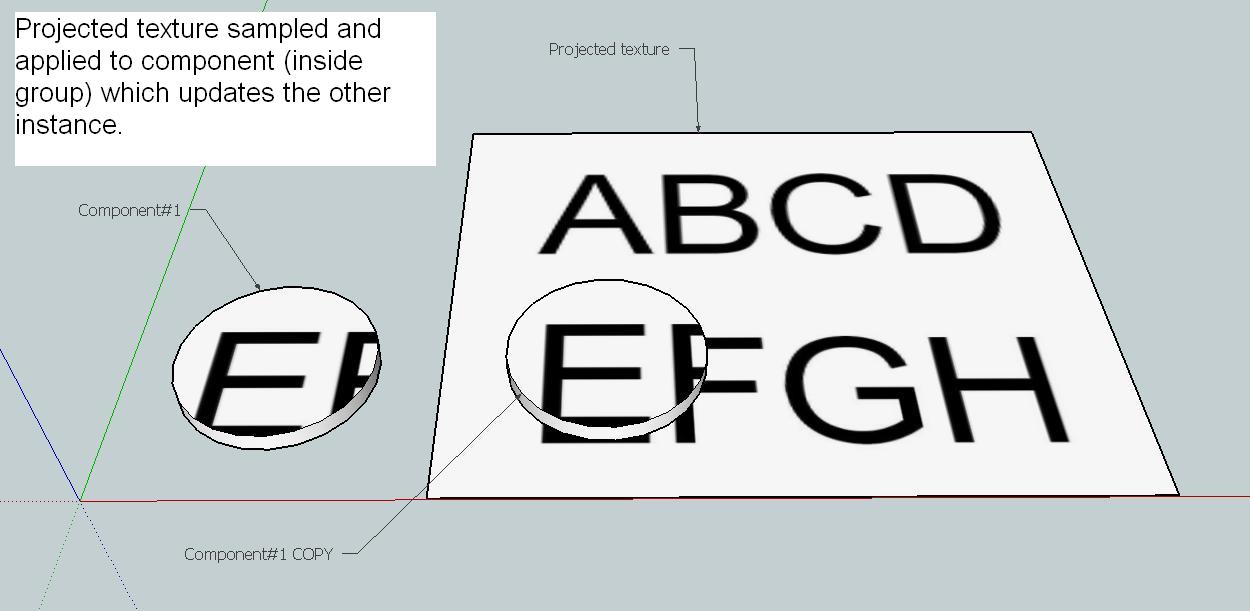
Sample a surface with a projected texture (with eyedropper)
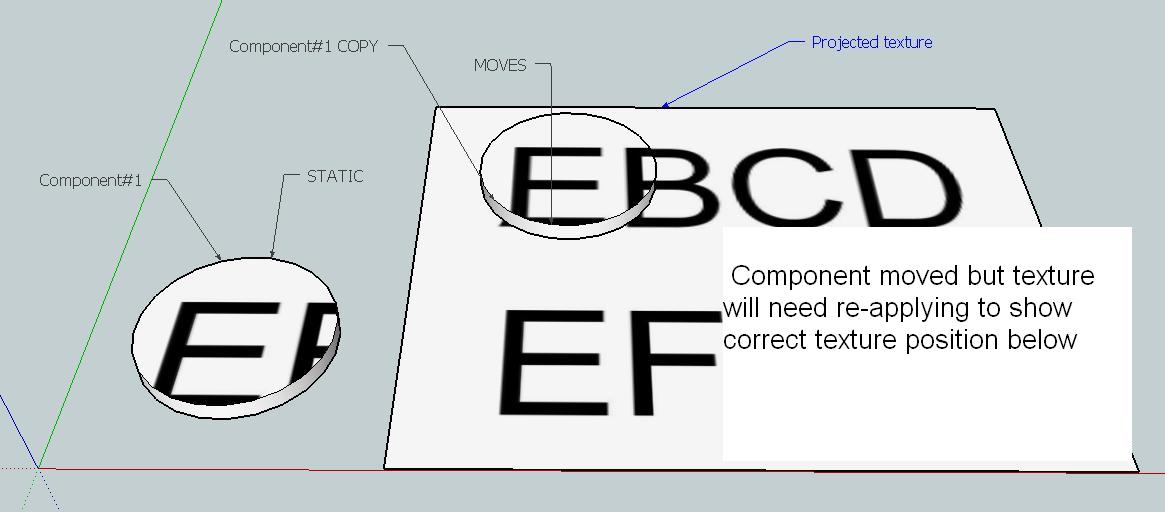
Move a component across this surface
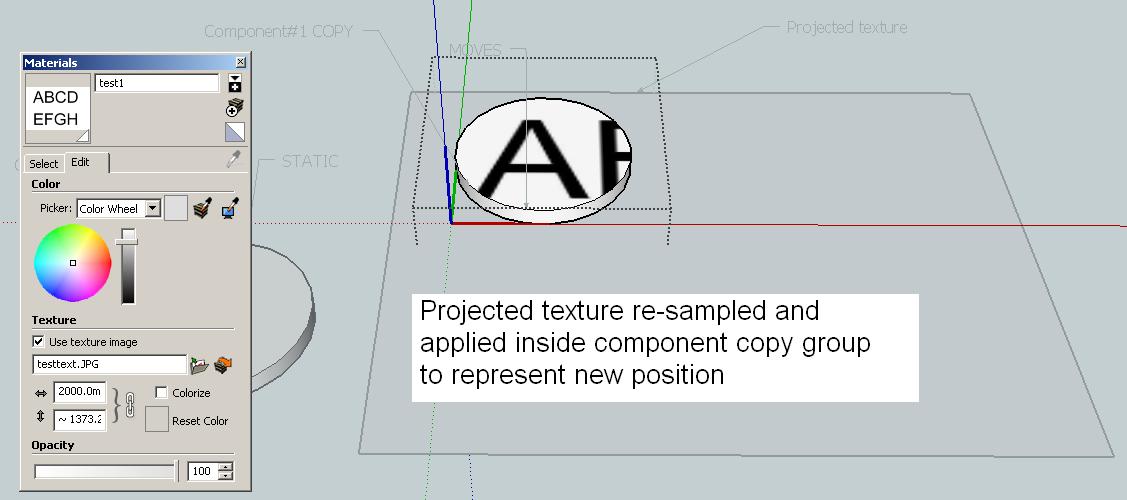
Open component group and apply sampled texture
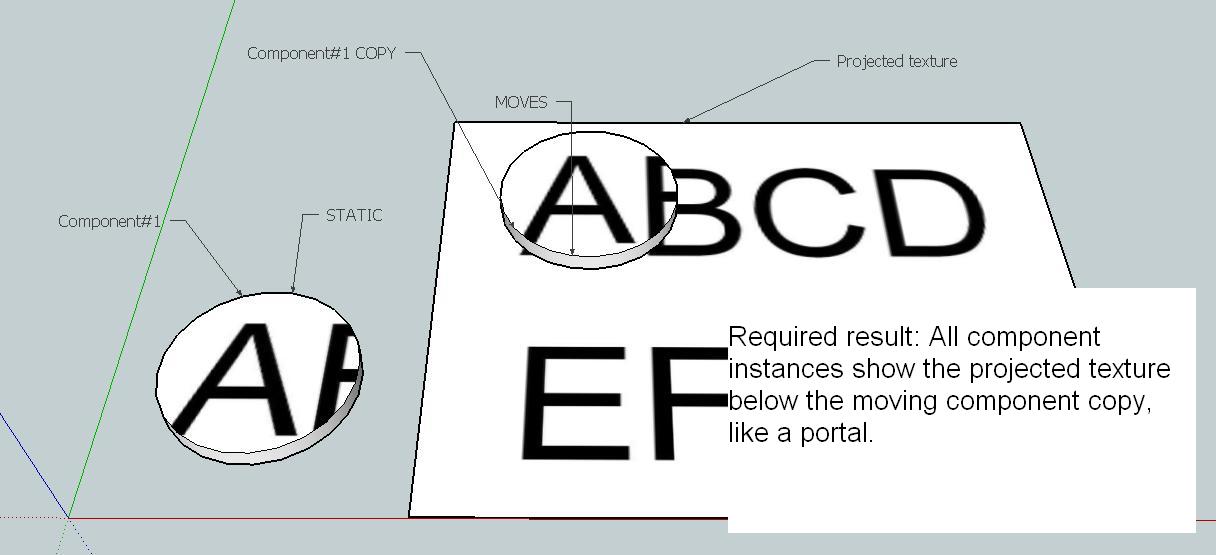
All component instances texture updates to represent new projected position over surfaceI can only get as far as moving the component around in ruby but these are the 2 main approaches I have been trying to get the correct looking texture effect.
(I sample the texture first using sketchup then ruby for following)
move component a set amount up/down/left/right
apply current material to faces of current component instance(I sample the texture first, then paint-bucket it inside the component then ruby for following)
move component a set amount up/down/left/right
re-position texture the same amount in the opposite directionThe different approaches are falling down because of the need to work inside a component and even after all the reading up and thinking it is trivial, I think it would take me many more days to get my head around it. Being a novice any help and snippets are greatly appreciated.
I have attached the images from my test model to illustrate.
Thank you.
-
Components will always have the same texture applied the same way as they are copies of each other.
-
Thanks for looking JQL. I am exploiting that property. The problem lies in getting the texture (projected from somewhere else) to reapply / re-project onto the component after it has moved and thus showing where it has moved to on the paired component. This is easily achieved in sketchup as in the images attached. However it needs to be done when nudging the component around via ruby incrementally 1-10mm multiple times for example. It probably doesn't make a lot of sense why this would be necessary from the images posted, its for trying to align intricate patterns across multiple, joined components cut from different areas of stock materials and planning a cut-sheet.
An analogy would be a cookie cutter, but you get a preview of your cookie somewhere else so you can see it in context. You can see if you're cutting from the right spot on the dough, if not you can nudge it around until happy. As happy as hardcore cookie designing can make you.
-
Here it is working by shoving texture opposite way. It breaks when doing any rotations, as the texture moves relative to component axis which is now rotated relative to red/green axis. There are manual workarounds, not very convenient though.
The inbuilt sketchup eyedropper/bucket works perfectly because it ignores all that and just projects it on, just couldn't simulate it in ruby, so had to go the moving texture opposite direction to component.
Hello! It looks like you're interested in this conversation, but you don't have an account yet.
Getting fed up of having to scroll through the same posts each visit? When you register for an account, you'll always come back to exactly where you were before, and choose to be notified of new replies (either via email, or push notification). You'll also be able to save bookmarks and upvote posts to show your appreciation to other community members.
With your input, this post could be even better 💗
Register Login


Advertisement