[Plugin] GKWare Cabinet Maker
-
CabMaker Version 1.0.50 is now available for download
- Added Horizontal Handles on PROJECT tab in Door Section.
- Made changes to the naming on the web dialog.
- Updated language files.
- For Mac OSX fixed checkboxes in web dialog. Check boxes for rules now have a red border. Also fixed checkbox focus event for context sensitive help images.
- Added mouse hover for text boxes, check boxes and drop downs. This is for users who prefer working mainly with the mouse.
-
Great release !
Graphics displaying as hovering over fields makes it much faster to understand. Almost self explanatory.
-
Anyone interested in helping out with language translation files?
I'm happy with English and French.
Russian gets updated from time to time.More work needed on German, Polish, Portuguese and United Kingdom
I would like to see Spanish, Japanese, Korean, Traditional Chinese and Simplified Chinese
-
Version 1.0.51 now available
It is now easier for Mac OSX users to distinguish between disabled and enabled controls and their labels. Disabled labels and controls are now grayed out.
-
I'm getting close with the DXF file export in CutMaster Gold.
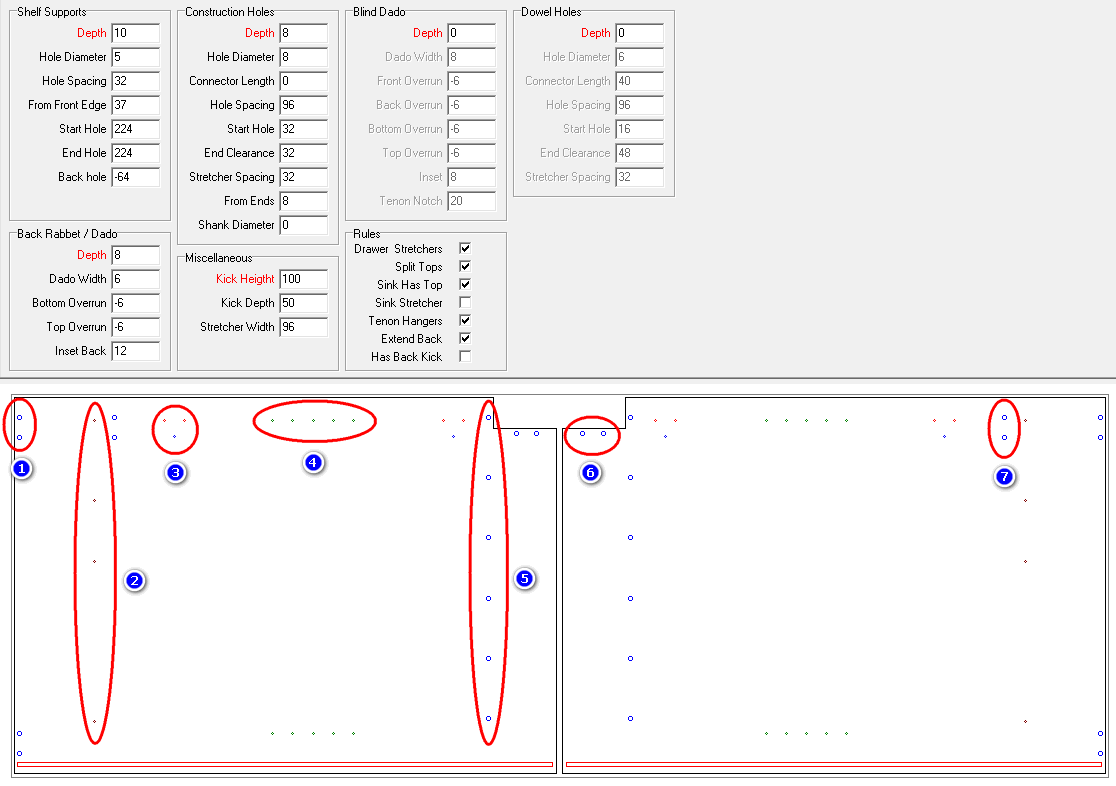
- construction holes for a split top (can be full top)
- holes for mounting drawer slides
- holes for hinge mounting plates
- holes for adjustable shelves
- construction holes for cabinet bottoms
- construction holes for front kick
- optional construction holes for optional stretchers
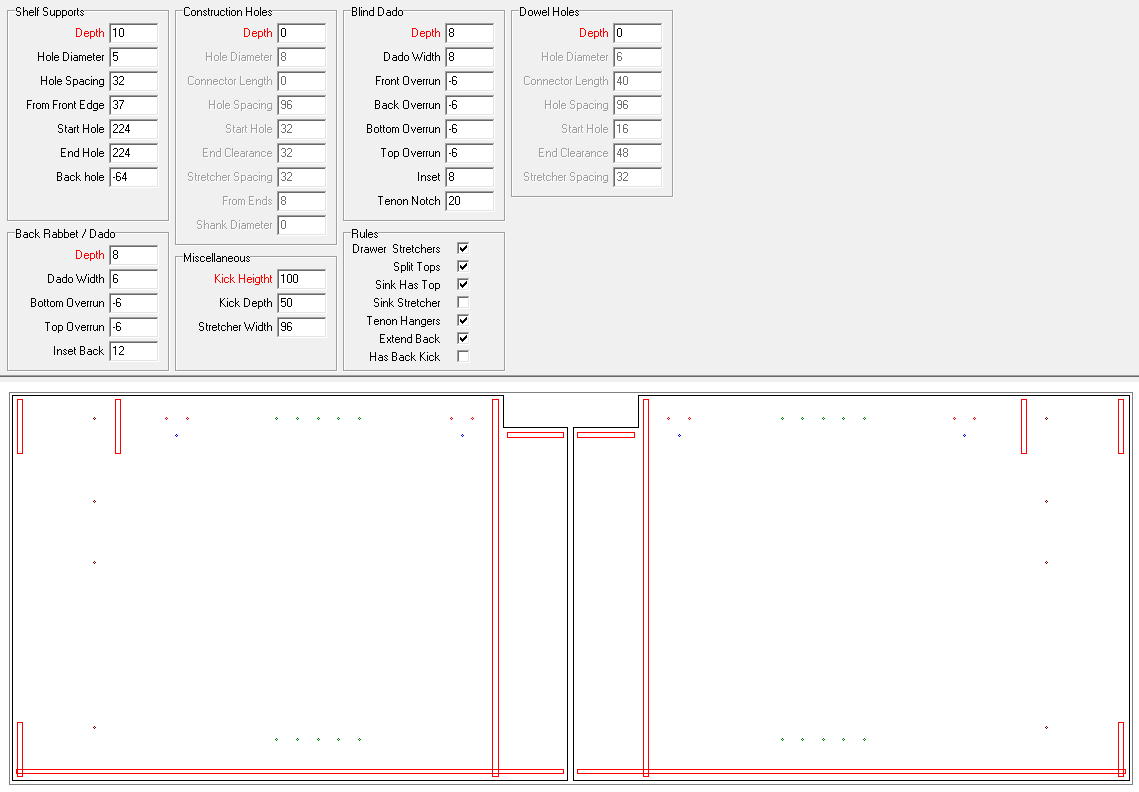
Or pocket routing for blind dados
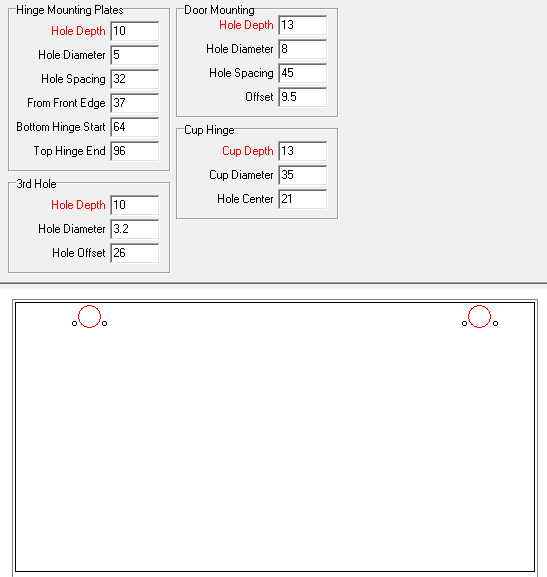
And drilling for cup hinges including drilling for hinge fastners
-
Excellent

-
Here are some of the parameters for Drawer boxes.
You can have construction holes for the drawers or rabbeted drawers.
This example shows a notch on both ends of the back for an undermount drawer slide.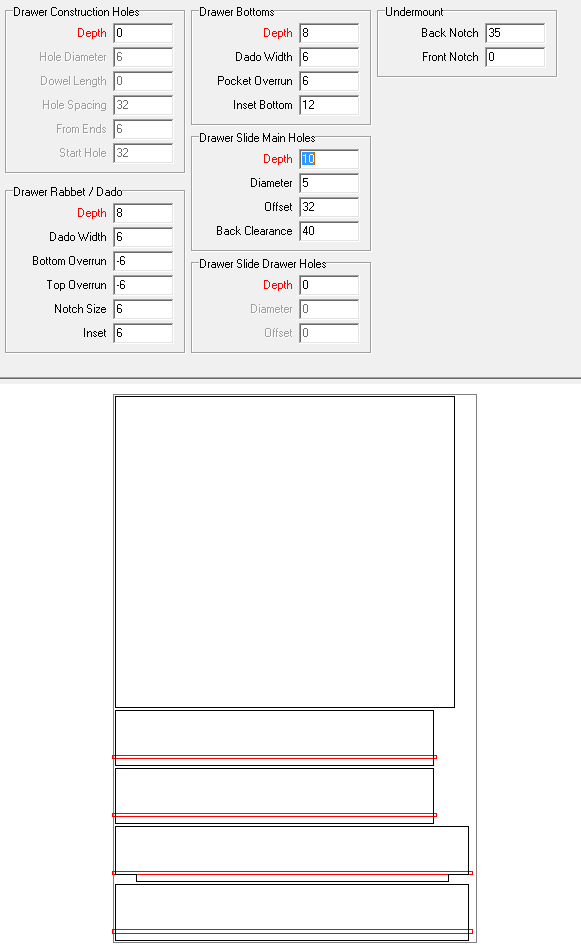
-
Garry,
It would be a nice addition if you add a Rafix connector to the optional constraction holes.
This connector type become popular in CNC cabinet manufacturing and it is very easy to draw in dxf.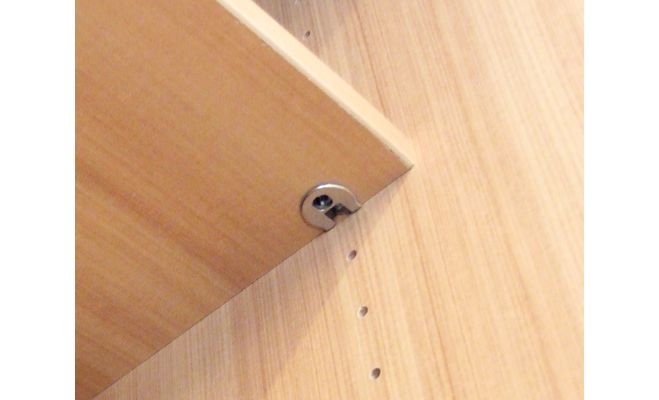
-
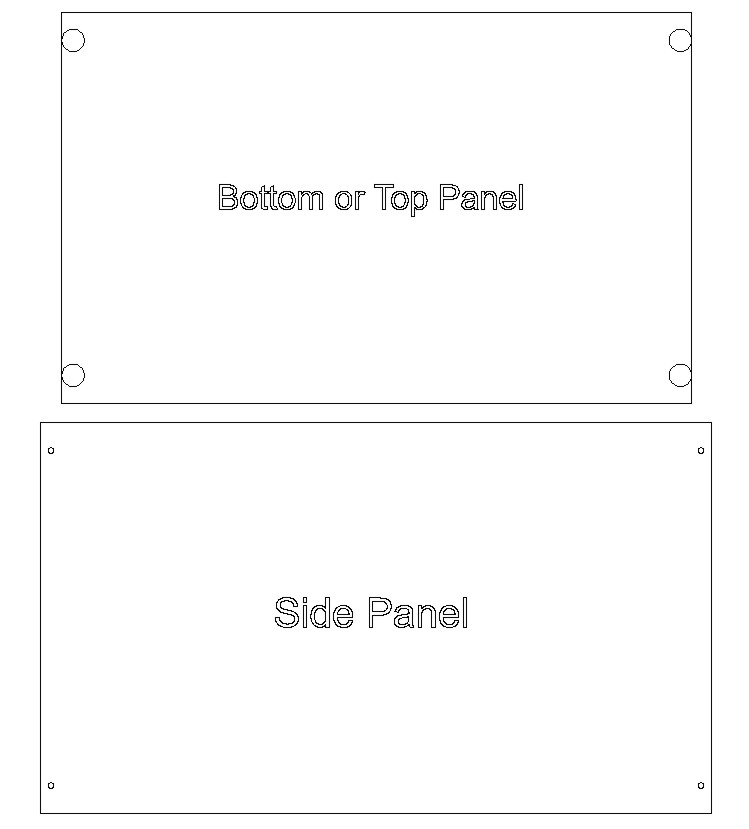
So I see that the diameter is 20 mm and the center is 9.5 mm from the edge and is 12.7 mm deep for 16mm thick top or 14.2 mm deep for 19 mm top.
For this connector to line up properly the 5 mm hole in the side panel needs to be offset from the top edge (center) based on top thickness - 9.5 mm.
How much play (if any) is there. Would you be using a couple or 3 dowels to align everything?
-
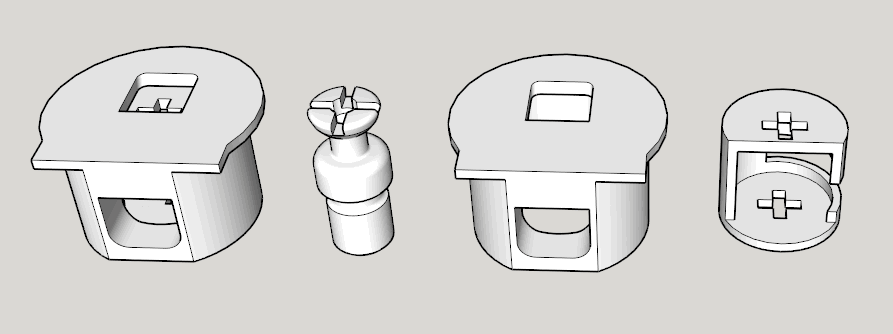
Nice little connector
-
No need for dowels but it can be used to give more strength to the cabinet
-
Version 1.0.52 ready for download
Added cabinet levelers. You can now have legs with or without kicks.
You control the leg and the placement by setting offsets from cabinet edge to center of leg.
If you don't want legs you just choose "No Leg"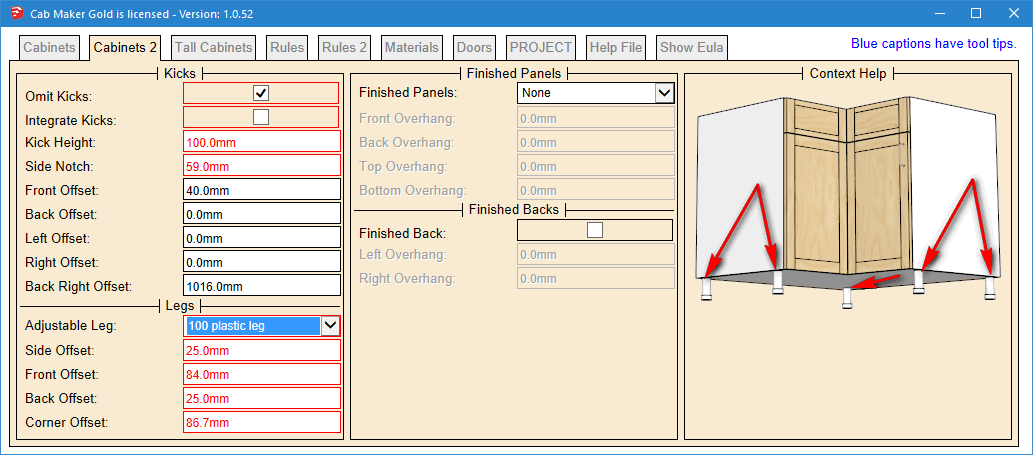
Legs are stored in GKWare_CabMaker\legs\ folder and are skp files.
Make sure you place the leg so that the top center is at the ORIGIN.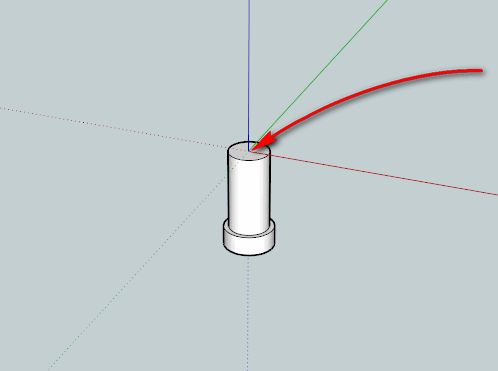
-
This is a dxf file which I imported into sketchup. Then I added some dimensions.
CutMaster pro setup controls all the details of the drilling (machining).Cup hinge mounting plates usually have 2 wings with mounting holes that are 32mm on center and 37mm from the center to the front edge of the side panels. You set these values in CutMaster DXF Options.
If you usually work in inches you can temporarily set your units to millimeters while you are setting up your DXF options. This allows you to set all the values to your hardware manufacturer's specifications.
Please note that door edging is currently set to 0mm. The software will adjust for door edging
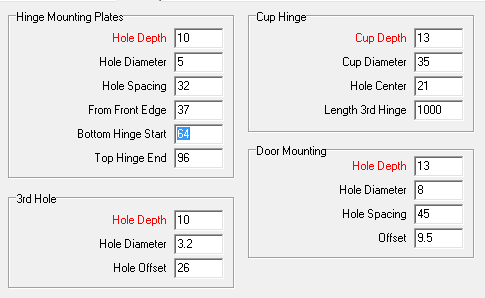
In this case I set distance to first hole as 64mm and I set the hole spacing for mounting plates at 32mm. I set the distance to the top hole for the top hinge at 96mm (just for show). The bottom gap is set to 0mm and the top gap is set to 3mm. This results in the 80mm to center of the bottom cup hole and 109mm to the center of the top hole. I've also set door height for 3rd hole as 1000mm resulting in a 3rd hinge for these 2 doors.
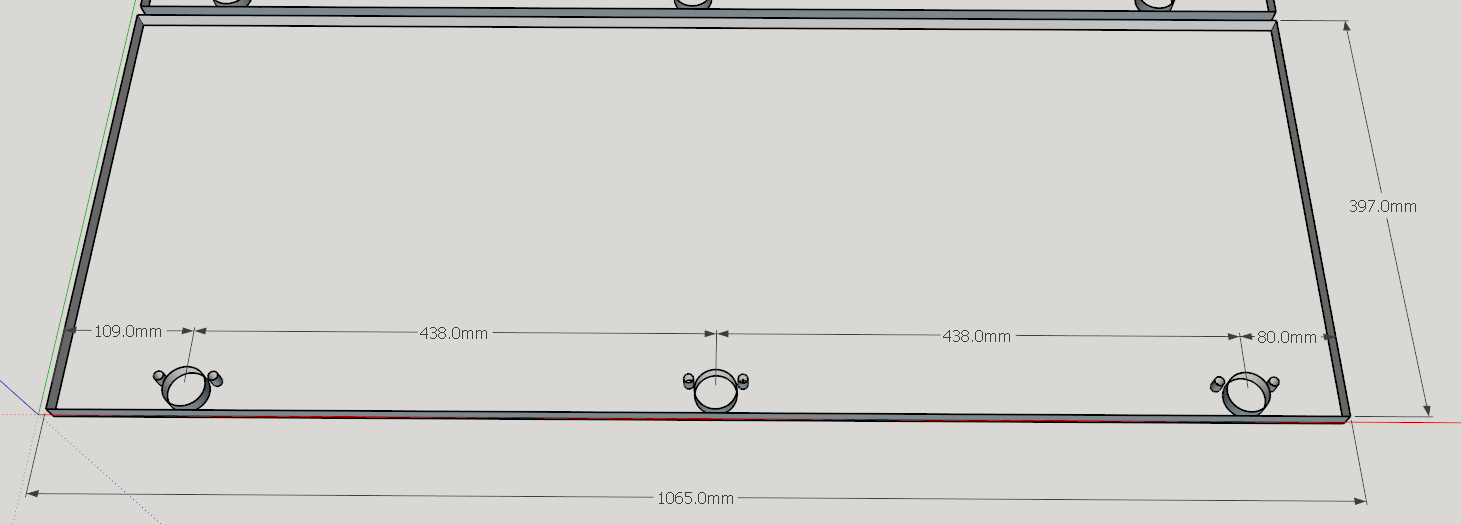
In this detail there are more dimensions. The cup hinge diameter is 35mm and is 21mm from the edge of the door and is 13 mm deep. The 4 values for the door mounting holes are also clearly illustrated.

-
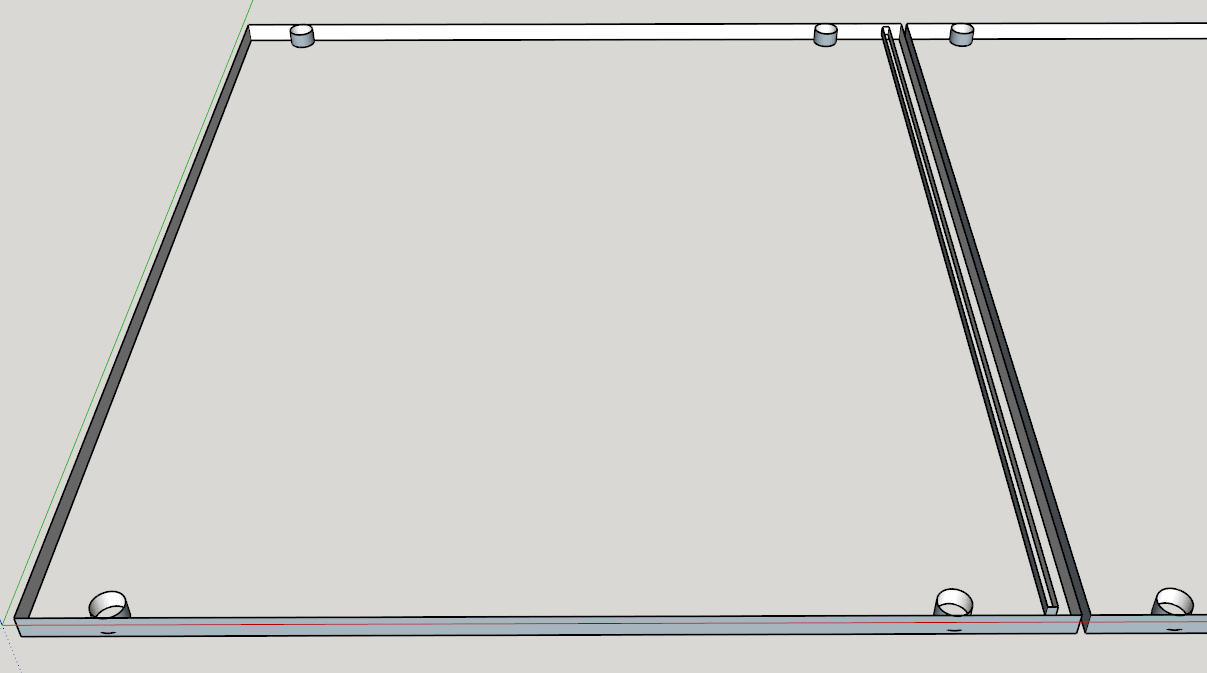
Here is the setup for a top and bottom with a dado for 6 mm thick back. Also setup for Rafix.
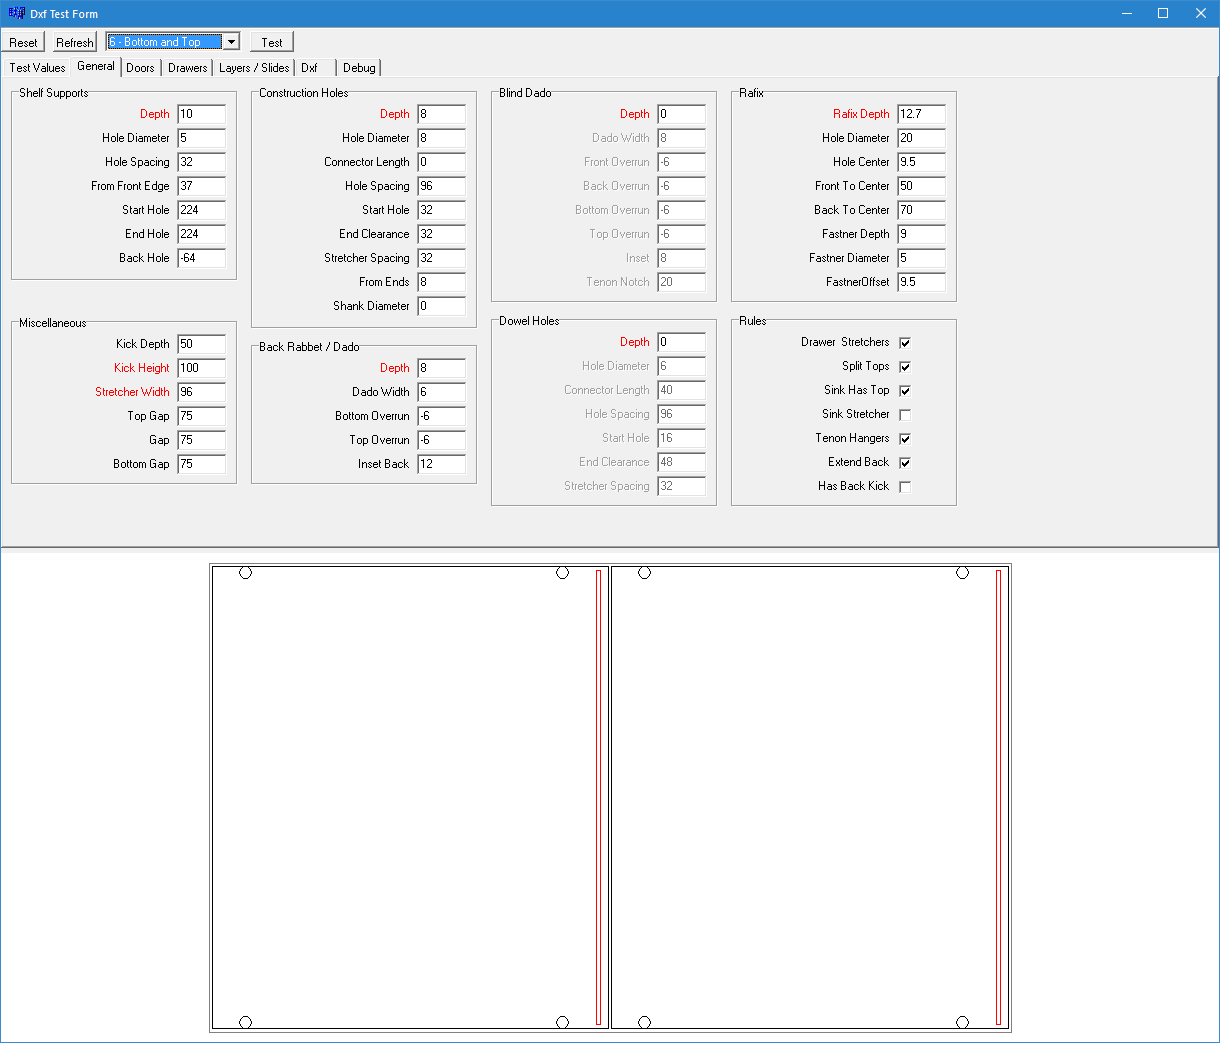
Imported DXF into Sketchup
-
Hi Garry,
@garry k said:
I will consider all options.
Right now you can add finished panels if you wish - that is how I used to build cabinets. A lot of advantages doing it this way.
......
Here is a dxf file for nested cnc. CutMasterPro reads in the parts list, optimizes it for cnc routing and creates dxf files.How about the grooves for backpanels and the different possibilities or holes of knock down connections.? If I use vertical processing by CNC, the machine gets all information in G-Code ?
Thanks
Bernd -
I have gone with lists for upper, base, split top and tall spacing details. These lists are for Shelf supports, Construction holes, Dowel holes, Minifix and Rafix connectors.
For example for these 2 sides for Base cabinets the list for shelf supports contains:
37,300-48
This tells Cutmaster to place the first line of holes at 37 mm on center from the front edge. The second line of holes is placed on center 300 mm from front edge. The negative sign tells Cutmaster to place the holes 48 mm from the back edge.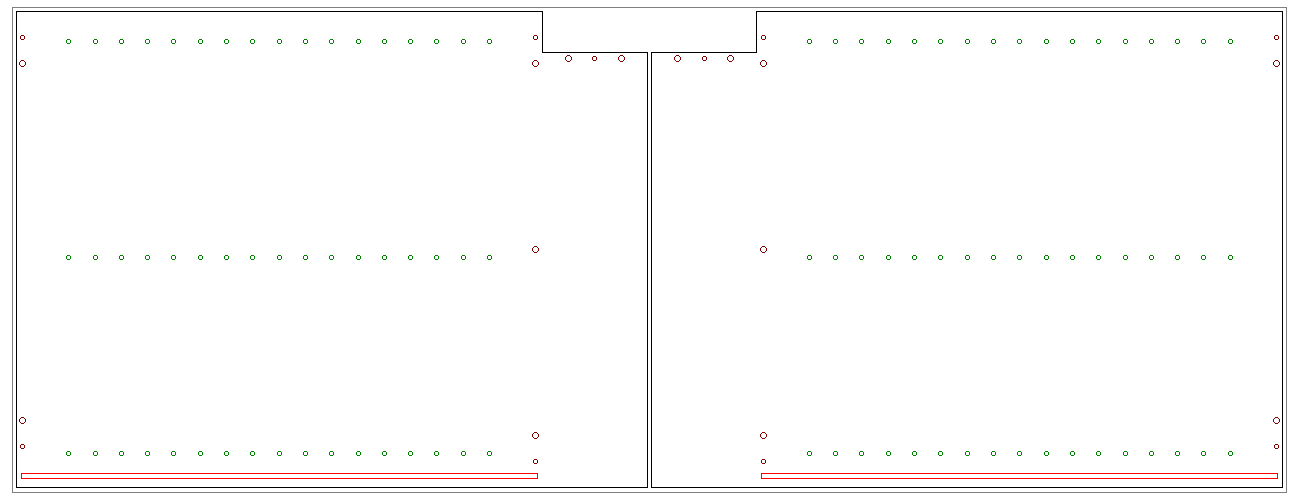
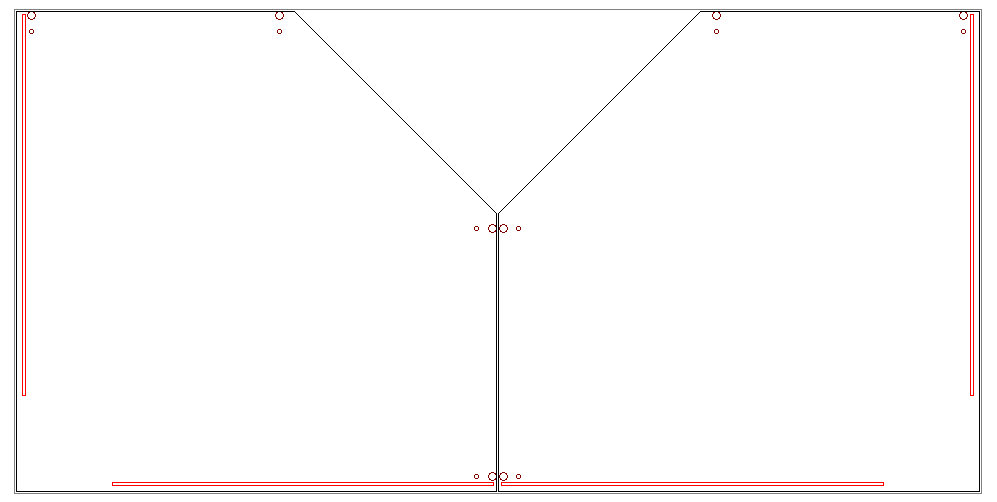
Here is the layout for Angled Top and Bottoms using Rafix connectors with Optional 10 mm dowel hole. In this case there is a mitered back support and the grooves stop where the back support ends.
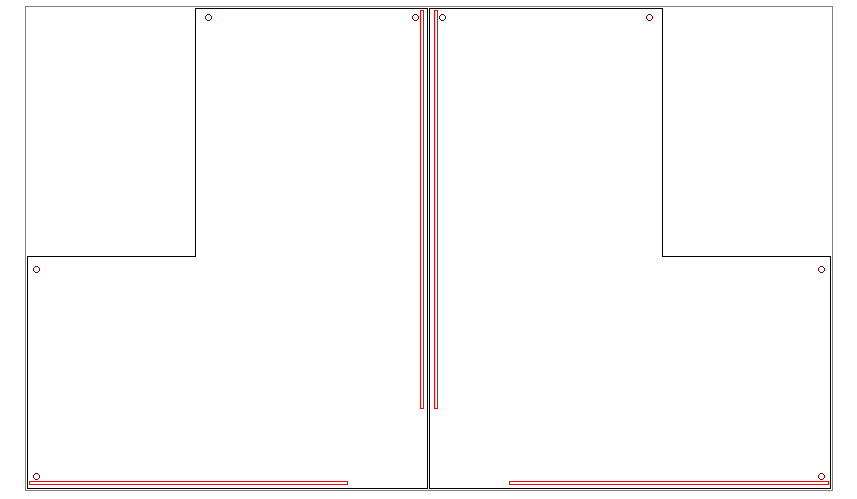
And here is the layout for Return Top and Bottoms using Minifix connectors.
-
The DXFTest program I wrote helps to understand many aspects of the drilling for parts. I've added an samples.ini file where users can add their own panels. Lots of comments in the ini file.
I am now working on edging adjustments. If you don't care about the thickness of the edging then set it to 0. However if you are working with 3 mm solid wood or pvc edging then it does matter.
For example your side panel may have up to 4 different edging and various thicknesses. Cutmaster automatically adjusts the panel sizing and also adjusts the actual spacing for the drilling.
-
Getting closer. The testing that I've done has different edge thickness for all edges on side panels.
I also wrote a DXF import that reads the DXF files that I generate and places construction points at the center of circles. I've added the script to my CabMaker so that I can check the accuracy of my DXF files. The DXF files have true circles and radius so I've adjusted the number of segments based on radius of circle. I've also placed each object inside a group but you can select all of the groups and explode them.
For drilling and grooving you have total control of placement, depth, width, length and or hole diameter.
Currently there are a few assumptions such as stretcher thickness and top and bottom thickness is assumed to be the same as the side panel thickness. With nested CNC most parts are the same thickness however if this doesn't work for everyone I am open to make changes.
-
The next version is close. Just need to finish of the documentation and translation files.
- Fixed positioning problem with drawer box for the right side of side by side drawers.
- Add my own DXF import for dxftext and cutmaster. This dxf import is not extensive but will import my own dxf files much faster than the built in dxf import. It also places construction points at the center of all holes making it much easier to test accuracy. I've also created groups for geometry and placed those groups in proper layers.
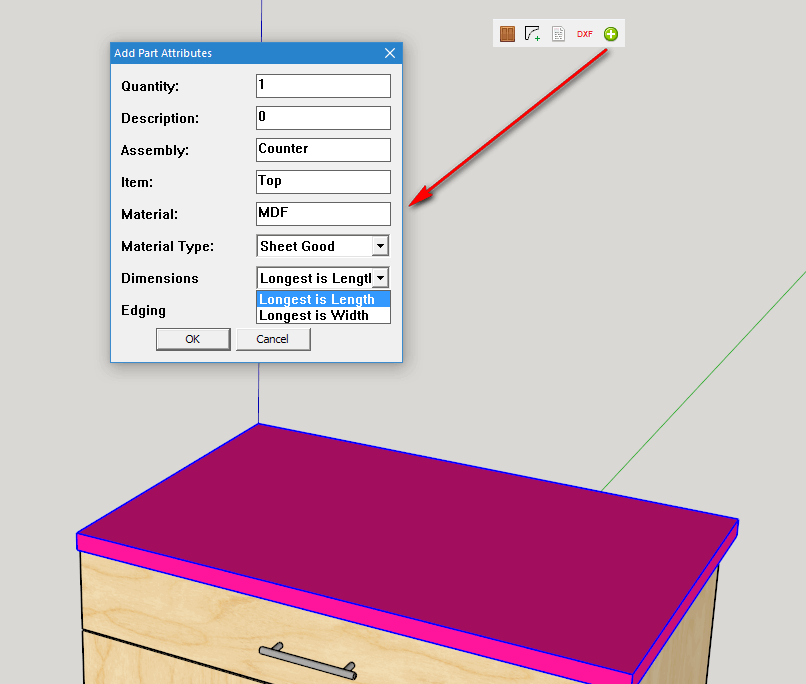
- Add a routine so you can add your own parts to the parts list. (CabMaker Gold). Thickness is always the smallest of the 3 dimensions but you can choose whether the longest measurement is Length or Width.
-
Version 1.0.53 is now ready for download.
I've also added a report configuration where you can choose the reports that you want and with the parts_list you can turn off a few sections if you want. For example if you purchase your doors and build cabinets then you can produce a door report and omit the door parts from the part listing report.
Advertisement


