sketchucation logo sketchucation
    • Login
    ℹ️ Licensed Extensions | FredoBatch, ElevationProfile, FredoSketch, LayOps, MatSim and Pic2Shape will require license from Sept 1st More Info

    Craftsman Tool Chest

    Scheduled Pinned Locked Moved Woodworking
    39 Posts 5 Posters 2.1k Views 5 Watching
    Loading More Posts
    • Oldest to Newest
    • Newest to Oldest
    • Most Votes
    Reply
    • Reply as topic
    Log in to reply
    This topic has been deleted. Only users with topic management privileges can see it.
    • M Offline
      mwm5053
      last edited by

      So it's been a long time since I've done a woodworking project in SU I've been using all my SU time to expand my Architectural Visualization skills just as a hobby. 🤣
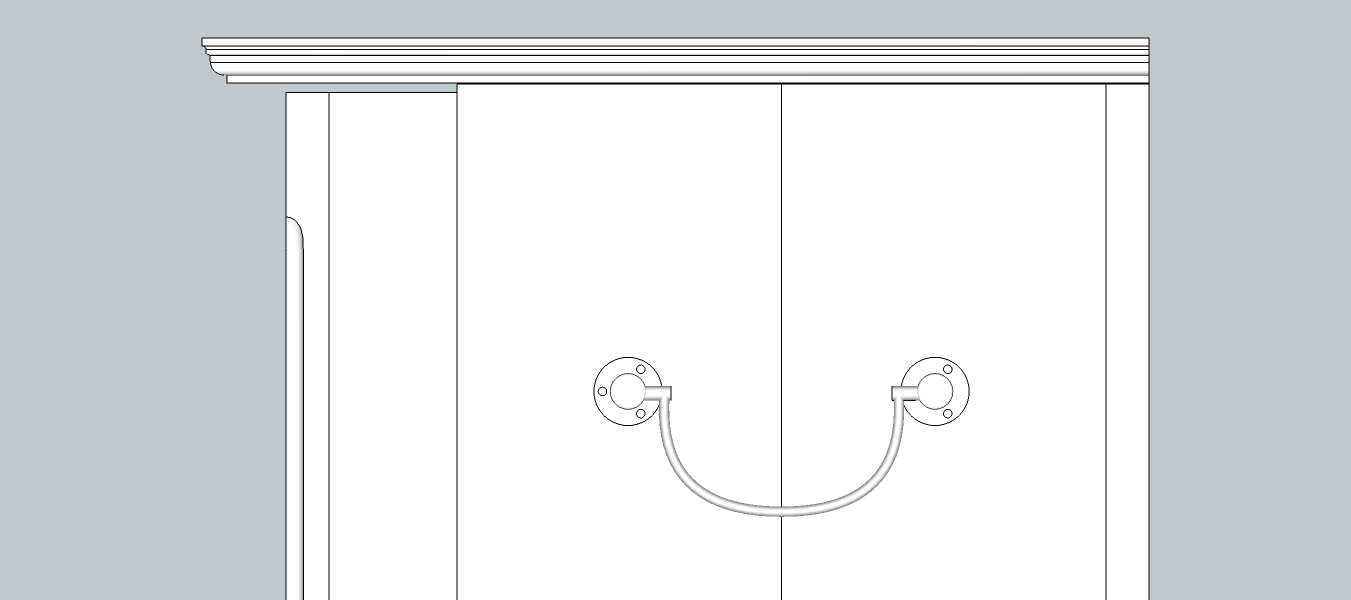
      But I've started this project so I can build it some day and hone up on my LO skills. So I thought I would start this as a WIP thread to get some ideas and some C&C. So my first question is in the plan in the magazine that I'm modeling this from the doors have quite a gap at the top to account for wood expansion but I think it's a bit much and kinda well unsightly? the gap is 1/8, which it might expand that much. The front of the doors are a frame and panel constructruction. To get some feed back. Not ready to post screen shot of entire model, another day 😮

      Thanks in advance.


      Craftsman's Tool Chest copy 2.jpg

      2011 iMac
      SU 2015 Pro, 2017 Make
      V2 Twilight
      macOS Sierra 10.12.5

      1 Reply Last reply Reply Quote 0
      • Dave RD Offline
        Dave R
        last edited by

        Walt, I agree the 1/8 in. gap looks unsightly in the 2D side view. It might be that you need that much of a gap though to allow for seasonal movement and still provide clearance for opening the door. You won't see the real one in 2D though so the gap won't look so big.

        In the projects I do for my major client, doors and inset drawers are drawn to the dimensions of the opening. We allow the person building the piece to make the determination of how much clearance they need. Since these projects could be built anywhere in the world, the gap would need to be different. In places where there aren't large swings in humidity, the gap can be quite small because there'll be little seasonal movement. In places like Minnesota where we have large changes in humidity throughout the year, a larger gap is needed. The width of the gap at the time of construction needs to be considered based on the current humidity.

        You also need to consider the species of wood and how it was cut. If the wood is quarter sawn it won't move as much as it would if it was plain or rift sawn.

        Before you build this piece you might go around and measure the gaps on pieces of furniture you have around the house. Consider how those gaps look and work for the piece and make adjustments as needed.

        I'm interested in seeing your progress on this.

        Etaoin Shrdlu

        %

        (THERE'S NO PLACE LIKE)

        G28 X0.0 Y0.0 Z0.0

        M30

        %

        1 Reply Last reply Reply Quote 0
        • M Offline
          mwm5053
          last edited by

          @ Dave I think your right, as usual.

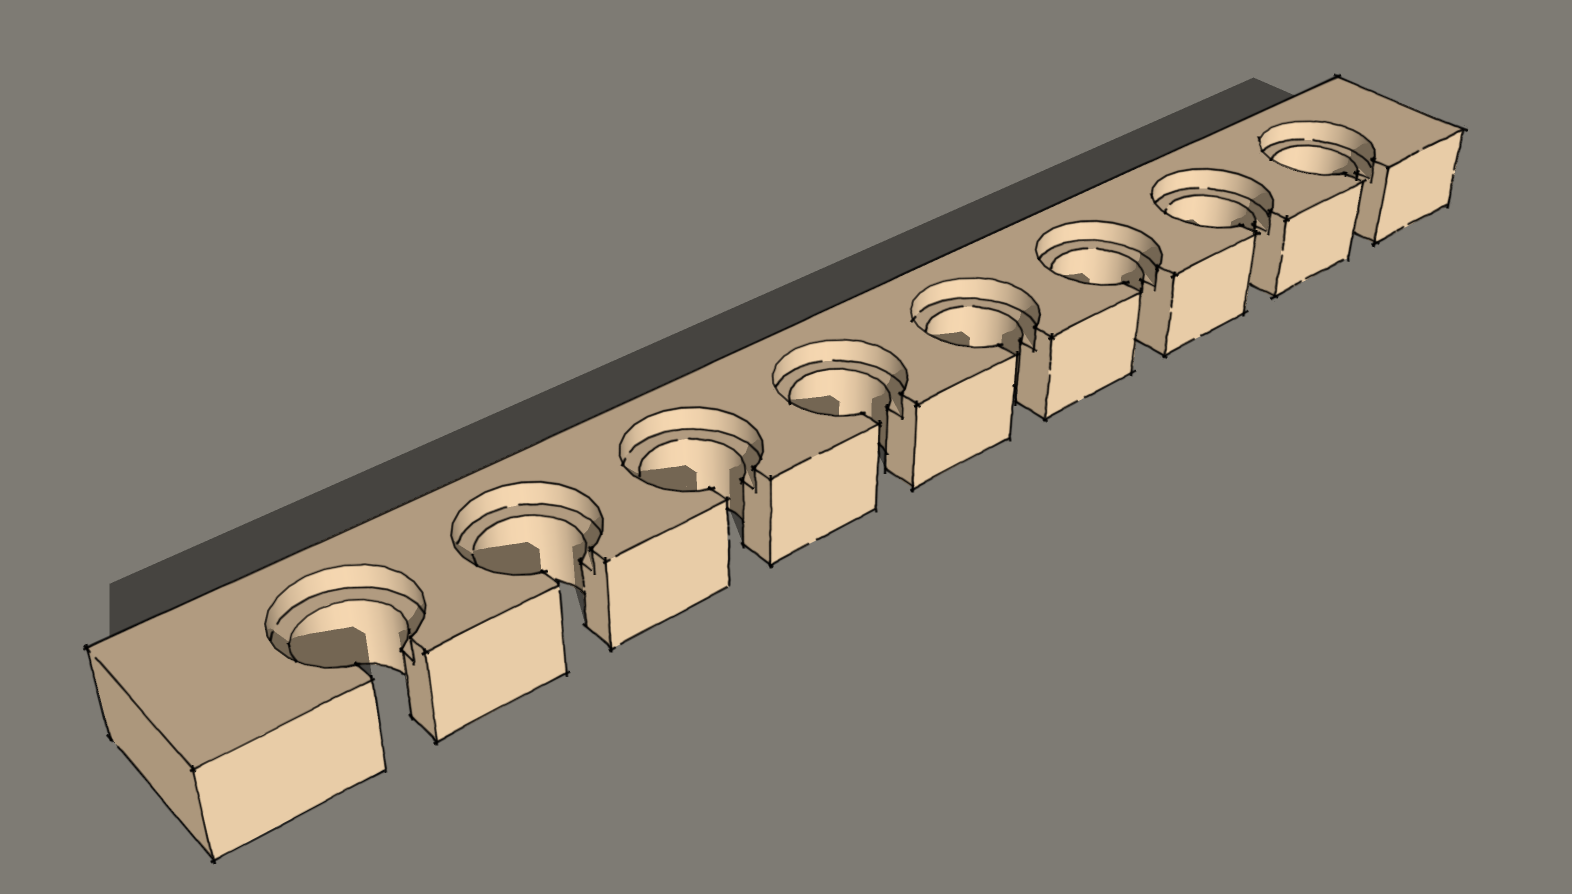
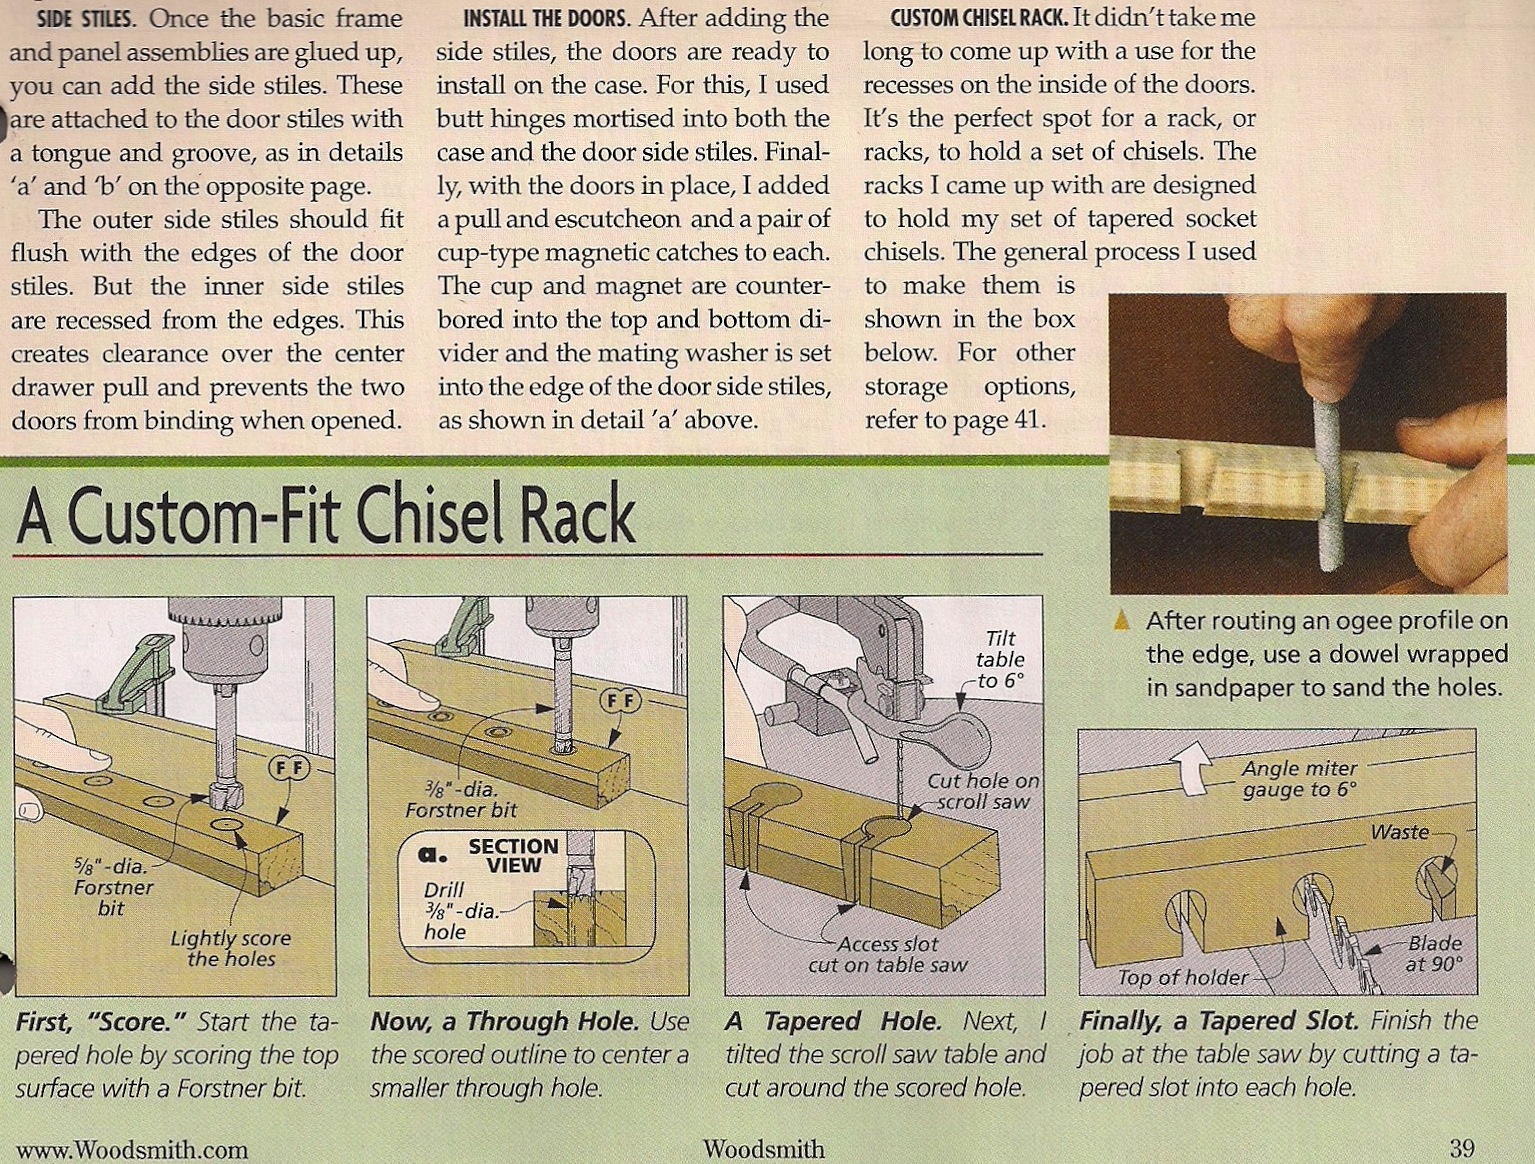
          I have a problem doing these chisel racks I want them to have tapered slots. I made the hole with circle tool and push/pull then scale bottom hole 75% about center then draw lines accordingly as you can see in .skp the first one didn't really have a problem but the way they're made they could slip out not what I wanted after I took another look at it so in doing the second one ( rack) the first slot came out fine the way I wanted but in doing the following slots have some strange geometry resulting, even scaling by 1000. Something simple I'm missing I'm sure.


          chisel rack.skp


          chisel rack2.skp


          chisels.skp

          2011 iMac
          SU 2015 Pro, 2017 Make
          V2 Twilight
          macOS Sierra 10.12.5

          1 Reply Last reply Reply Quote 0
          • Dave RD Offline
            Dave R
            last edited by

            I saw in chisel rack.skp some extra lines in the tapered slot. Deleting them resulted in the adjoining faces disappearing but I then traced along the top edges of the slot and the surface appeared to be heeled.

            Out of curiosity, how do you plan to create the tapered holes? If I were making chisel holders I would use counterbored holes instead of tapers because I could drill them without special tools. Then I would cut slots with parallel sides using a dado set in the table saw which would be very straightforward.

            Tool holders.png

            Etaoin Shrdlu

            %

            (THERE'S NO PLACE LIKE)

            G28 X0.0 Y0.0 Z0.0

            M30

            %

            1 Reply Last reply Reply Quote 0
            • M Offline
              mwm5053
              last edited by

              The way you mentioned is the way buit them in my shop probably the best way to go. KISS as my shop teacher always told me.

              2011 iMac
              SU 2015 Pro, 2017 Make
              V2 Twilight
              macOS Sierra 10.12.5

              1 Reply Last reply Reply Quote 0
              • Dave RD Offline
                Dave R
                last edited by

                Actually you should make the holder with tapered holes just because I want to see how you do it. 😆

                KISS is best. 😉

                Etaoin Shrdlu

                %

                (THERE'S NO PLACE LIKE)

                G28 X0.0 Y0.0 Z0.0

                M30

                %

                1 Reply Last reply Reply Quote 0
                • M Offline
                  mwm5053
                  last edited by

                  Know a good tool and die man?


                  taper bore.jpg


                  taper bor2.jpg

                  2011 iMac
                  SU 2015 Pro, 2017 Make
                  V2 Twilight
                  macOS Sierra 10.12.5

                  1 Reply Last reply Reply Quote 0
                  • Dave RD Offline
                    Dave R
                    last edited by

                    😆

                    I used to.

                    Etaoin Shrdlu

                    %

                    (THERE'S NO PLACE LIKE)

                    G28 X0.0 Y0.0 Z0.0

                    M30

                    %

                    1 Reply Last reply Reply Quote 0
                    • M Offline
                      mwm5053
                      last edited by

                      I was being facetious by the way 🤣

                      2011 iMac
                      SU 2015 Pro, 2017 Make
                      V2 Twilight
                      macOS Sierra 10.12.5

                      1 Reply Last reply Reply Quote 0
                      • Dave RD Offline
                        Dave R
                        last edited by

                        I know. There are boring tools for cutting tapered holes. Windsor chair makers and other chair makers for that matter would use them. There's probably one sold by Brian Boggs. Still, a couple of readily available Forstner bits would do the trick.

                        Etaoin Shrdlu

                        %

                        (THERE'S NO PLACE LIKE)

                        G28 X0.0 Y0.0 Z0.0

                        M30

                        %

                        1 Reply Last reply Reply Quote 0
                        • M Offline
                          mwm5053
                          last edited by

                          This is a scan of the article so I was just following as close as I could and see if I could do it in SU probably won't build it that way however. But after all it is a Craftsman Tool Chest.


                          Scanned Image.jpg

                          2011 iMac
                          SU 2015 Pro, 2017 Make
                          V2 Twilight
                          macOS Sierra 10.12.5

                          1 Reply Last reply Reply Quote 0
                          • Dave RD Offline
                            Dave R
                            last edited by

                            Ah. I see. That seems like a lot of work to me. Good SU practice, though.

                            Etaoin Shrdlu

                            %

                            (THERE'S NO PLACE LIKE)

                            G28 X0.0 Y0.0 Z0.0

                            M30

                            %

                            1 Reply Last reply Reply Quote 0
                            • boofredlayB Offline
                              boofredlay
                              last edited by

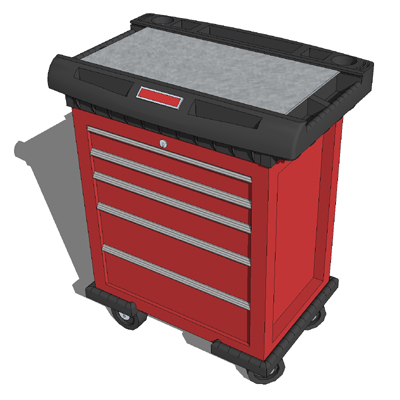
                              Aw man, I saw the title and thought you were making one of these. 😄


                              Rolling_Tool_Caddy.jpg

                              http://www.coroflot.com/boofredlay

                              1 Reply Last reply Reply Quote 0
                              • M Offline
                                mwm5053
                                last edited by

                                Check it out, it was a lot trouble but it was good practice I used your method in the stopped chamfers tut cut and paste in place and used the solid tools for the first time since I bought SU


                                chisel rack_1.skp

                                2011 iMac
                                SU 2015 Pro, 2017 Make
                                V2 Twilight
                                macOS Sierra 10.12.5

                                1 Reply Last reply Reply Quote 0
                                • M Offline
                                  mwm5053
                                  last edited by

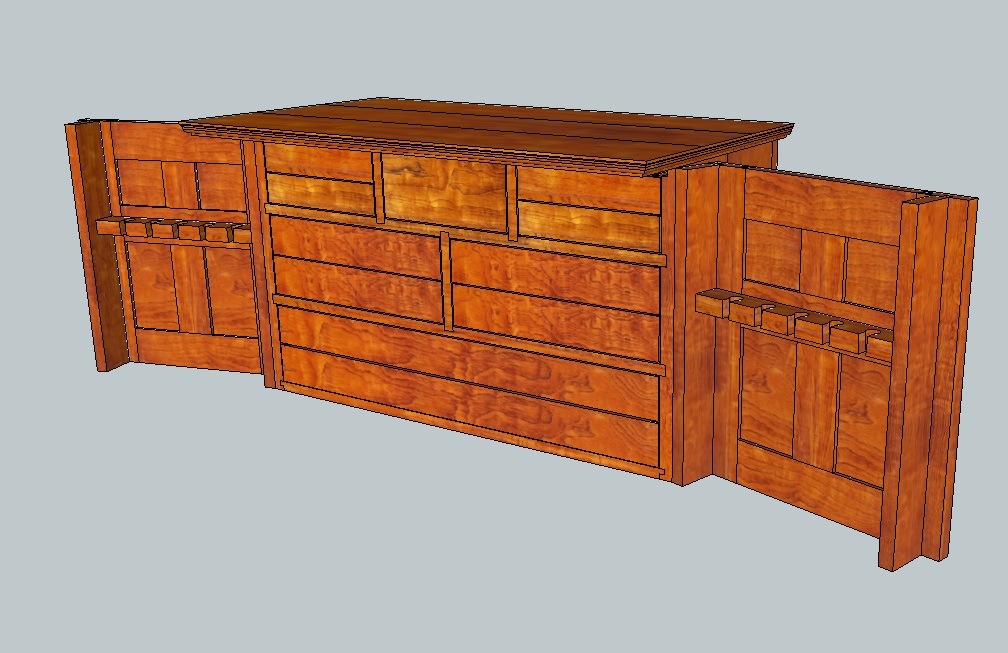
                                  @ Eric maybe someday. Here's peek I got so far


                                  Tool chest.jpg

                                  2011 iMac
                                  SU 2015 Pro, 2017 Make
                                  V2 Twilight
                                  macOS Sierra 10.12.5

                                  1 Reply Last reply Reply Quote 0
                                  • boofredlayB Offline
                                    boofredlay
                                    last edited by

                                    That looks great. I long to make one of those myself someday. My tools are just laying around inside the cart I posted above, not very organized.

                                    If I may, a visual tip with SU. If you turn your back face color to a black or near black you wont' get the white jaggies showing up in your image export.

                                    http://www.coroflot.com/boofredlay

                                    1 Reply Last reply Reply Quote 0
                                    • M Offline
                                      mwm5053
                                      last edited by

                                      Thanks Eric great suggestion 👍

                                      2011 iMac
                                      SU 2015 Pro, 2017 Make
                                      V2 Twilight
                                      macOS Sierra 10.12.5

                                      1 Reply Last reply Reply Quote 0
                                      • Dave RD Offline
                                        Dave R
                                        last edited by

                                        @unknownuser said:

                                        If I may, a visual tip with SU. If you turn your back face color to a black or near black you wont' get the white jaggies showing up in your image export.

                                        Yes, that's a good suggestion. I do that before I make image exports although I use my default green back face color while drawing.

                                        Walt, it looks like a good model. Keep up the good work.

                                        Etaoin Shrdlu

                                        %

                                        (THERE'S NO PLACE LIKE)

                                        G28 X0.0 Y0.0 Z0.0

                                        M30

                                        %

                                        1 Reply Last reply Reply Quote 0
                                        • D Offline
                                          davidheim1
                                          last edited by

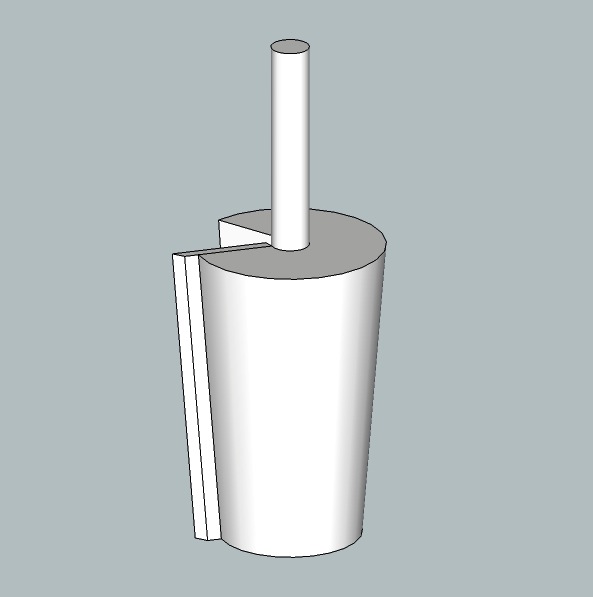
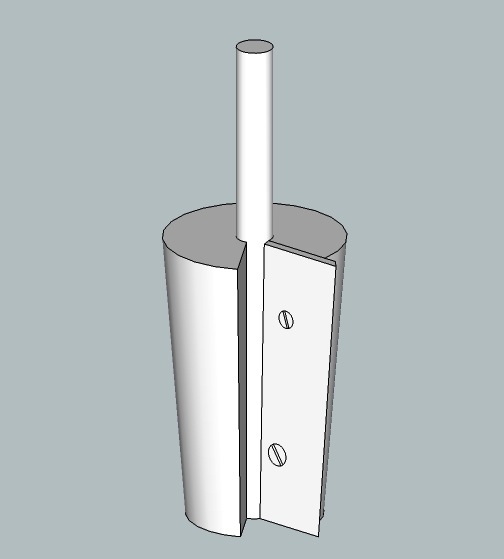
                                          Am I missing something? Seems to me that modeling a tapered hole and slot for the chisels is infinitely easier in SketchUp than in real life. In real life, I'd probably use a reamer, like the one Dave R. mentioned that Windsor chair makers use. In SU, I'd make a hole for the smallest diameter, then use the Offset Tool to set the largest diameter on the top face of the board. With the Move/Copy Tool, I'd pull the smaller diameter over to the larger one, tapering the hole. Then, for the slot, I'd turn on X-Ray view and hidden geometry. Trace over hidden geometry lines to mark where the tapered slot falls on the hole, then carry those lines through the board and across the faces. A little erasing, and I'm done. Took longer to type these abbreviated instructions than it did to do the modeling.
                                          dh

                                          1 Reply Last reply Reply Quote 0
                                          • Dave RD Offline
                                            Dave R
                                            last edited by

                                            David, I agree with you. Modeling it would be easier than making the real thing. I'd still just use the counterbored holes in real wood.

                                            I can think of several ways to create the tapered hole in SketchUp. Using Cardinal Points is one, Autofold, another.

                                            Etaoin Shrdlu

                                            %

                                            (THERE'S NO PLACE LIKE)

                                            G28 X0.0 Y0.0 Z0.0

                                            M30

                                            %

                                            1 Reply Last reply Reply Quote 0
                                            • 1
                                            • 2
                                            • 1 / 2
                                            • First post
                                              Last post
                                            Buy SketchPlus
                                            Buy SUbD
                                            Buy WrapR
                                            Buy eBook
                                            Buy Modelur
                                            Buy Vertex Tools
                                            Buy SketchCuisine
                                            Buy FormFonts

                                            Advertisement