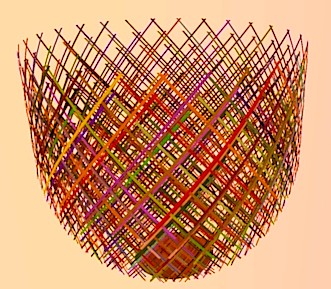
Large circular lattice work
-
It's just the very funny RandomPainter by Chris Fullmer!

-
I'm making head way. I've got the slat to line up correctly. Now I just need to get the spacing down. Basically I went back to the 1st helix and started to double check EVERYTHING. I did find 1 small mistake I made in height, but that didn't affect anything. I also found 2 added inputs through boxes or cells on the spread sheet, but after recalculating the numbers, it seemed to small to worry about. But I started over just to play it safe. I could not tell the difference between the 1st helix and the new 1. The very tops didn't meet perfectly, but you had to really zoom in to see it. So I went through all the steps again, with 1 small twist. The outside slat is the old helix and the inside is the new. My 1st guess is I made some stupid rookie error and didn't catch it. I used some of Peter's suggestions to double check things where lined up as I went. But after practicing the steps all those times, there was less chance for an error. But I still need to check my typing when I enter file names.

-
Cliff,
Those look like they line up about as perfectly as SU can. Good job.
Peter
-
Clean!

But seems one slat is missing ?Here I have used the famous Grow By Tig
Who permits Array Move, Rotate, Scale in the same time!
-
Thanks guys, I've had a LOT of practice trying to get it right. And a big thanks to Dave for showing me the helix and extrude by rails.
Pilou, there is a slat missing, actually 2 sets of slats missing. the spacing with the bolt holes is wrong so everything isn't lining up. I went all the way back to the beginning and found 1 more mistake that just compounded all the way through. I working on correcting that now. I also need to work on getting the holes in the slats, but that been a pain I still need to work on.
Here's the next file to check out. See if you like how I did the layers. There's small stuff missing and I want to put thread on the bolts, but that will be later.
-
Seems good for people who love Layers

You have 2 general groups without names!
As in SU Layers are only layer of visibility and not layer of Geometry
Create always your objects in Layer 0, then dispatch them in layer wished
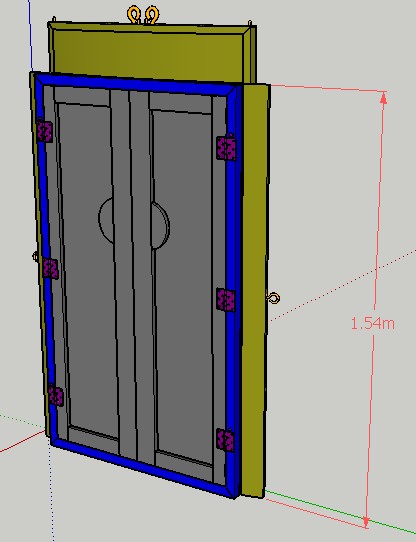
for avoid many problems!Something curious

As I am in an old country with decimal system
When I transform your measures in meters
I have that! Does this normal for a door?Ps Maybe you must choose colors of layers more near reality ? (not an obligation)
Here the objects by your Color's Layer
-
@Pilou: The dimensions of that door assembly may not be standard- but, then, I would not call a yurt(s) a standard domestic structure. One standard size for USA is 32" x 80" ~(800 x 2000, where 4"= ~100mm).
-
Ah for Yurt's doors that is an another story indeed!
-
Pilou this file should clear things up.
Well after all the practice I've had drawing slats and trying to figure out how to space them. I've come really close. The last slat is 1/4” short (that's a 1/4” out of 536.735” circumference). As Dave would say, it's good enough for a sketch to so someone how a yurts is built. But the goal of this project is to draw it correctly down to the last nut and bolt. This is my big learning curve. I know it will take some time to finish and I'll be doing other projects before I'm done. To get it this far is “huge” to me. In the last couple of weeks, I've seen things that I've heard from people you just can't do with SU. Drawing something like this yurts is 1 of them. But then those people didn't have you guys helping them either.
The next step well working out the spacing problem, is to figure out a way to get the holes right. If I can get those right, then I should have solved my spacing problem. I've got a few ideas I've seen do something close and will give it my best shot. I've already seen a few things I'll be changing. Since I changed the top of the door, everything up there needs to be changed. Guessing is 1 thing, seeing it drawn out in 3D is another. Here's a few things for future work you guys might have seen something that would help. The canvas walls will not hang perfectly straight down, so is there a way to mimic the lattice work under the canvas to make it look closure to the real thing? If you lathe a cone shape, can you cut pie shape slices out of it?
So to Dave R, Pilou, Peter, TIG, and the rest of you guys that have posted up. Thanks for helping me get this far. Hope your around to see the final drawing.
-
I wasn't as close as I though I was, but ¾” isn't that bad either. I basically have 29 slat pairs I need to adjust the spacing to make is work. So if you look at the inside of the door, you'll see the 6 studs don't line up on the slat so the are in the middle of the overlap joint.
The 1st couple of attempts at laying out the holes didn't work either. What I'm trying to do is set up a component with all the holes (extra long) and a bottom marker. The bottom marker will line up with the bottom corner of the slat and the holes in the center of the slat. When I get the comp lined up with the slat, I'll open it and explode it, cut the whole comp. Edit the slat and then paste the comp in place and use intersect to make the holes. That a lot of work per slat I know, but until I can figure out an easier way. That's my only option I feel that will work.
Hello! It looks like you're interested in this conversation, but you don't have an account yet.
Getting fed up of having to scroll through the same posts each visit? When you register for an account, you'll always come back to exactly where you were before, and choose to be notified of new replies (either via email, or push notification). You'll also be able to save bookmarks and upvote posts to show your appreciation to other community members.
With your input, this post could be even better 💗
Register Login


Advertisement