Texture
-
I have a file in which I have a model. I need to give a photo with plan under it. I draw rectangle and filled it with a texture of photo/plan. However, always (not only in this file) I have the problem that the texture is displayed in incorrect position, like it is 90° turned and it is flapped. So the texture does not fit the model. I also have a feeling like there is some deformation or what. What I did was that I clicked Paint Bucket, clicked add material, clicked Browse and select my file. I also try to fix the position with rotation or resizing the texture with ration lock on. But this does not help much because still it is flipped so what should be on left side is on right side, like in mirror. I want always when I click face, to have the image right.

-
When you import an image and apply it on a back face, it will be mirrored. So first you need to right click on the face and "reverse" it.
Now you need to learn all about texture positioning. When you right click on the face and go to the "Texture" context menu item, there is a "Position texture" tool. It will open up the positioning tools. You can right click again and select fixed pin mode or free pin mode, rotate the texture (at 90 degree increments) etc.
Please, visit the "Position texture" section in the Help Center. On the left, there are further links to related articles.
-
@gaieus said:
When you import an image and apply it on a back face, it will be mirrored. So first you need to right click on the face and "reverse" it.
OK, that was good. But I don't want to revese the image every time. I think this is not the answer I wanted to hair. The problem is, that the image always is displayed in odd direction and I believe, this behaviour must be set so I will save my work with texture positioning.
I open help page here and there are some good tips, which sounds good to use:
http://support.google.com/sketchup/bin/answer.py?hl=en&answer=94881&topic=2458148&ctx=topic
However I have a problem in point 10. (I had draw the image into rectangle, but did not succeed to place it on the cylinder... but that is not the biggest problem) the problem is by point 10, when I click so in the context menu the option use as material is not available.
PS:
Importing image this way seems definitely better way then drawing it onto rectangle! -
@rumcajs said:
I think this is not the answer I wanted to hair. The problem is, that the image always is displayed in odd direction and I believe, this behaviour must be set so I will save my work with texture positioning.
Well, it's indifferent what answer you expected. Images are displayed mirrored on back faces with reason. Now if you draw a face on the ground, it will always show its back face up - so you need to reverse it either before or after you apply the materials. There's no setting for this.
@rumcajs said:
the problem is by point 10, when I click so in the context menu the option use as material is not available.
It is only available if you imported the image as an image entity and have not exploded it yet or used this command already. If it is a material on a face entity, you will not have this menu item indeed. Then just sample the material from the material browser and apply it on the cylinder.
-
OK. Thanks. I see one point which I did not see before. I must be in view when the red axis in horizontal position,
So I moved and rotated the object
http://i47.tinypic.com/21epxt0.pngAnd now the image is displayed in correct rotation.
-
I hope you don't mind I will not create new question for this. But this is related with importing object to create plan under the castle. Mz problem is that I need to change visibility of the component or layer to cca 35% because when I want to ad the plan under it, I cannot see how I position it. So I ask if it is possible to do it.
-
Hi,
my question may not fit entirely on this thread. But the picture above shows itself SketchUp with other colors in the border and the windows. How Can I change the colors?

-
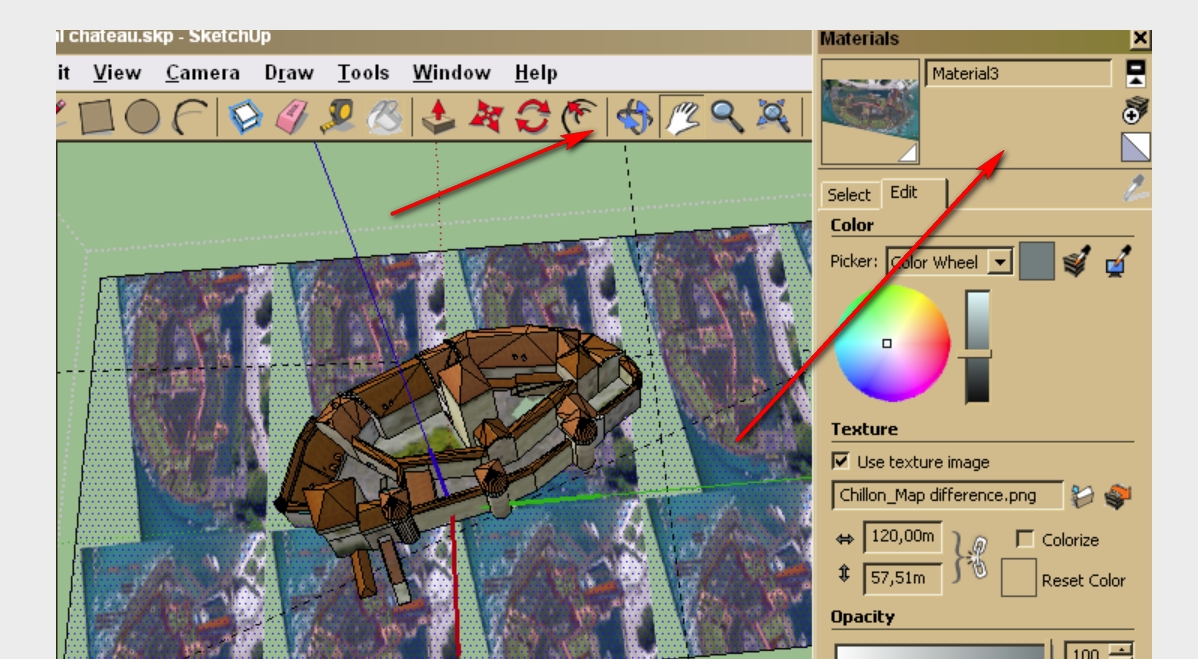
When I created the rectangle with a photo by import, how can I change opacity of it? I tried Paint Bucket, and change opacity, but the layer did not change.
Now I clicked to the gray/white rectangle which is divided with two trianlges (Edit menu, upper right corner, third icon from top). Edit options are disabled and cannot to get it back (I clicked undo but this stayed disabled)...
And I click alt+click on texture to select it as material, but no, nothing changed in the Edit tab. In the Select tab "TESTERS" folder no files to see. There should be my files.
-
There's a slider for opacity/transparency at the bottom for each "In model" material under the edit tab. The white/grey material at the top is the default material and you cannot change its properties here (just under the styles settings but there's no transparency option for that there)
-
Okay, do this (in the original model from the Warehouse):
- Turn on hidden geometry (to see the original, now hidden GE snapshot) and delete it (twice, for some reason - it seems that the original modeller made a copy of it)
- Turn on the GE Terrain layer. right click on the terrain > Unlock. Delete that, too.
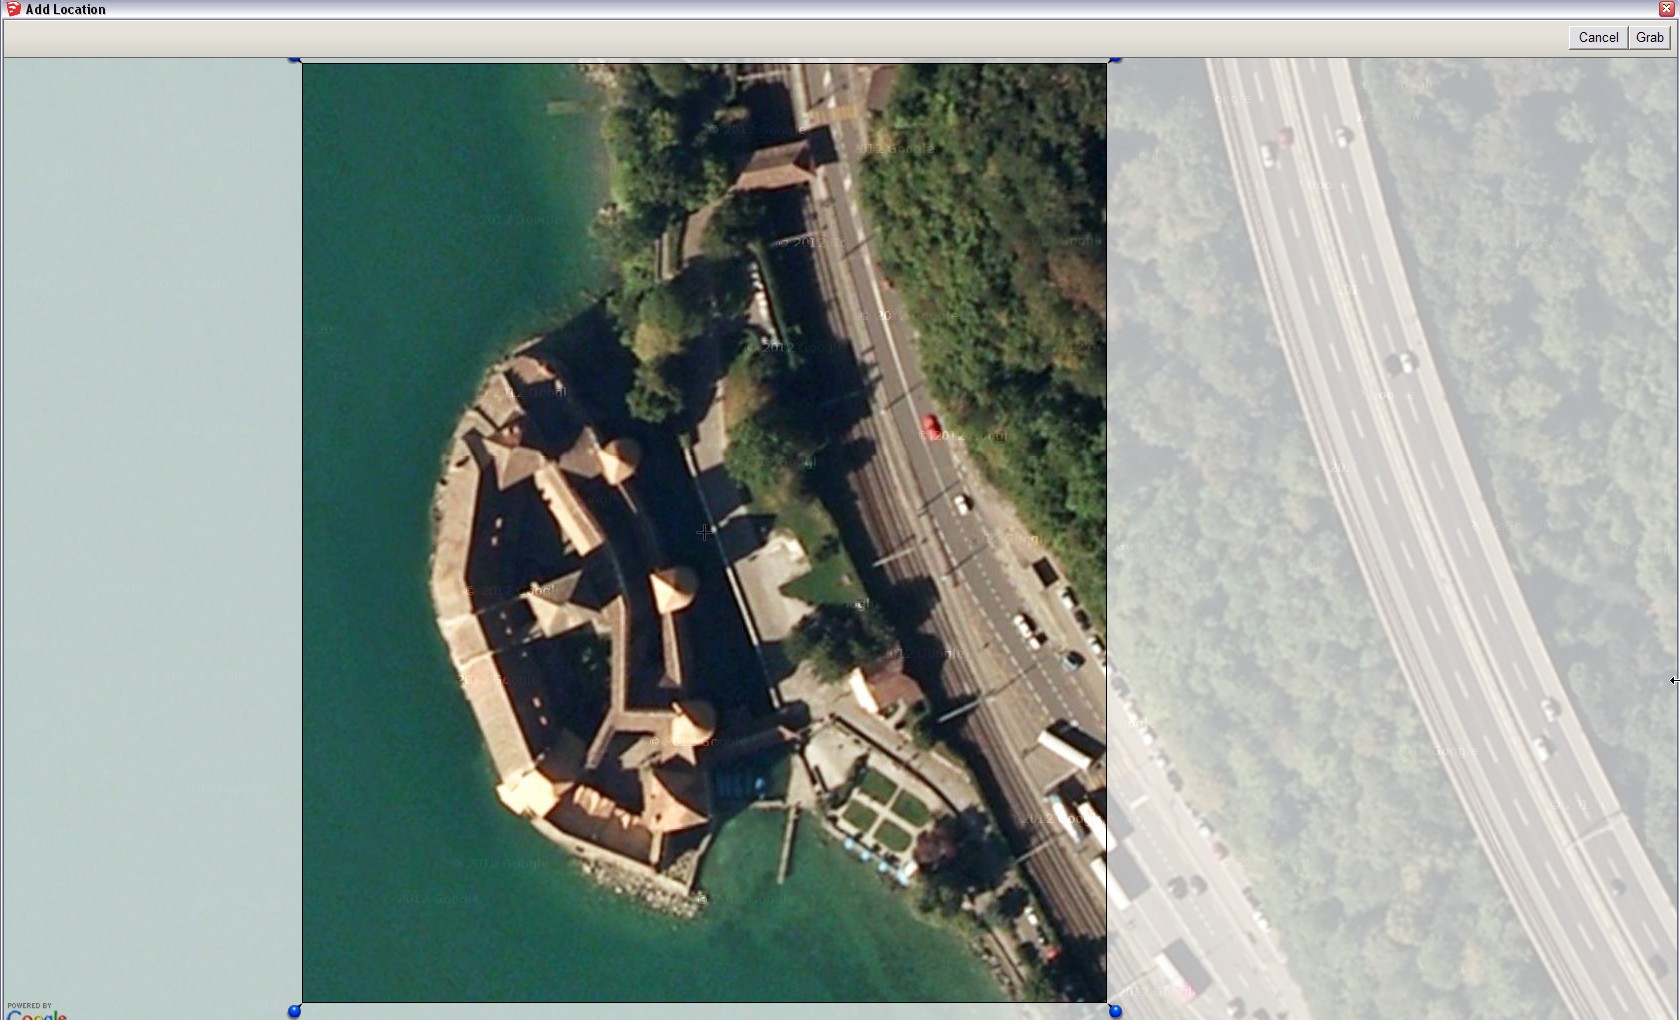
- Now go to Window > Model info > Geo-location and press the button "Add more imagery". A new dialog pops up - you can resize it to fill your screen. At the top right, there is a "Select region" button...
- Now scroll in/out to see the whole castle and pull the pins of the region to cover what you want to grab.

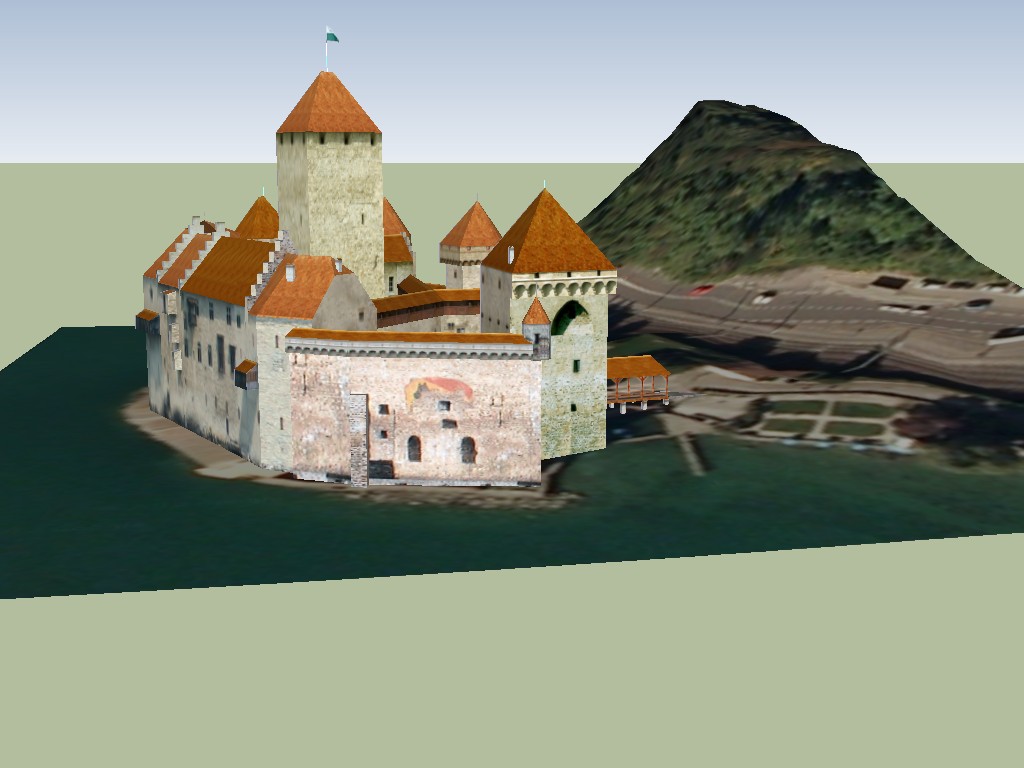
- Now press the "Grab" button at the top right again and it will import the colour imagery you selected right (and exactly) under your castle. If you toggle the terrain layer on (and hide the snapshot layer), you will even have the mountain next to the building.

-
This is what happened to me:

after I clicked the icon. There was the image set but now it is not.
-
I did it different. Just clicked the icon Add More Imaginary. Is that the same? I think so.
IHO is - that these data are unsusable. The LOD is too small resolution. Do you see that bridge? It should be 10m high and cca 8,5m above water. Incorrect elevation data that is the reason why the model was inaccurate.
-
Well, Google Earth does not have precise elevation data almost anywhere. It's just an "approximation". You can always "sculpt" your terrain with the Smoove Tool - and add some more detailed mesh with the Add detail tool.
Or if you have some extra cash, you can even purchase Vertex Tools.

-
Sandbox is not installed on my PC (i see it not there), can I download it?
-
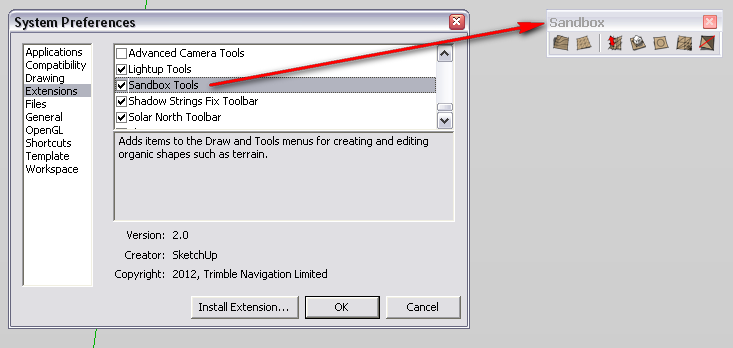
Sandbox IS installed with SU - maybe not enabled. Go to Window > Preferences > Extensions and check its box. Restart SketchUp. Now (if the toolbar is still not active), go to View > Toolbars > and check Sandbox tools.
-
@gaieus said:
Sandbox IS installed with SU - maybe not enabled. Go to Window > Preferences > Extensions and check its box. Restart SketchUp. Now (if the toolbar is still not active), go to View > Toolbars > and check Sandbox tools.
No, I don't have it there
-
Are you saying you do not have this under your extensions tab in Preferences?

If this is the case, reinstall SketchUp. -
I don't have any extension. But I don't see any sense of reinstalling from buggy installation file. Also my version 8.0.15158 crashes sometimes.
-
I still the problem as I described above with the textures. The images from my folder called "Materials\TESTERS" "disappeared" - but they are really there in Explorer. They are just not displayed by Select tab when I choose this folder. Any idea why it is not displayed there?
-
@rumcajs said:
I don't have any extension. But I don't see any sense of reinstalling from buggy installation file. Also my version 8.0.15158 crashes sometimes.
Sometimes the download is corrupt somehow. Believe me, these things (missing extensions or exporters) can often be corrected with a fresh download/install.
@rumcajs said:
The images from my folder called "Materials\TESTERS" "disappeared" - but they are really there in Explorer.
What format (extension) are they?
Advertisement


