The Art of Stairbuilding per Harry Waldemar
-
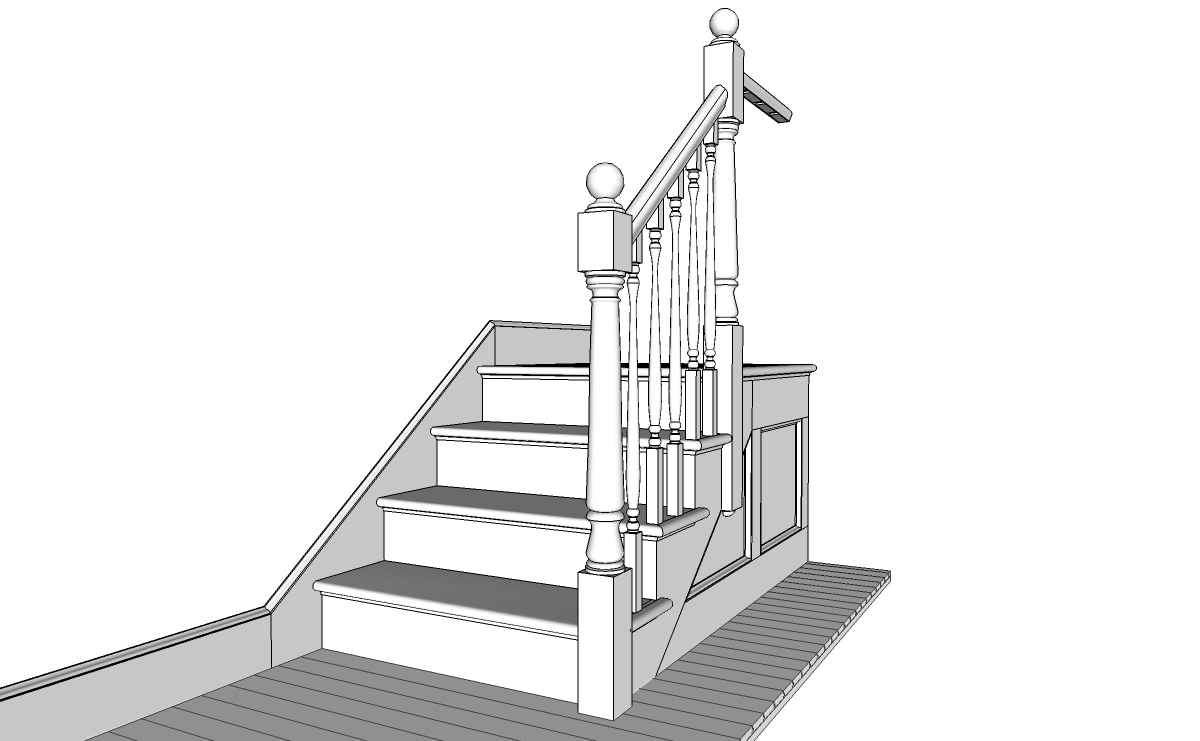
Years ago I came across a back issue of Fine Homebuilding magazine with a set of stairs on the cover, and the simple title "Building Stairs". The issue was from September/October 1981, issue #30. I purchased that immediately feeling like I had found a gem in the used bin. Inside were two half scale models of stairs built by Harry Waldemar, a New York stairbuilder, who started his apprenticeship in 1925 and spent forty years in the trade. Harry Waldemar had built two half-scale, "knock-down", precise models stairs to "show the old-time way to a custom job" to the next generation. I've always been fascinated by this instructional article, since I had studied stairbuilding and roof framing as part of my apprenticeship.
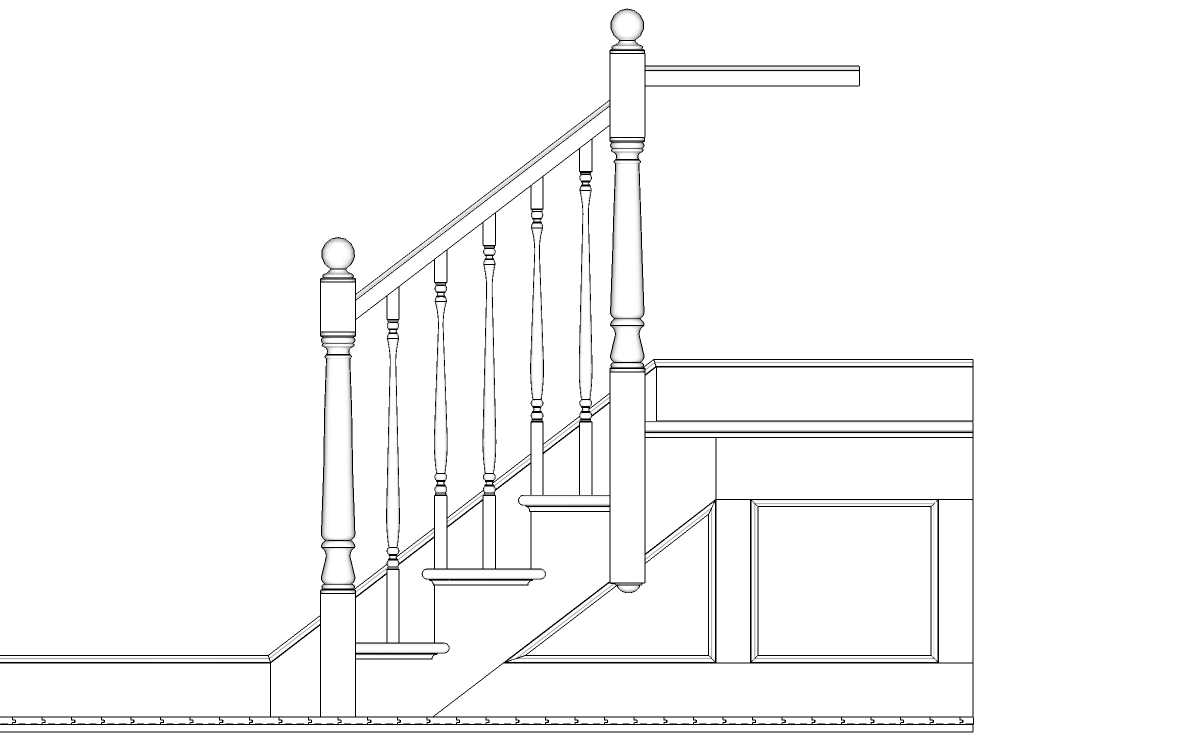
This is the "open stair" set featured in that article. This is my tribute to that article and to Harry Waldemar. This set of stairs follows Harry's pattern of building. I have updated dimensional lumber to reflect what is now available, and I've updated the "Uniform Building Code" height requirements for handrails and guardrails to current standards. I will be adding more views as I get time.
Best,

-
Dear PKast,
That is a very nice model. It would be great if you felt able to post the skippy. I should very much like to see all the detail up close.
Kind regards,
Bob -
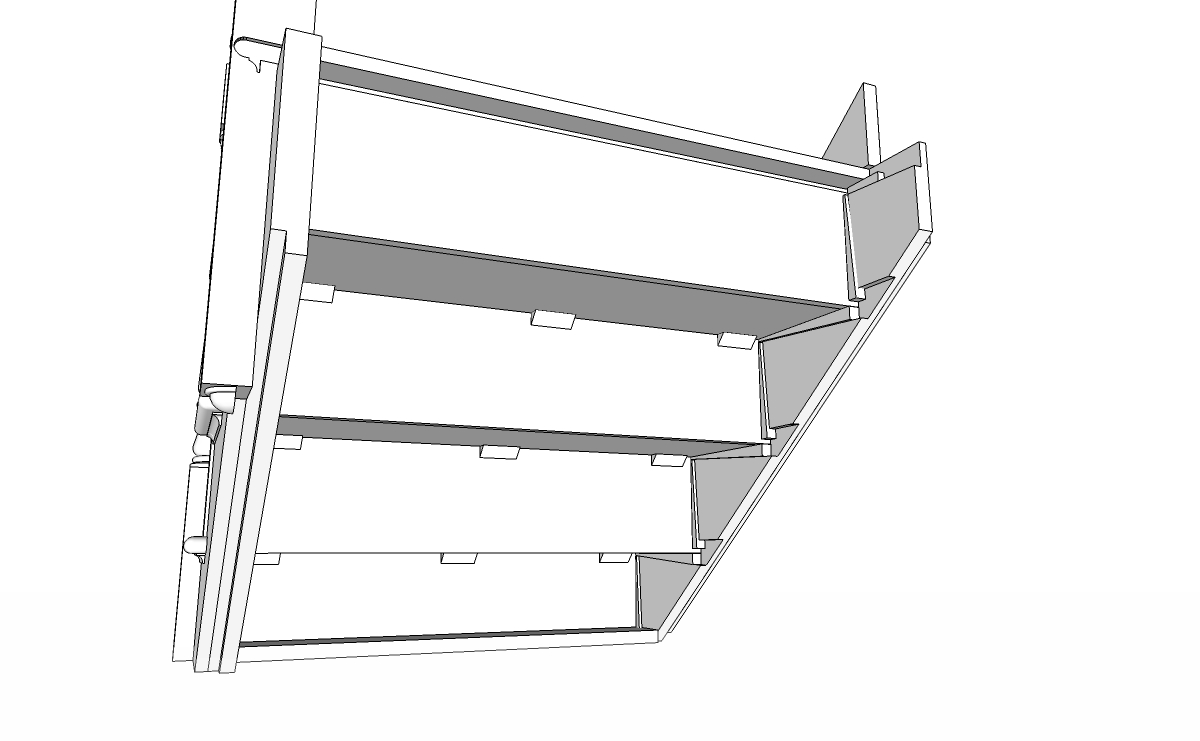
Peter, that is very nice. Aren't those tapered housings for the stair treads and risers cool? Slide the tread in and wedge it in place so it doesn't shift or squeak.
-
Again, I love it. I'm a huge fan of traditional building techniques in this ever-growing big box world. These pictures alone make me want to go back and buy a complete set of the Fine Homebuilding magazines and search for these gems.
I don't know it it is just a commentary on the quality of the Taunton publications, but it seems articles like these are now the exception to the rule with their recent editions of their publications (no offense to you, Dave, your sketchup posts at FWW are spot on). Maybe it is just my personal bias toward less contemporary aesthetics.
-
cool
 i really like that model. (its quite similar to the one Ive just spent this morning doing)
thats pretty much how we do them (im a staircase manufacturer in the UK)
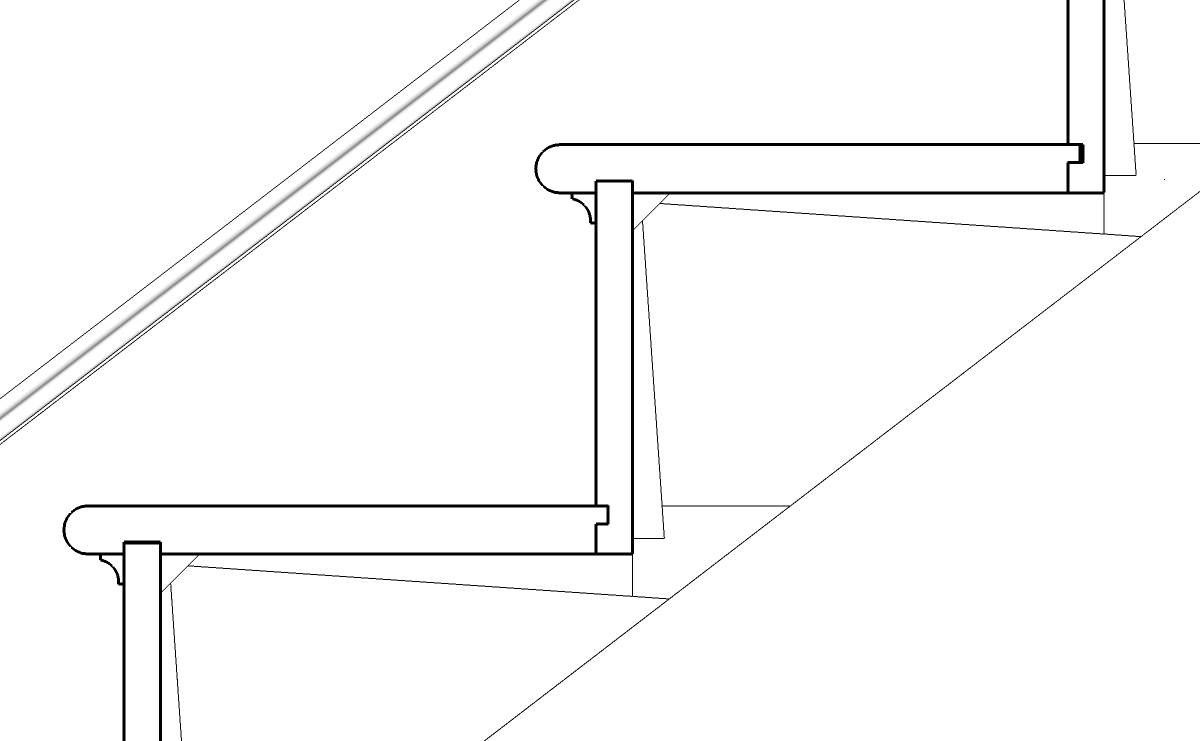
on a cut string staircase like that, I would usually tend to put a decorative bracket where the riser meets the string, mitering the riser into the bracket. (depending on what the customer etc wanted)
but I think i prefer it how you have drawn it, mitering the riser into the string.Tom.
-
Dave, yes the tapered housings are cool. The depth of the routed housing is 1/2" (and some stair builders even route that with dovetail bit so they get a nice sharp edge touching the tread and riser), the wedges are typically inserted with glue applied to three sides and then slipped into place. Same thing with the glue blocks applied between the riser and tread, glue is applied to the two surfaces and rubbed into place to create tension on the glue surfaces, then they are left to dry. Both are essential for a squeaky-free staircase.
Charles, thanks for the positive feed back. I'm also a huge fan of traditional building techniques, that's why I did this.
Watkins, thanks for the comments. I won't be posting the skippy yet, I'm not quite done and might try to publish something first. If I do post the skippy I will do it here first.
Tom, I think that most new houses here would also approach it that way with a decorative bracket instead of a mitered finish stringer. It is probably more cost effective in labor and in wood. Plus decorative brackets can be bought here as stock items from a stair part company.
What are the height requirements in the UK now for a rail above finish nosing and the guard rail at a landing? Every time I turn around it goes higher. Here, it is now 34"-36" above the nosing (with 34" preferred because it just looks plain ugly at 36") and 36" minimum at the landing side. By the way we are also limited to a 4-3/8" sphere fitting between balusters. I'm curious what the UK is requiring these days.Thanks, best, and "cheers".
Peter -
regarding the taped housing, we always use a dovetail bit here, makes sure that the joint is perfect.
we manufacture our brackets to suit, never considered buying them.. (you'd have to mess around with them to get the right rise/go anyway right?) + cnc router takes care of tasks like that easily.
the guard rail needs to be 900mm (35-1/2") above the nosings on the staircase, and on the landing, except for commercial use, when it needs to be 1100mm (43-1/4") above (only on the landing - can be 900 on the staircase).
we have to space the spindles so that you cant put a 100mm (4") sphere through at any point, the same goes for open plan stairs (where there would usually be a riser), where we have to put a dummy riser in to close this gap down. (i have started to use round steel balusters turned horizontally for this - still looks open, but has a gap smaller than 100mm)
too many regs

Tom.
Hello! It looks like you're interested in this conversation, but you don't have an account yet.
Getting fed up of having to scroll through the same posts each visit? When you register for an account, you'll always come back to exactly where you were before, and choose to be notified of new replies (either via email, or push notification). You'll also be able to save bookmarks and upvote posts to show your appreciation to other community members.
With your input, this post could be even better 💗
Register Login


Advertisement