Custom Part Creation
-
Dear Fred,
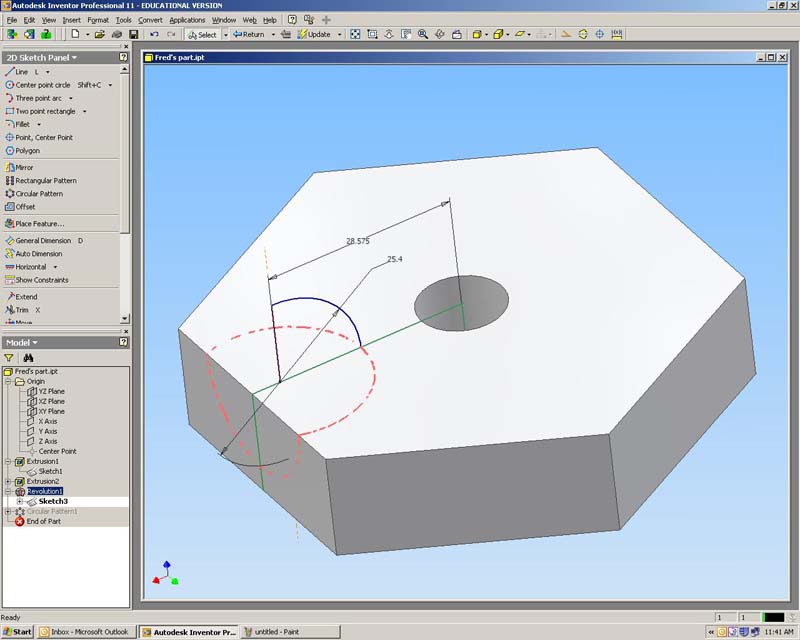
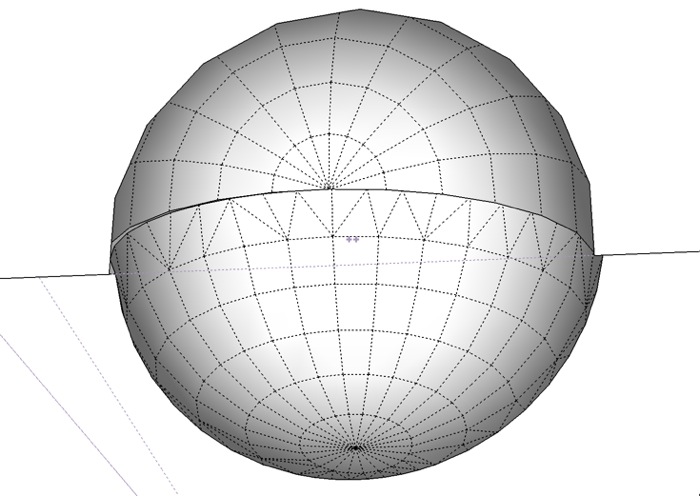
Would you please check the dimensions of the attached model, which seems to be slightly different from yours. The original and the Inventor model (which is which) should be obvious (view with hidden geometry switched on). It might be due to the fact that Inventor exports with circles set to 40 line segments and so there is a visual difference. The screenshot shows the geometry for the hemispherical features. The dimensions shown are in mm.
Regards,
Bob
-
Bob,
Thanks so much for taking the time to help with this!
I believe, after comparing the two files, there was a problem with my original file in the sockets not being perfectly centered on the sides. If you take a look at the attached file you will see that in your model (on the bottom) the sockets are centered and in my original (on the top) they are not. Your version looks perfect!
Fred
-
Dear Fred,
Okay, I will post the model tomorrow in a few file formats so that you can chose which one to use.
Regards,
Bob -
I have tried to upload files with different file extensions, but the system won't let me.
Could you send me a personal PM please.
Thanks,
Bob -
Dear Fred,
Here are the files in zipped format. The .ipt is the native Inventor file type. The others are typical file types for export/import into other CAD systems.
Hope this helps.
Regards,
Bob
-
Here is the .stl file. I have had to zip it in a folder as the Forum tells me that the extension .stl is not allowed.
Regards,
Bob
-
I'm working with a rapid prototyping service called Harvest Technologies (and Bob's model of the part) to make two copies of the part out of a Nylon/Glass-bead composite material. They are charging me $85 per unit for a total of $170. Since I'm new at this I'm not sure how this compares to other options (in particular to using a local machine shop with a CNC cutting device). The person I dealt with at HT was very helpful and took the time to answer all my questions. The parts should arrive next week and I'll provide an update with pictures then.
As always, any advice or suggestions much appreciated.
Fred
-
Looking forward to seeing the pictures. Oh, and when are you going to start building a house?
 cant be long at the rate your currently going...
 -
Remus... no house building for a long time ... if ever. This is still in the nature of a wacky research project.
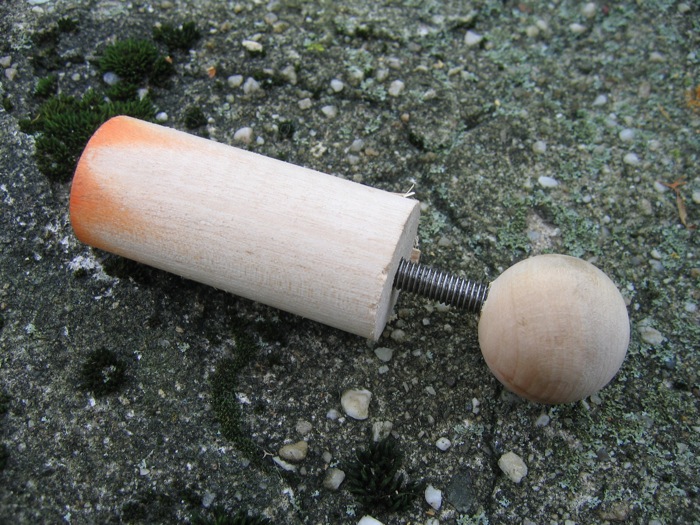
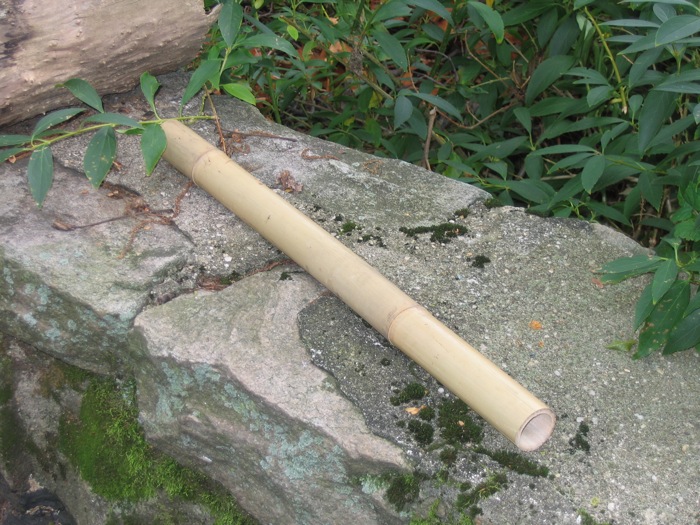
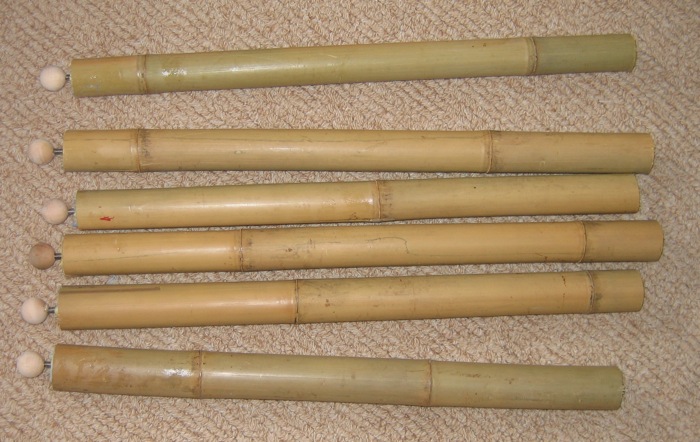
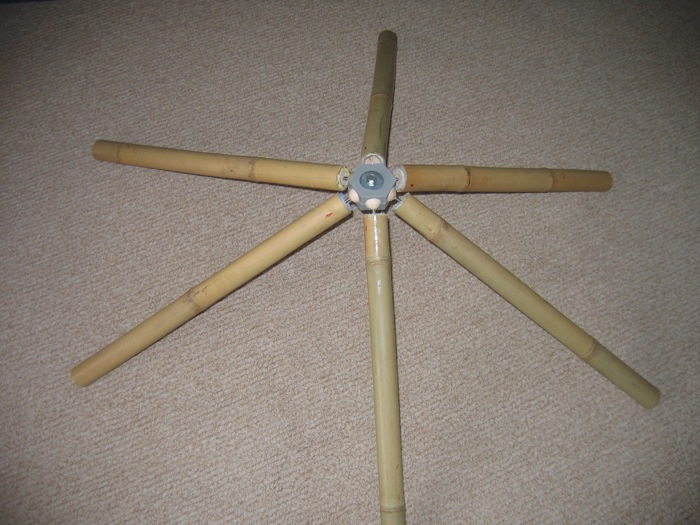
Anyway, while I'm waiting for the prototype hub parts to arrive I thought I'd get to work on the socket and "spoke" parts. After getting a little nervous regarding some of the health issues related to working with PVC I've switched to bamboo for my spoke material. This was always my long-term plan but my miniscule research budget made PVC more appealing until the health concerns overrode the cost concerns.
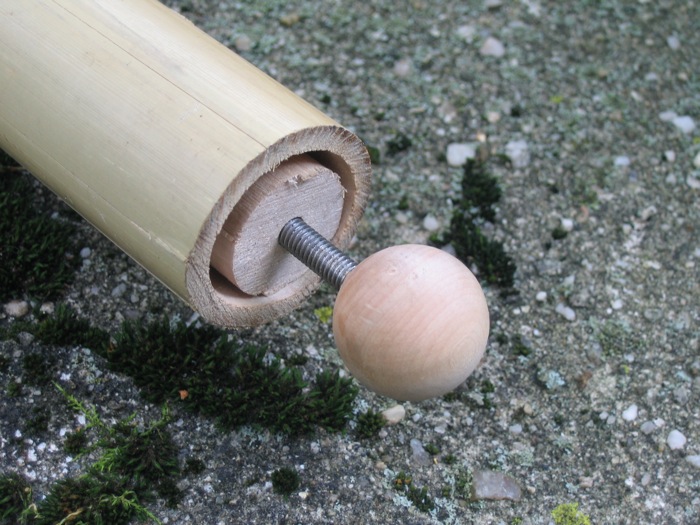
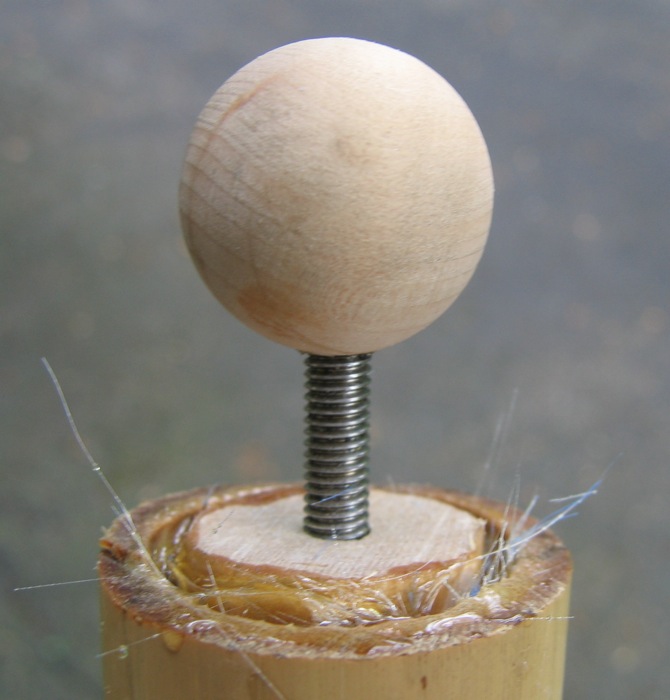
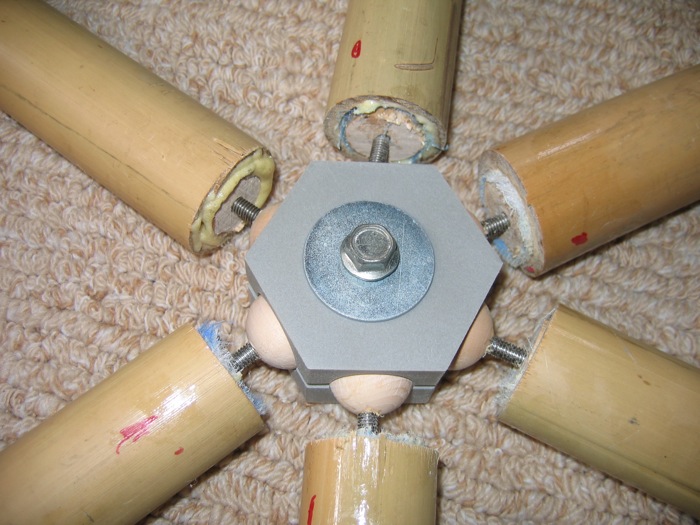
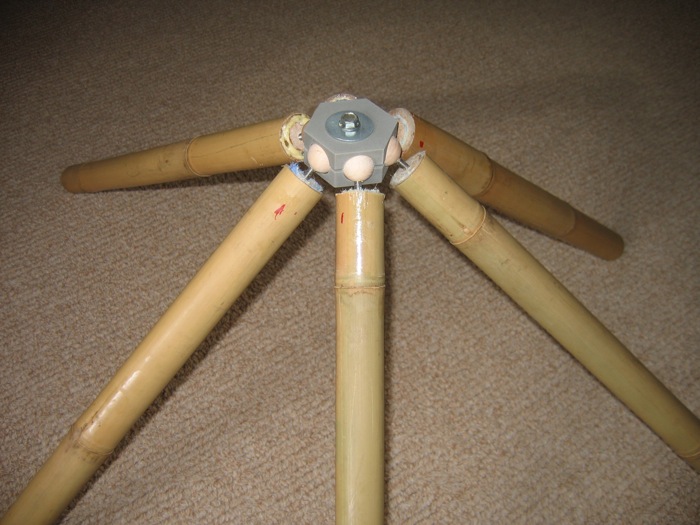
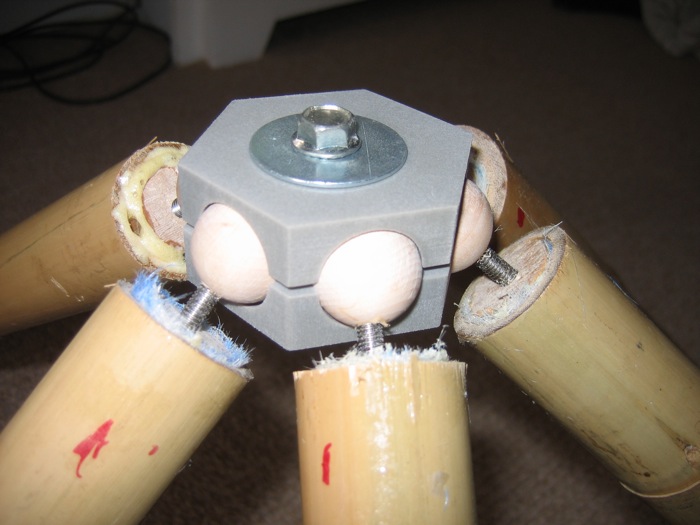
I'm working with 1.5" diameter (roughly) bamboo. In the ends of the bamboo sections I'm glueing 1" diameter dowel lengths in which I've drilled a hole for 1/4" threaded rod. On one end of the threaded rod I've glued a 1" diameter wooden ball which will fit into a socket in the hexagonal hub part (in theory). The threaded rod is used so that the length of the spoke can be adjusted.
I'm trying to use materials that are inexpensive and might be readily available in a third-world country, with the exception, currently, of the hub part. I am trying to get a hold of some Ductal primarily to use as a roofing layer, but I also think it might be possible to use Ductal to make the hub part. If that is possible then all the parts could be made or purchased locally wherever bamboo can grow.
As always, comments and suggestions and fellow collaborators are welcome.
Some pictures of the socket/spoke parts.

-
So after two days of not being home to sign for the FedEx delivery I finally received the parts from Harvest Tech today. For some reason my initial reaction was that they were smaller than I was expecting but they are in fact perfect (thanks again to Bob Watkins for creating the CAD file). The next step is to make some molds from these prototypes and see if I can reproduce the parts using Ductal. I found what I think is just the stuff for making the molds from Areo Marine Products.

-
Dear Fred,
Glad to see that it all worked out.
Regards,
Bob -
Yeah, looks very good. Keep us posted.
-
Dear Fred,
You can also buy off-the-shelf plastic balls:
For my development model I would drill and tap the plastic ball to take a wire-thread insert (http://www.emhart.com/products/helicoil.asp). The insert would increase the durability of the thread, making stripping out less likely.
A production model might use moulded-in fittings (for example http://www.anchorinserts.co.uk/)
A one piece moulding (ball and attached arm) might also be possible.
Regards,
Bob -
Bob,
Thanks so much for sharing the leads!
Since this "system" is open source I hope that you and others will be interested in trying your own variations on the theme. One of the cool things about the system is that it is scalable. When I first got interested in TINs I thought they would make a great building toy and still do. In this entry to the Buckminster Fuller Challenge I tried to make the argument that a TIN building system (or toy) would help people think outside the box. (BTW, there are a lot of interesting design proposals on the BFC pages.)
I'm focusing now on a version that could be implemented with inexpensive materials by local craftspeople, but that is just one of many possible paths to explore. If anyone is interested I would like to consider working with a few people to develop a proposal for the 2009 International Development Design Summit.
Fred
-
what **production material **are you thinking of, fbartels ?
-
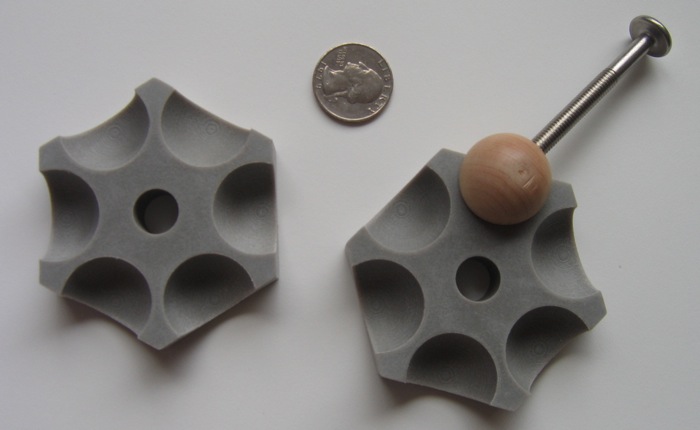
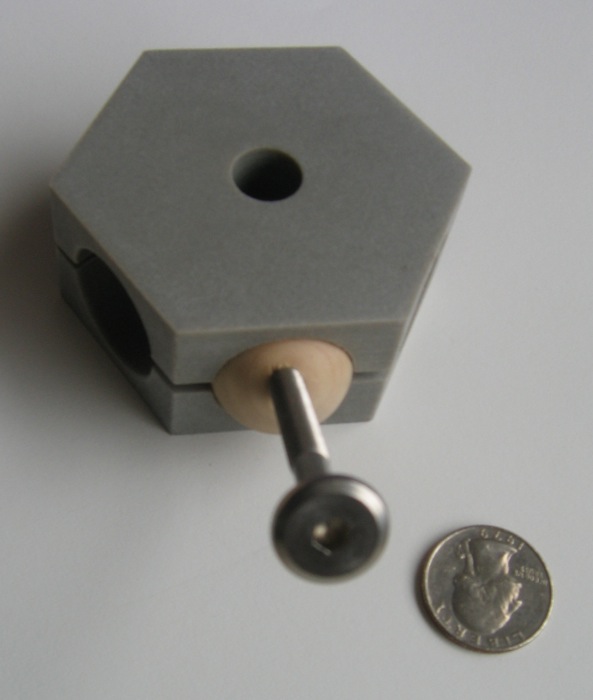
First test of the part. The photos pretty much tell the story. No surprises in terms of the pieces going together as designed.
I didn't put much stress on the hub because I definitely don't want to break the prototype. When (and if) I'm able to reproduce the part in a production material then I'll really tighten up the bolt and stress test it.
-
@juanv.soler said:
what **production material **are you thinking of, fbartels ?
Juan,
As I noted in an earlier post I want to try using Ductal as its cost is within my limited research budget and it just might work really well.
Fred
-
cant it be softened the prototype with Ductal ?
i did not know it. thanks for the link.
and a great work of investigation you are making.
cheers -
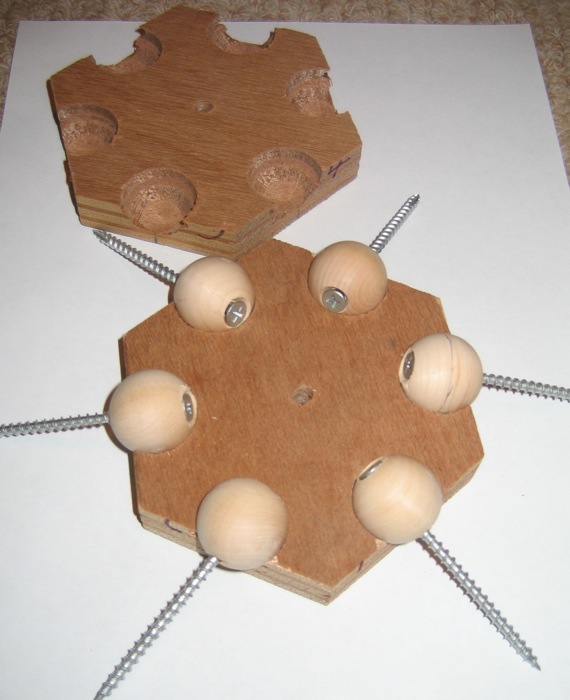
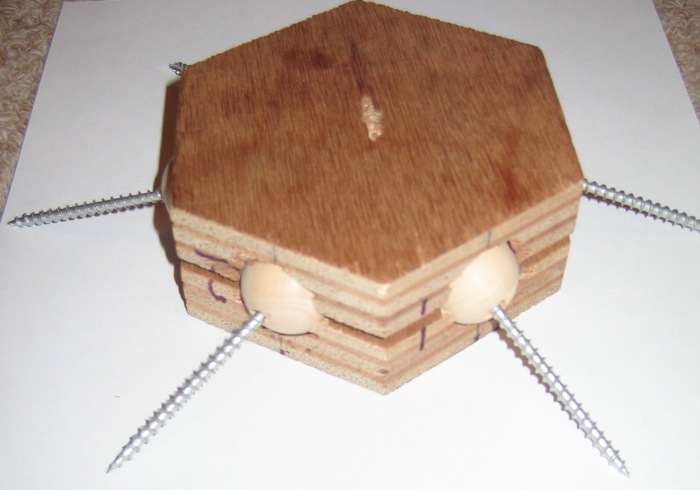
After letting this lie fallow for quite a while I had an idea to try a slightly different approach. Using a round router bit I've been able to make half-spherical holes in plywood hexagons. With the help of the wood shop teacher at my school I've come up with a jig idea that should allow me to make these hubs reasonably easily and quickly. I'm going to try making a few over our upcoming March break. With those I'll see if I can't make a prototype curved roofing section using 2x2 deck rails as the spokes and half-inch plywood for the triangular faces.
-
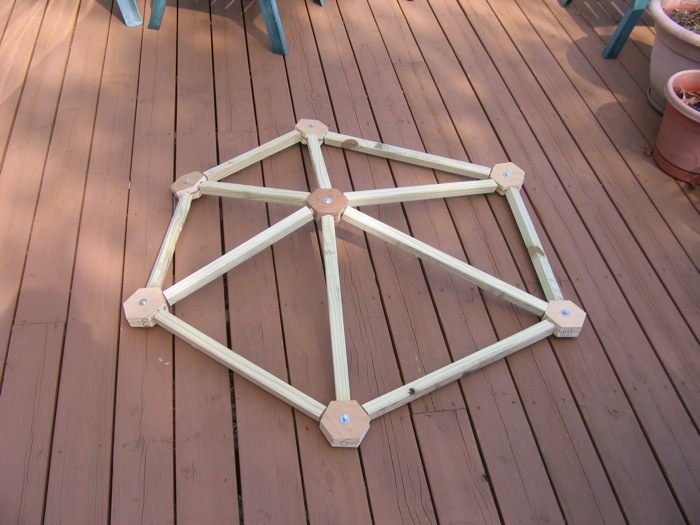
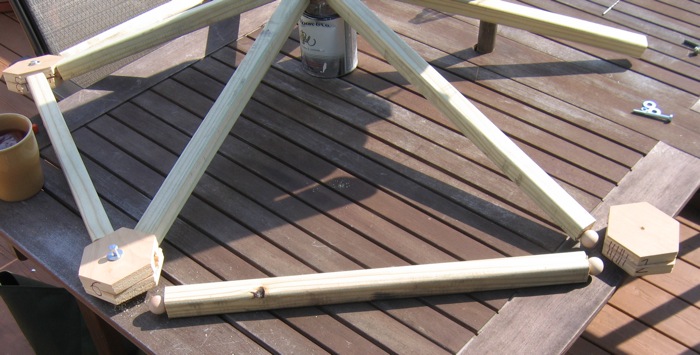
Just to bring the ongoing saga up to date.
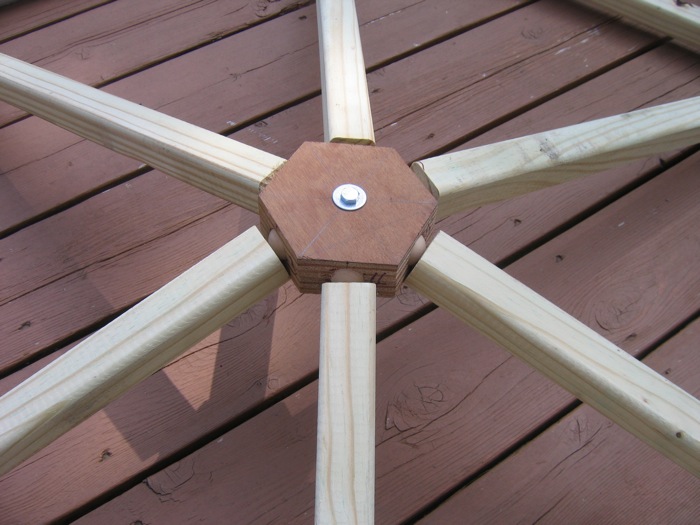
I made six more of the hexagonal hubs out of plywood. (As an aside, let me state that it is a lot easier to build things in the virtual world of SketchUp than the real world of saws, drills and wood... and I have the bandaids to prove it.) The jig I built to assist with creating the hubs helped but I'm not able to cut the hexagons to the tolerances really needed to make the jig work well.
Anyway, I put everything together yesterday, glued it up and tightened up the bolts. I am quite pleased with the results. I now have a prototype of a structurally solid wooden TIN. I can stand (all 200+ pounds of me) on the center hub and the TIN barely flexes. Next step is to cut triangles for the faces out of 1/2" plywood.

Hello! It looks like you're interested in this conversation, but you don't have an account yet.
Getting fed up of having to scroll through the same posts each visit? When you register for an account, you'll always come back to exactly where you were before, and choose to be notified of new replies (either via email, or push notification). You'll also be able to save bookmarks and upvote posts to show your appreciation to other community members.
With your input, this post could be even better 💗
Register Login


Advertisement