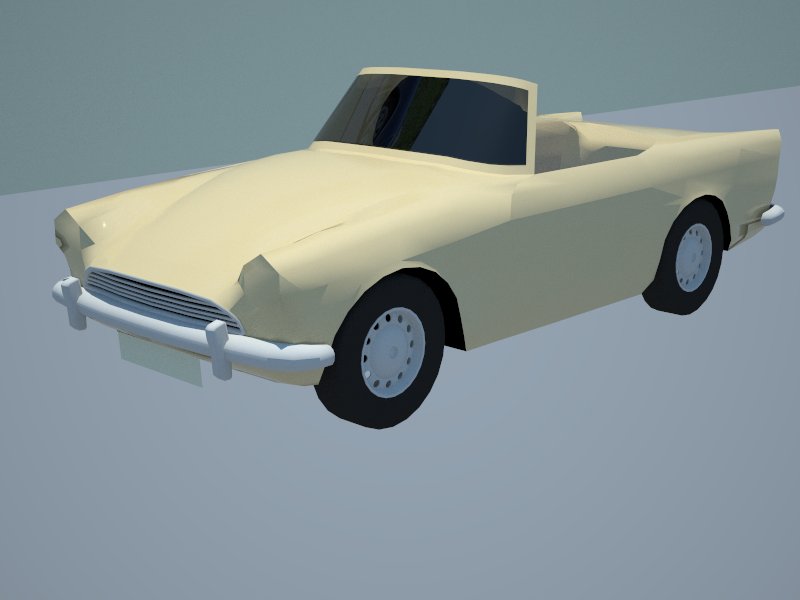
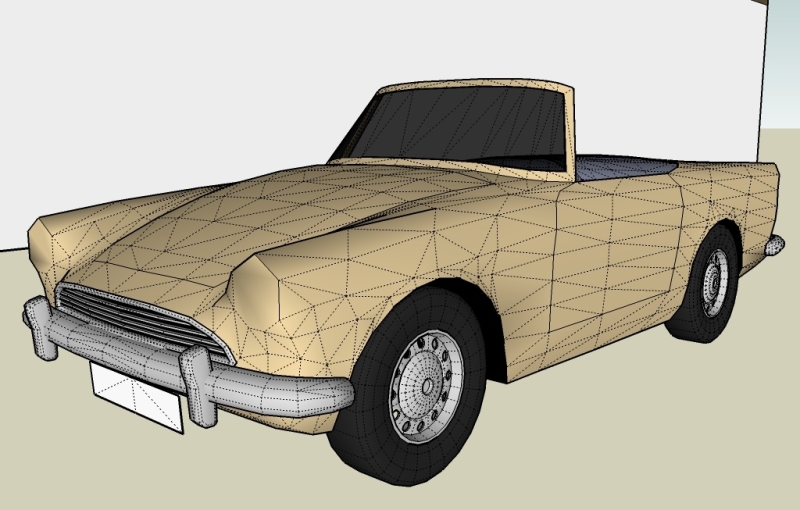
Update Low Poly SU cars
-
plot-paris, I have a tumbler in my models already (modelled it last year sometime) I will look for it tonight if you want it.
-
oh, that would be great! I simply love that vehicle!
and in one months time you have a new chanllenge - modelling the batpod

-
@plot-paris said:
well, then my request will be the Tumbler!

oh dear, I simply love the mixture between hummer and lamborghini...

(and I cant wait for the next batman movie to come out at the end of july)What the hell is that man = maybe I need to get to the movies more!
-
-
Richard,
It is the bat mobile in Batman Begins and The Dark Knight (July 18th by the way). You should definitely get out more! -
Mr solo what do u think is this close of what u were talking about??
i must sub&smooth it and make a interior and few details and is almost done


-
Looing great so far!

-
Just linked this to another thread and thought I'd quickly post to say sorry no updates - though something that bought to mind that I should get in and do this stuff!
-
@richard said:
That is the beauty of them they are really light in SU yet will render really well. Well as long as you don't use them for close up!
That's the magic formula- I've been having pretty good success with extremely low-poly trees- simply a vertical png material plane (made from photographs) for the canopy and about 12 polys for a semi circular trunk- all set to face me. I've got 640 of them in one of my SU models and it still orbits pretty well on my average-spec laptop. VRay doesn't support png transparency, but I just make a clipmap for each tree type, load it in VRay and they render pretty well too, with nice soft shadows on the ground
 . It has saved me so much time not having to PS in trees to renders! Cars like yours would be very valuable for the same reasons- how are you planning to market them?
@richard said:
Not sure the same clip and weight mapping would work in Vray. I don't know my way around Vray so can't say! by the way these don't use any displacement just colour, weight and clip mapping.
AFAIK VRay doesn't support weight mapping so I'm not sure how I would go about blending materials- I suspect the easiest/only way would be to simply mark out the glass as separate geometry and just let all the other bodywork, bumpers, etc be shiny like the paintwork. Not fishing for a tutorial or trade secrets, but I'm very intrigued about how you make the maps. Do you unfold the geometry and then Photoshop the maps to fit? Surely you don't fix the UV mapping in SU?
I can't wait to see more examples- I've become a little obsessed with streamlining the workflow from SU to render progs, finding the balance between components that look good and work well in SU, but which also render well and IMO you have achieved that balance almost perfectly with this car!
-
Hi Richard,
Just a quick update to say I was wrong about VRay not supporting weight mapping- it's done via a blend map and two diffuse layers/materials, probably in just the same way as Maxwell.
Dying to see the fruits of your labours- that Audi pic is still a real teaser.
-
@jackson said:
Hi Richard,
Just a quick update to say I was wrong about VRay not supporting weight mapping- it's done via a blend map and two diffuse layers/materials, probably in just the same way as Maxwell.
Dying to see the fruits of your labours- that Audi pic is still a real teaser.
Hey thanks for the reply Jackson!
I'm not sure blending (vray) and weight mapping (maxwell/fry) might be the same thing?
In maxwell weight maps either blend materials by the grey weight (50% grey = 50% blend) or can exclude / include just like clipping.
For example with the car (audi) posted the the glass layer of the material will have a weight map that is white (255) for the glass areas and black (0) for all others. The other areas will be white with black for the window areas, though a specularity map will gloss or matt the paint / trim / tyres. However what I was working on was the grey areas of the weight maps where some layers may or may not blend.
I'm trying to get the whole car as one material so it is just dropped in scene and rendered without too much user fuss! If every part of the car assigned a separate material as commonly done now and opened in say maxwell studio the material list will saturate with so many meaningless materials: car glass, trim, alloys, tyres, car paint red, car paint yellow, number plate etc etc. It just becomes confusing in a large scene and one has to dig to find any important materials to be adjusted.
I'm thinking that if the car can be done in one material then the material list can be Audi silver, mazda red, nissan gold etc. Simple!
I've been working on even setting up the low poly interiors I use for exterior renders this way so that the materials for the exterior (the ones I want to edit) are easily found and the rest shows as Interior 1, interior 2 etc - at present even a low poly interior for this use may have 10-20 materials, more than the rest of the scene!
-
Yep, AFAIK "weight" mapping and "blend" mapping are just different terms for the same method so your impressive hard work should translate over to VRay (or any render prog) without any problems. In VRay you have two diffuse bitmaps which are overlaid so the first always has precedence/render priority over the second. A grayscale blend map is applied to the first diffuse map which, by making that diffuse layer more or less transparent, allows the second diffuse layer to show through instead or creates a blend of the two where the blend map is grey. I've used this method mostly for road surfaces where I want a high detail tiling texture like tarmac, but I need it to show wear and tear and dirt where water has run off. The actual bitmaps which render might only be 2000 x 2000 px, but the blend map may be up to 10000 x 10000 px to allow for control over the whole rendered surface.
I seriously admire your determination and single-mindedness in streamlining the whole modelling/rendering process. I spent a considerable amount of time stripping all my SU car components of their many various materials and replacing them with a distinct set- Car Chrome, Car Tyres, Car Black Plastic, Car Aluminium Rims, etc (all with corresponding saved VRay equivalents) so at least when I drop a bunch of cars into a scene I only have maybe 10 materials to import and all the cars are taken care of. I had a recent forum conversation with a VRay user who was complaining that he was having trouble keeping track of the materials in his skp/VRay file- it turned out he was dropping 3DW car components straight into his model. He had over 450 materials undoubtedly with random, completely meaningless names. I never once regretted spending a bit of my spare time to organise my components and material libraries- the time (and stress) savings are easily worth it. Having one material per car would be awesome
Keep us updated with your progress, if only to generate more marketing for your product!
Jackson
p.s. still dying to know how you apply the UV mapping to such organic forms in SU; lots of construction geometry and eye dropper/projected texturing?
-
Elisei
Rather late than never
 , I got around to playing with your model, I used Artisan to divide and smooth it further, added a bunch of detail, created a soft top roof and rendered in Thea.
Heavy mesh (no longer low poly)

Quick Thea render, Raw render. no photoshop

I love Sunbeam Alpine's (mark 1)
-
That's pure sex pete! There is something so sweet about older numbers, nothing new compares really!
-
@richard said:
That's pure sex Pete! There is something so sweet about older numbers, nothing new compares really!
Oh yeah, the Sunbeam was a pathetically under powered 2 Lt 4 speed British sports car but what it lacked in Horsepower and torque it made up with sex appeal. It was made for swanking on par with the MG's, slow country drives, and many weekends of repairing oil leaks. Made for a true car enthusiast, I have always wanted one, nearly bought one in the mid 90's but got an Esprit twin turbo instead from the same estate auction. ( would have bought both if I could have)
-
Beautiful car! The model's not too shabby either, Pete.

-
Stop it!!!!!!
-
White paint with reflections, without loosing the details, how beautiful is this....
Thea is amazing, into the right hands! Congrats Master!
-
@solo said:
Quick Thea render, Raw render. no photoshop

How you did the composition, if is raw render?
 The shadows on ground are very accurate.
Are you so kind to write some steps?
Thank you. -
@unknownuser said:
How you did the composition, if is raw render?
 The shadows on ground are very accurate.
Are you so kind to write some steps?Solo have already made the Thea - Shadow catcher tutorial available...

Advertisement


