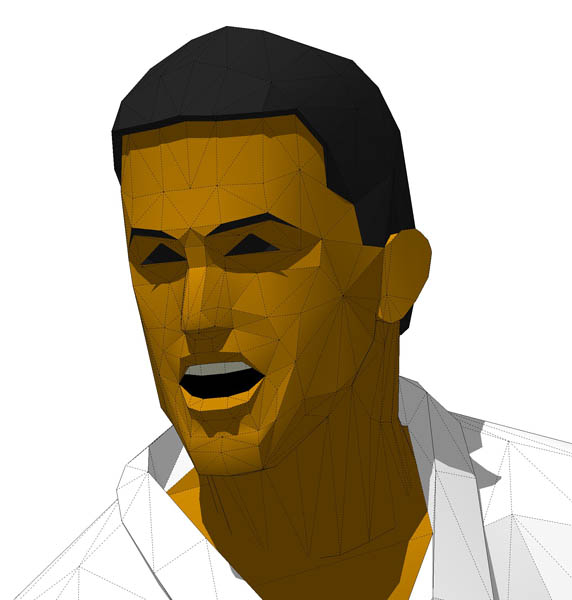
Low poly folk ... edit
-
Thanks for the info and links, was interesting reading.
I have always wanted to create low poly figures for resale, but the ones I have made always came out just too large to be used as low polygon figures. When I reduced the poly's the detail flew out the window, however after some thought I came up with a new way of looking at this (probably old news for you as you already succeeded in creating low poly figures that have been sought after by everyone and their dog) by having multiple levels of detail.
making sure there is medium facial detail to give character and reducing the clothing detail.Below is a 100% SU created figure, thanks to FFD, JPP, and newly aquired skills with other rubies. I desperately tried to keep it under 300kb but the difference between bad and acceptable was 40kb.
Progress screen shot (the hardest part)

-
I have a couple of suggestions, Pete. The first is that you can go quite a bit lower poly yet...especially on the head. Model half a head, with shadows on, so you can see how they fall (it's all you tend to notice on a low-poly figure viewed from any real distance.) Concentrate on the main planes. When you are reasonably happy, mirror and join. You can then add a little asymmetrical stuff like hairstyle if you so wish.
The second tip is don't oversmooth everything. Select all and use the smooth slider to make all the interior edges disappear, just leaving the outline...however uncheck both boxes underneath the slider. This will give you a figure with no edges showing, but which is still facetted. Then go over this figure with Erase+Ctrl to smooth certain faces only.
Smooth where clothing would be stretched against the figure...across the shoulders, upper arms of clothing, upper leg etc. Smooth skin parts separately, so you leave some hard edges around elbows, wrists, knees, cheeks, jawline and mouth. This gives the impression of a separation of muscle groups and slightly crumpled clothing. You can see the difference in the shot of the male nurse in scrubs. The one on the left looks much more detailed and less pneumatic, despite being exactly the same mesh as the one on the right.
On the head, I have smoothed the brow and cheeks but have left hard edges around the mouth, parts of the nose and those creases from the nose down the sides of the mouth...detail without having to actually model it.The nurse has 2119 faces and is 243 KB


-
Thanks a bunch for those tips, I will certailny use them on my next attempt, I would love to see your workflow as to how you create your figures (If possible).
How do you start your figure?This is my first step (below) and then from there everything gets very busy and crazy as I shape, twist, delete, cut, morph and cuss at the mesh.

-
Here's a 4 year old post from the old @Last forum.
Link
Modular, like I said. I only model one leg, for instance, then I bend it to a variety of angles, add different footwear etc. As long as you keep the section cut largely unaltered, you can copy/flip and join very easily to produce a complete lower half.
Justin (MonsterZero) has done a complete run-through, showing how he creates a game figure. It's almost identical to my own workflow. But I can't find it at the moment. -
Thanks for that, I have seen Monsterzero's stuff a while back, I believe it was a youtube clip. His method dazzled me into submission, so very different to what I was used to.
I have been succesful with high poly character modeling, I use that same method almost to the way I hand draw.
I will use every available free moment to master this low poly figure modeling (not much unfortunately as I have some paying work just arrived) as what I want to achieve is a figure that is relatively small for mass placements yet good enough to use in a Vis render. -
thanks for the components Pete, these are really great!
-
Thanks Tina.
Alan,
Here are a few screen shots of my progress so far, I am able to create a character that is about 200kb. I indeed tried your method of symetrical build and it works like a charm, in fact I found it very easy and fast.
I may ask if possible for you to help me get the smooth to line balance correct if you have the time.
-
-
-
-
I'm enjoying this thread immensely...
Anssi
-
Thanks Anssi
This started as a figure give away and progressed to Alan Frasers run in with Zygote, which got my back up against Poser and now a journey of discovery into low poly modeling.
Maybe one day it will help a newbie learn a new technique, help folks get away from the generic Poser imports.
And maybe I create a market for these figures and make a ton of money.
-
Got a Landscape design to complete before morning so I will get back to this later.

The next time y'all download a figure from Form Fonts you get an idea of how much work went into it.

-
That last one looks like some crazy russian power lifter

-
I tracked down Justin's video. This is pretty much how I go about constructing a limb...at least initially. After being manipulated this way and that on various figures, which then get cannibalised to form yet other figures, the geometry gets a little less ordered over time.
http://www.youtube.com/watch?v=ZzDM_JrHCGM -
-
Hah! Just like mine...except yours doesn't seem to be peppered with air gun dart holes.

-
LOL, My youngest son wants to paint him ... daft sod.
-
-
Wow- these are really fantastic Solo. I have been trying to figure out a way to get lower-poly 3d figures for a while now- I just don't seem to be able to muster the patients it takes to do what you have done here... Truly an artist. I'm sure you have seen this/these?
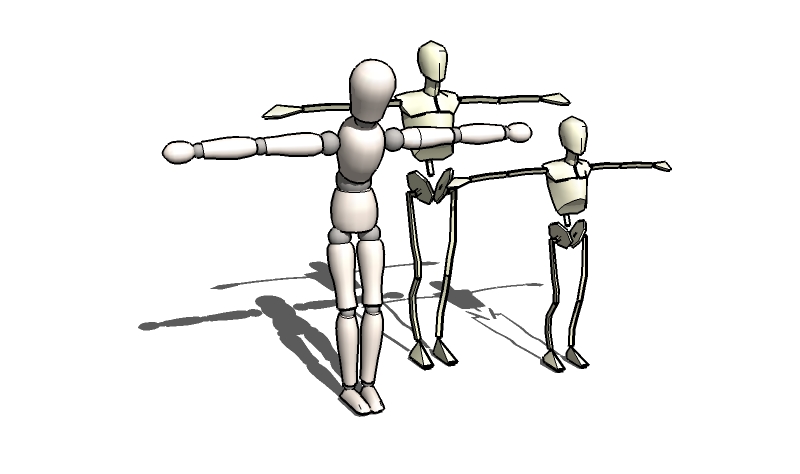
I followed the thread(s) about the copy right issues using Poser and Daz content until my eyes started crossing. Have you tried tracing an SU model of a manikin? Now that I think about it... seems like you could lock the joints with Sketchy Physics and move the little guy/gal around just like a real one? hmmm...
Not really sure where I got these little guys- but I would be more than happy to share them.
Keep you the great work.

Hello! It looks like you're interested in this conversation, but you don't have an account yet.
Getting fed up of having to scroll through the same posts each visit? When you register for an account, you'll always come back to exactly where you were before, and choose to be notified of new replies (either via email, or push notification). You'll also be able to save bookmarks and upvote posts to show your appreciation to other community members.
With your input, this post could be even better 💗
Register LoginAdvertisement


