My CarterCraft Boat -- (W-I-P)
-
Reg,
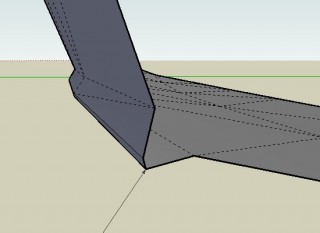
Some of the "mess" was due to the top part, the connecting, longitudinal "rib" (or what that is) and the bottom part not being evenly segmented. I mean that from where there are endpoints of the vertical (hidden) lines of the top part, you should go on modelling the bottom part, too - keeping the hull following the segmentation all the way. If you have a closer look, the curves just don't meet.
Now if you are just thinking of adding "guide ribs" for modelling the bottom part, keep this in mind and start those "ribs" from those endpoints of the top part.
Well, I may sound a little "messy" with what I have written down - I hope you see what I was trying to say in my lame way...
(Nice advance though... )
-
looking good Reg...
you may notice some clipping when you try to zoom in... try turning off the perspective view, this will make your view of the model a bit strange, but it will also allow you to zoom in very close, with out clipping.
cross sections are the slices of the boat we talked about earlier, remember the port to starboard slices?
i think it's looking very good... remember they are always messy until they are done...
-
This is just little orientation that could maybe make your boat easier to make.I just wanted to show you how you can make your boat more beautifull.Removeing some dots and lines can make it better and correcting some of the lines as I show you on image .NIce boat btw
-
WOW- I want to thank all of you for taking time to help!
Sure gives me a lot to think about (uhuh- a good way to keep me off the forum for a while )Confession: This runabout model is supposed to get me ready for the boat I spent my early years working on as a deckhand for my dad..
Maybe I better hold off on that
-
really it's never the size but the detail... the hull should be very much the same regardless of size...
-
Indeed I am currently writing a small tutorial that will help you with the beat you are currently creating
-
I hope this helps you out a little to clean up your mesh, if you got any questions please do ask them!
-
@krisidious said:
really it's never the size but the detail... the hull should be very much the same regardless of size...
Oh yes! If/when I get that hull done there should be enough detail work to keep me busy for a long time.
BTW- that is/was a 2-inch thick mahogany hull 65 ft long (I don't know if Katrina spared it- it was in Biloxi)
-
robmoors says:
@unknownuser said:
I hope this helps you out a little to clean up your mesh, if you got any questions please do ask them!
Gracias! That tut will be a great help. However, I feel defensive about some of the "junk" you see in that model.. please see attached.
The eraser is really a serious tool that I had ignored.
It will be interesting to apply your method at the "pointy" end of the boat.
-
As I stated in the tutorial just increase the number of sections at the point to increase detail, then you should be fine
-
@robmoors said:
I hope this helps you out a little to clean up your mesh, if you got any questions please do ask them!
I have been diverted, but I come back to ask how you got those nice views of my hull sections. I'm thinking you must be using the section tool-- any comments that may get me up to speed? I have never used the section tool
(Meanwhile--- back to the manual...)
Not only are you guys great modelers, but your tutorials are beautiful! -
Well what I basically did to get those was create several reqtangles and spread them throughout your boat with section spacing between them, after that intersect with model and I deleted the edges and faces of the reqtangles so that I was left with nothing but the intersected geometry of your boat. After that it was just a matter of cleaning up that geometry...
Advertisement