Copy along a path plugin
-
I think you'll find you have more luck if you make the soldier brick into a component, both in terms of control and model size.
Components (unlike groups) have axes control, allowing you to position the axes and the faces in the correct relative positions. Then, when the component is copied around the path, it will pick up its orientation from the path direction at the insert point, and more accurately than a group will.
Personally, I use textures for brickwork - just add border edges 8" high, and rotate & stretch (in one direction only) a brick texture to use for a soldier course.
Hope that helps,
-
Thanks Rick! I have been able to use the tool effectively after some prodding. I'm going to try and see if making it into a component as opposed to grouping will make it easier. I'm still having a bit of issue with trying to figure out how the script decides which side of the line the item will be copied to. Generally, I'll take the shape of my walkway or patio and offset it by 9", then when I add the soldier course, I'll try both the outside line and the offset line as my "copy to" path, and sometimes, I run into the problem where I choose the outer line and the tool will copy to the outside of that line, so I'll undo and try the inside (offset) line and the tool will copy to the inside of that line. I'm trying to have the tool create the border in the middle of the two lines.
Is there any way to tell the script to flip it's placement of the copied item to the opposite side of the line?
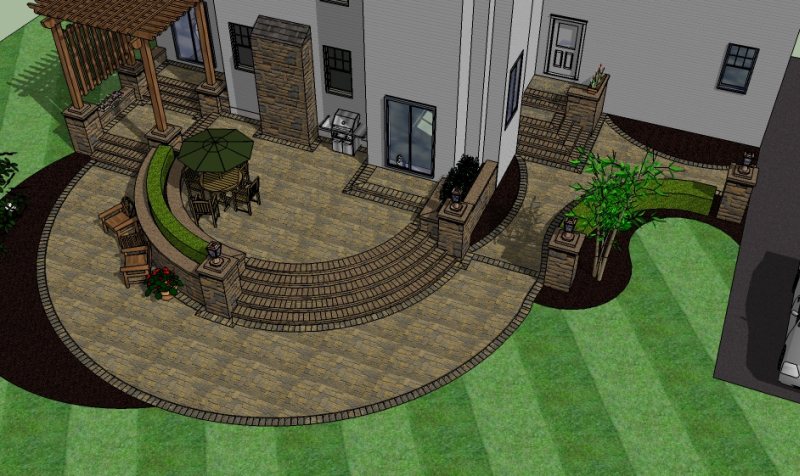
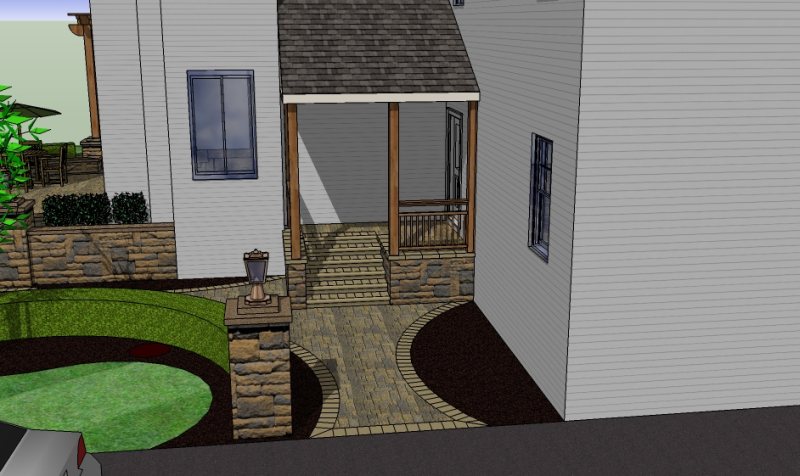
Here's an examply of what I've been able to accomplish with the script so far....but it took some effort with the border. Thanks for the great script and all your help so far!!!


-
Nice work!
With groups, the script assumes the group is in the correct initial orientation (for the rotation aspect), and uses the group's transformation origin for the insert point. That origin is the corner of the group's bounding box nearest the model origin at the time the group was created.
With components, things are much more predictable. The script will use the component origin, will orient the component so the x-axis is in line with the first edge of the path, will rotate so the x-axis is parallel to the path, and the z-axis is always up.
Also, with strictly radial paths, the rotate-copy tool might work as well, and be more predictable with groups (though I'd still recommend using components if they are all the same along a path - less "weight" in the file, and any changes are much easier).
Hope that helps,
-
Hi Rick:
I had assumed that the script didn't work "as advertised" because I have always chosen the Copy to Path NODES option
 .
.Unlike Copy to SPACING, this option doesn't use the axis orientation of the component in the same manner.
Could there be a 3rd option, Copy to Path NODES (Oriented) added to the script? Except for the first node in a path, it would orient the component according to the direction of a node's previous segment. The existing Copy to Path Nodes function is useful as it stands so I am not requested it be modified.
Regards, John
P.S. Congratulations on the new family member!
-
To be clear, you're asking for
copy to nodes (oriented) and
copy to nodes (disoriented) ?
But seriously, I'll add it to the list. It's a long list these days, with short time...
Thanks,
-
"But seriously, I'll add it to the list. It's a long list these days, with short time..."
Understood, Rick.
Yes:
copy to nodes (oriented) and
copy to nodes (as it exists now)Perhaps a little contribution to the baby's college fund ?

-
Rick,
I've been trying to figure out your suggestions and I'm still a little lost as to a solution. I've tried things several different ways with both components and groups and I am having the same results. I have a attached a simple model to illustrate my basic issue. I apologize if this is a novice problem, but I am still quite new to sketchup. If I could have the option to invert the side of the line the component or group is copied to, it would make my life a lot easier when designing hardscapes. Any further help or suggestions would be appreciated.
Thank you kindly!
Adam
-
Rick, I just thought of another possible solution.
When the script is run, have it:
1. gather the distances of the shortest and longest segments in the path,
2. also have it gather the total distance of all segments and divide it by the number of segments in the path to produce an Average Segment Distance.3. Then display this info either in the Copy-to-Space dialog (or SU TaskBar or temporary text label);
4. the user could then use this info to determine the distance to enter (or the average segment could automatically be put into the entry box which could then be changed by the user).
Regards, John
-
Unfortunately, it appears that the welded? lines that are causing the problems are going in opposite directions, so no matter which you choose, it is not what you want. An ironic problem, but a problem nonetheless...
Something I tried, with some success (see attached):
- relocate the component axes to be outside the brick
- selected all the edges in the inner shape and welded them all together, then used this for the path.
It still requires some minor adjustments, but is still an improvement over manual placement.
-
Hello,
I have the same "problem " to solve with pavers along a curved path.
first of all, your work looks neat and tidy and i assume that you work with high precision/detail.
here's my solution:
The main issue with curves in SU is that they are not adaptive like in e.g. Auto Cad.
In SU curves are line segments aligned to appear like a curves.Okay, knowing this fact, lead me to the conclusion, that by using paver units for soldier borders you want to draw your curves accordingly.
e.g. your paver is say 6 inches wide by 12 inches long so now you draw a curve as desired, the next step is to divide the calculated length (window---entity info) by the paver width (in this example 6 inches plus spacing) and apply this result to your arch (segments).
now your arch/curve will precisely match your pavers. for your inside arches you may have to do some angular calculations to determine the spacing or you could just offset another arch in this example it would be 12 inches and do the spacing as before.so now that you have the layout geometry you can use the "path copy" and your result should be okay.
Now you definitely want to turn your rectangle (paver) into a CoMPONENT! Why?
here is an example: lets say you used the path copy tool to distribute your paver's along the path, it seems though they followed the path but are not correctly aligned.
Easy fix here since they are components, insert a single paver into your drawing, make sure it is aligned to the red blue axis.
double click the paver to get into the component (edit component mode)now zoom to see both, the path and the paver component you're working on.
Now select all geometry in the component and move or rotate from edge to edge until you see the correct alignment of your paver along the path. All the other paver's will align accordingly, that is the power of components!hope I was of some help here.
I don't know how to attach a file to this post so I can't send an actual example file
-
thx a lot
Hello! It looks like you're interested in this conversation, but you don't have an account yet.
Getting fed up of having to scroll through the same posts each visit? When you register for an account, you'll always come back to exactly where you were before, and choose to be notified of new replies (either via email, or push notification). You'll also be able to save bookmarks and upvote posts to show your appreciation to other community members.
With your input, this post could be even better 💗
Register LoginAdvertisement


