Grass with VRay material ID and PS... what am i doing wrong?
-
so, i've seen a couple of tutorials and they both teach this method to save Material ID channel with VRay, and then replace it with grass from a photo
my problem is: i cant get the shadows on like they teach in the tutorials.....
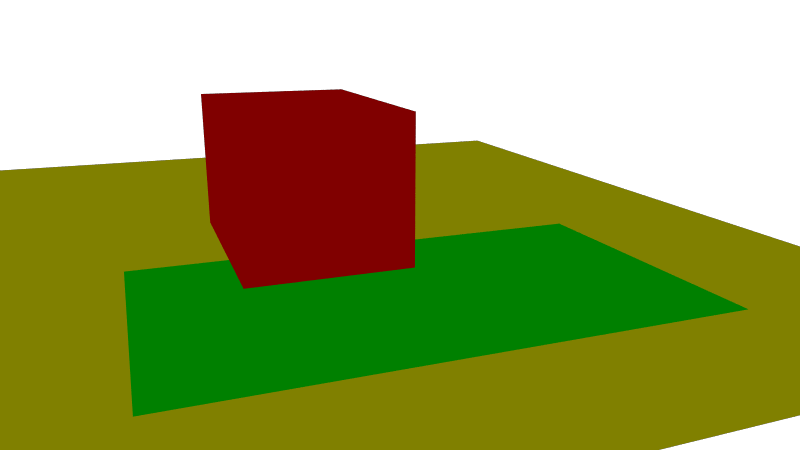
- i rendered the image with RGB, Alpha and Material ID channels, and saved it in .PNG
(i will use a simple model so that it doesnt get confusing)
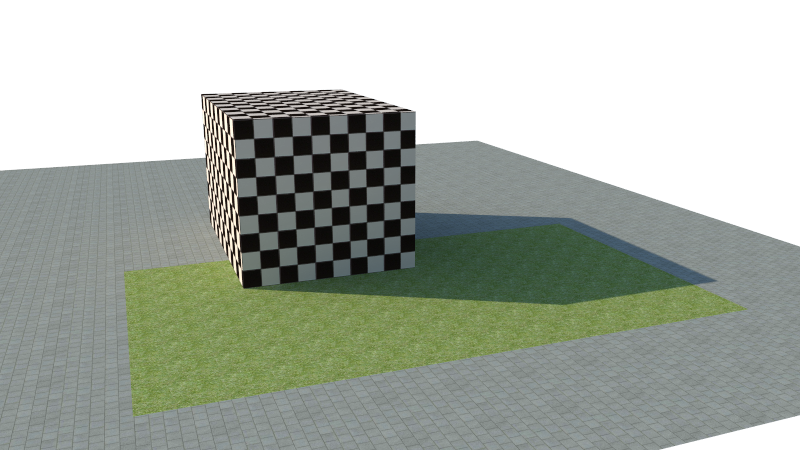
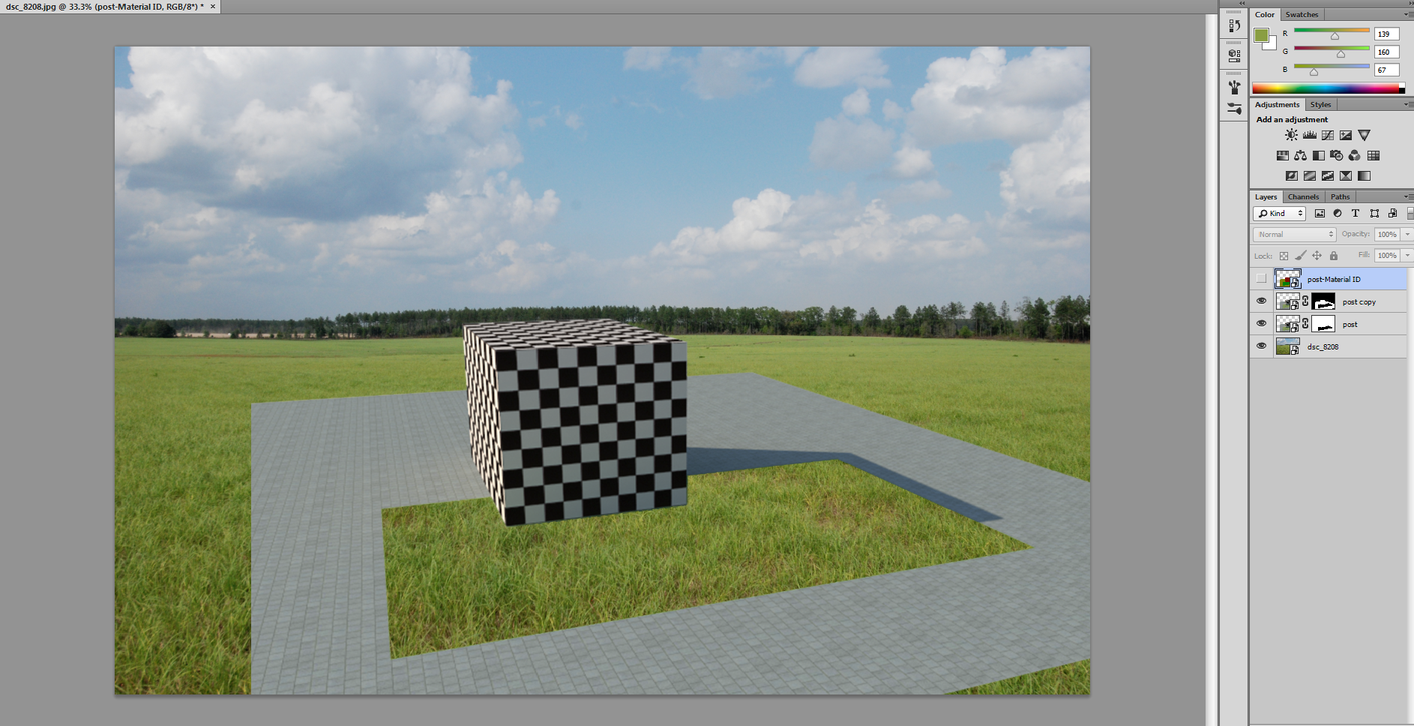
- i opened and layered it all in photoshop in the right order, then applied the Layer Mask > Hide Selection to the grass rectangle in the original render
and the Layer Mask > Reveal Selection to the rest of the image (minus the grass rectangle) in the copy layer of the render
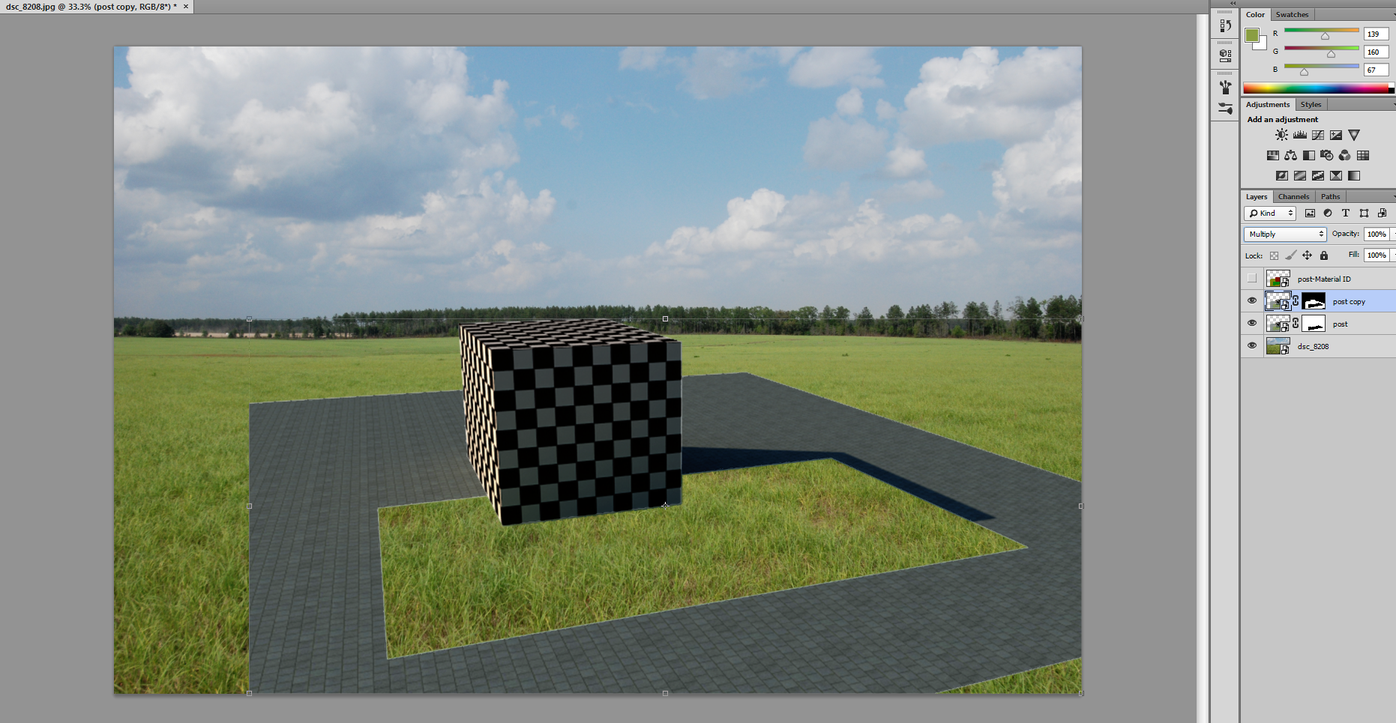
it all went well, BUT, when i do the last step of the tutorial -- select copy layer and choose multiply, to turn on the shadows on the new grass -- it just darkens the whole thing and no shadows....
what am i doing wrong?
- i rendered the image with RGB, Alpha and Material ID channels, and saved it in .PNG
-
in your last step - invert your layer mask.
-
im sorry if it seems obvious and dumb but..... i dont follow..
invert the mask, right? in which step? i think i tried it all, lol... maybe im not exporting the channels the right way?
i feel such a noob for asking this but, is there a "for dummies" tutorial for this that you guys know about?
-
the last screenshot you posted - look at the black and white layer mask that you have. Click on the layer mask in your layer manager to select it. Hit "ctrl-i" (invert) so the black parts are white, and the white parts are black. White is what is visible, black is what is hidden. You just have it flipped for some reason.
-
thanks a lot, i got it to work
of course you are right, i masked the wrong part in the material ID
such a simple mistake and it was driving me nutsthanks
Hello! It looks like you're interested in this conversation, but you don't have an account yet.
Getting fed up of having to scroll through the same posts each visit? When you register for an account, you'll always come back to exactly where you were before, and choose to be notified of new replies (either via email, or push notification). You'll also be able to save bookmarks and upvote posts to show your appreciation to other community members.
With your input, this post could be even better 💗
Register Login


Advertisement