Rail & Stile Edge Routing
-
If you run into it again, e-mail the file to me so I can see.
-
@jimnjulia said:
Is there a list of these practices somewhere or a tutorial of some sort. I've looked through Google's help site but it's not very in depth.
Dave's latest video shows many modeling techniques I would describe as best practices.
-
-
I didn't have any difficulty after scaling the model up by a factor of 100. Your ogee profile is quite fine although you probably don't need that many faces for it to look alright. Those short segments create some unfilled faces during the intersection.
-
Not sure I even chose the number of segments. I only resized x2 I tried x100 and it does work! The curve was a classic bezier. I think the default is 20s
Thanks Dave
-
That would essplain it, Lucy.

-
That works. Now correct the wood grain orientation and you're done.
His method works well but I would simplify it.
As to components, yes, by all means, do this once and save it as a component. You can make the original coped rail component just a couple of inches long if you want and modify its length when you insert it into future models.
-
Hey Dave, new user her. Really struggling with the intersecting of rails and stiles. I found this thread and I'm attempting to figure it out....could you assist me by chance? I realize it's a old thread so I'm not sure if you even check this anymore.
I've watched a video on it, and found a nice model in the sketchup 3d warehouse and I still can't seem to get it from reading the directions. I guess you could say I'm a visual learner. Do you have anything to help me figure out how to:
- use the model here from the sketchup warehouse: http://sketchup.google.com/3dwarehouse/details?mid=26e0074f414114c5f927dd0b5df2955c%26amp;prevstart=0
and make some rails and stiles.
- I read on multiple threads that once I have a good rail I can save it and modify the length at a later date. How is this possible by just using the push/pull tab with the curved/coped end of the rail?
Thanks!
-
Michael,
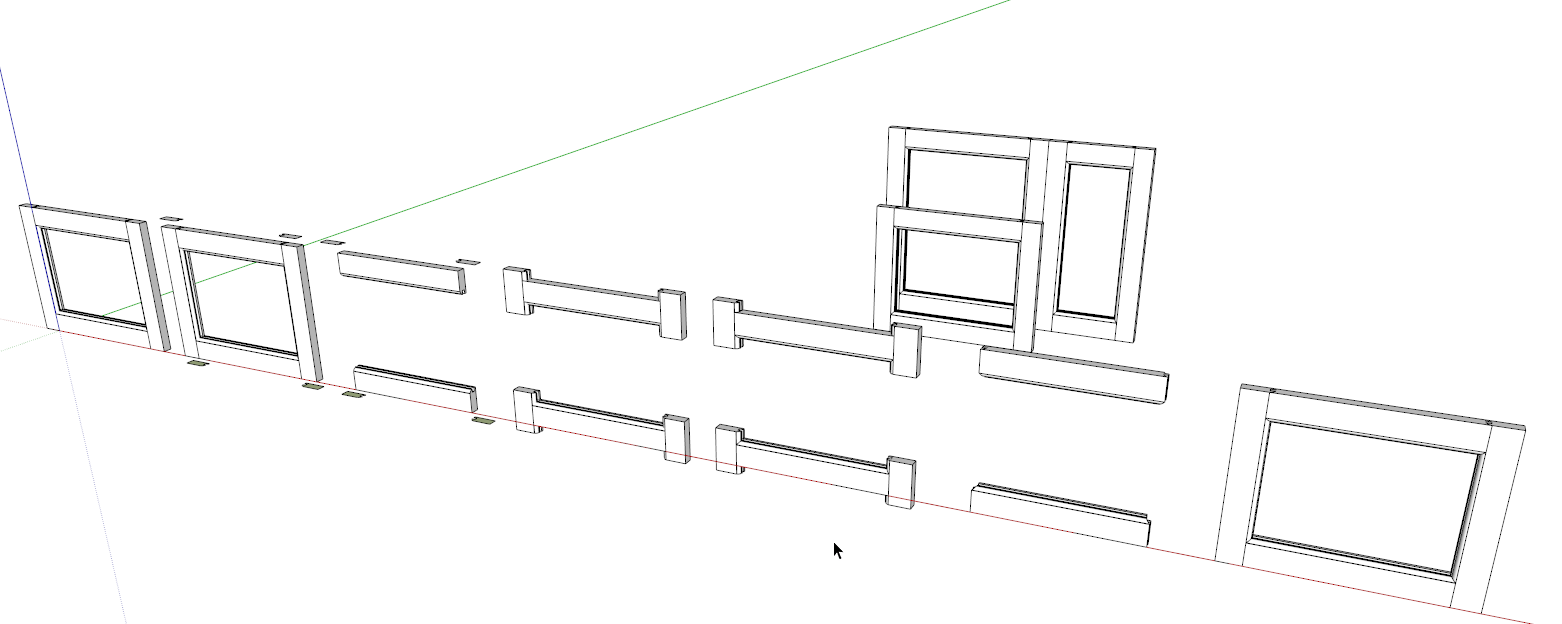
Have a look at the attached SKP and the instructions here. Click on the scene tabs to follow along. Maybe it'll help clarify.
-
Rails and stiles drawn and placed in proper relationship to each other. The parts are components. The topped rail is a flipped (not rotated end for end) copy of the bottom and the right side stile is a flipped copy (again, not rotated end for end) of the left.
-
Open a stile for editing, select the end face and its edges using a double click of the Select tool. Use Move/Copy to copy the face up a bit away from the end of the stile. While the copy of the face is still selected, hit Ctrl+X (Command-X on Mac) for Cut. Open the top rail for editing and choose Edit>Paste in place. Use Move/Copy to copy the face to the opposite end of the rail and use Flip Along to flip the newest copy. Make sure this copy is in the correct position above the end of the rail. These faces will form the cope cutter for the rails and just like working with the rail and stile cutters in the shop, if the cutter isn't located correctly, you'll get a lousy joint.
-
Hide the stiles for the time being.
-
Open the rail component for editing again and use Push/Pull to push the cutters through the ends of the rails.
-
Notice there are no intersections where the faces on the "cutter" pass through the rail.
-
Select all of the geometry in the rail component including the cutters. Right click on it and choose Intersect Faces>With Selection.
-
Erase what is rail and correct any reversed faces. The rails are finished.
-
Unhide the stiles.
-
The thing about reusing the rails and stiles is correct and you can make them any length you need. Push/Pull will work on the stiles but not on the ends of the rails. Instead, use the Move tool. Open the rail component for editing, drag a left to right selection fence around the end of the rail. Get the Move tool and move the selection in the required direction and for the required distance. Make sure if you've got more doors to make that you are using Make Unique on pairs of like components. In this last scene, all three door frames are from the original components. If you would use this rail and stile again, save these components so you don't have to redraw them.
-
-
Thanks very much! I understand now how to use the rails you made for any project. Still working on making my own however and getting them to intersect. Thanks again!
-Mike
-
Maybe you could post what you've got or send it by PM with a note about where you're getting hung up?
-
Hey it worked! I think I've figured it all out. Just need to practice a bit until I feel comfortable. I've been working with sketchup for about 5 years now designing furniture and its probably one of the best tools in my shop. I just discovered this resource so I'm sure I'll be posting questions. What a great site! Thanks again for your help.
-Mike
-
Glad you got it sorted out, Mike.
Next comes tombstone doors...
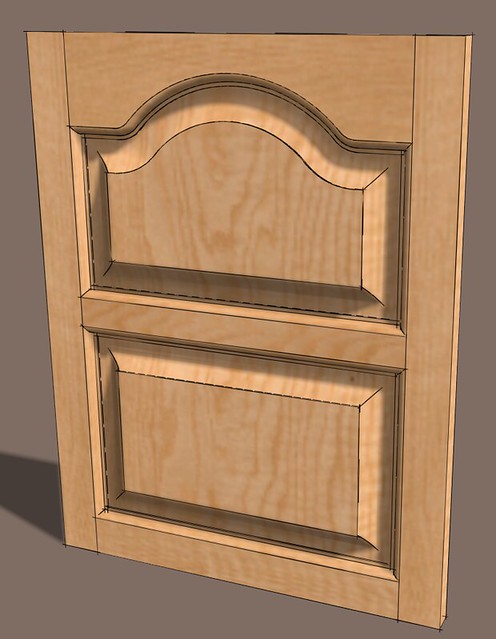
And proper rails and stiles with mitered moldings and mortise and tenon joinery.

-
Yeah that might be next on my list!
Hello! It looks like you're interested in this conversation, but you don't have an account yet.
Getting fed up of having to scroll through the same posts each visit? When you register for an account, you'll always come back to exactly where you were before, and choose to be notified of new replies (either via email, or push notification). You'll also be able to save bookmarks and upvote posts to show your appreciation to other community members.
With your input, this post could be even better 💗
Register Login


Advertisement