[Breakdown] Paradise Sandbox's Christmas scene
-
Hi everyone, Merry Christmas and Happy New Year 2014!

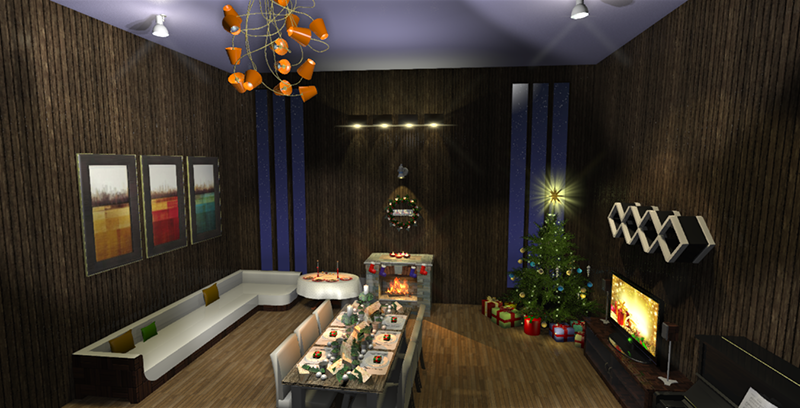
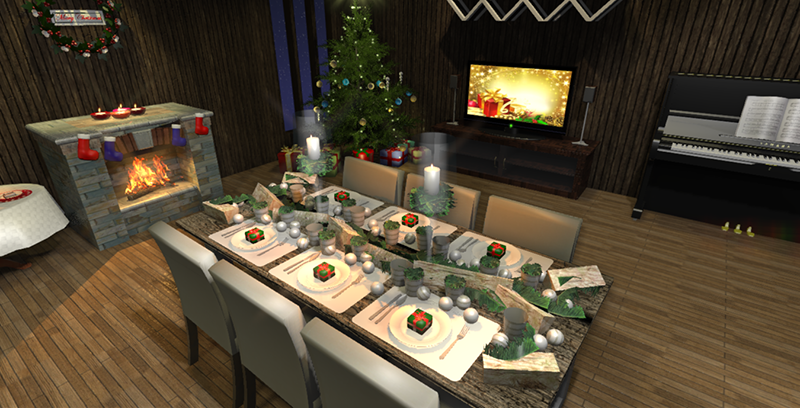
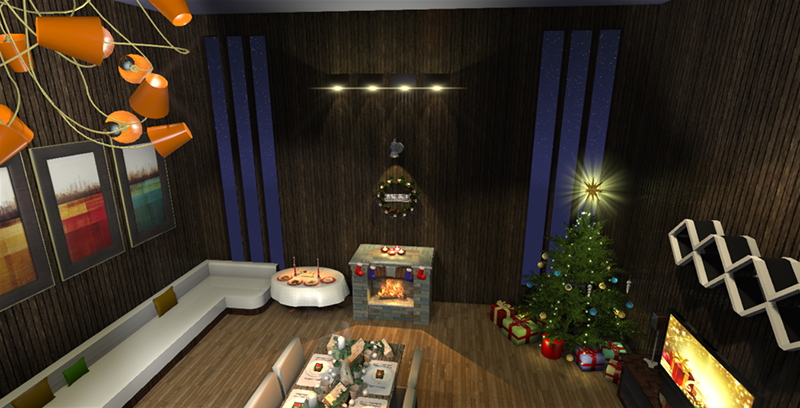
Download: http://paradise-sandbox.com/#download.phpWe wanted to create a Christmas scene for congratulate the new year to all people and also showcasing the new features included in the new version of [url=http://paradise-sandbox.com/:m79ziy3f]Paradise Sandbox[/url:m79ziy3f] (1.2), a real-time scene builder and visualization tool, so here we go:
Note: Since I'm not a modeler, and even if I wanted to do some experiments unfortunately I don't have the time, I have use models from the SketchUp Warehouse (so yes, every model here is from the Warehouse).
[url=http://www.paradise-sandbox.com/media/XMAS/1.png:m79ziy3f]
[/url:m79ziy3f]
[url=http://www.paradise-sandbox.com/media/XMAS/2.png:m79ziy3f]

[/url:m79ziy3f]
[url=http://www.paradise-sandbox.com/media/XMAS/3.png:m79ziy3f]
[/url:m79ziy3f]
[url=http://www.paradise-sandbox.com/media/XMAS/4.png:m79ziy3f]
[/url:m79ziy3f]
[url=http://www.paradise-sandbox.com/media/XMAS/5.png:m79ziy3f]
[/url:m79ziy3f]NOW SOME IMAGES OF THE SCENE BUILDING PROCESS
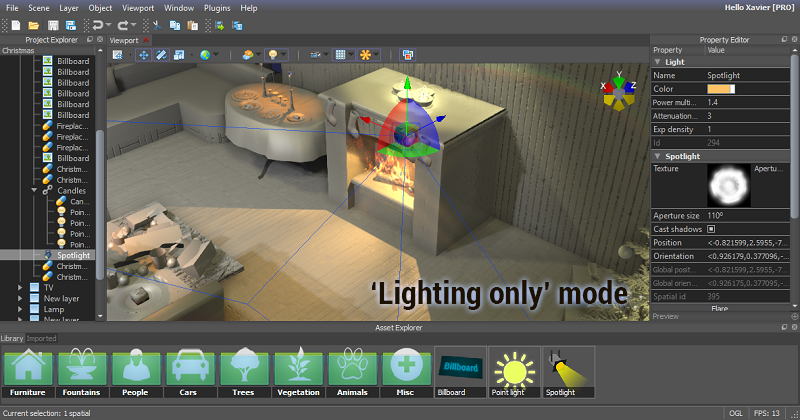
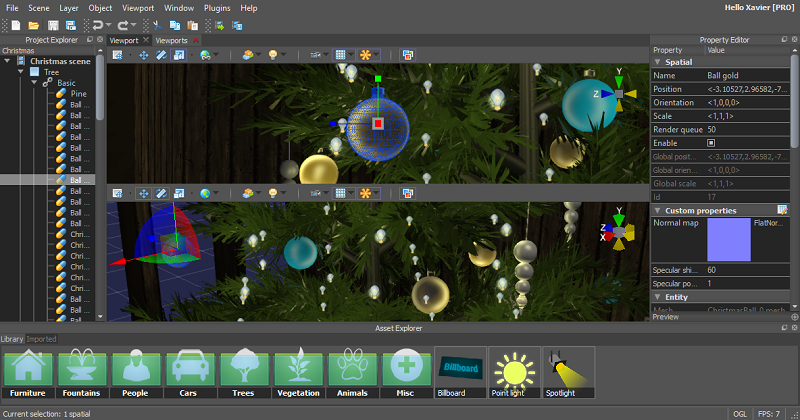
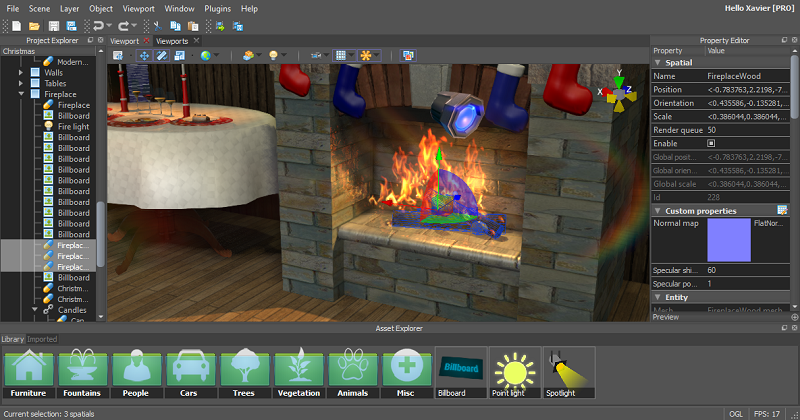
BREAKDOWN
Now I will do a complete breakdown of the design process of Paradise Sandbox's Christmas scene, with an special focus on little tricks for making the scene development scene faster.
Sections:
- Christmas tree
- Tables
- Fireplace
- Lamp
- Wall lights
- TV
- Candles
1. Christmas tree
At first, this scene is an interior scene, so after creating a new project I just added a scene based on the preset for interiors.The Christmas tree must to be an high-detailed pine, since we will want to make some captures from close up views, so I did some researches in the warehouse and found these candidates:
- [url=http://sketchup.google.com/3dwarehouse/details?mid=1db15930260e6723d68b734cc19267d9%26amp;prevstart=0:m79ziy3f]http://sketchup.google.com/3dwarehouse/details?mid=1db15930260e6723d68b734cc19267d9&prevstart=0[/url:m79ziy3f]
- [url=http://sketchup.google.com/3dwarehouse/details?mid=b2d41ab5fd7c8cd4d31ee1f941754e04%26amp;prevstart=0:m79ziy3f]http://sketchup.google.com/3dwarehouse/details?mid=b2d41ab5fd7c8cd4d31ee1f941754e04&prevstart=0[/url:m79ziy3f]
I just exported them in COLLADA .dae, imported them in Paradise Sandbox, added a couple of point lights (with flare) and also a non auto-oriented billboard as ground quad (temporally), this is how they looked:

(Note: the ambient color and background color have been tweaked a little too, them are properties of the scene)
As you can see, both are good enough for being used as Christmas trees, so we will use the first one since I like it a little more (just a personal choice).
Christmas tree decoration
Now we will focus on the christmas tree decoration, a quick search in the warehouse with the term "Christmas ornament" will give us some nice models.1. Decoration balls
I have choosen this ball: [url=http://sketchup.google.com/3dwarehouse/details?mid=9c5c3520c2d15fa4b3e7bb8f51a8aa90%26amp;prevstart=0:m79ziy3f]http://sketchup.google.com/3dwarehouse/details?mid=9c5c3520c2d15fa4b3e7bb8f51a8aa90&prevstart=0[/url:m79ziy3f]After importing it to Paradise Sandbox, I have played a little with the materials. The model itself is formed by 3 parts: the top handgrip, an inner sphere and the outher sphere. So I just changed the outer sphere material and set the transparent color material, I've also set a semi-transparent color, of course. Now playing with the inner sphere color you can get different color balls.
Here is the result:

After some manual work placing about ten balls here and there, this is the current aspect of our tree. It's important to remark the need of setting a very slow camera speed in order to manipulate small objets, here you can see how:

2. Decoration pendants
This is another type of ornament, but quite nice for our tree: [url=http://sketchup.google.com/3dwarehouse/details?mid=4a8465f1ad70deb0febdb1f263373824%26amp;prevstart=12:m79ziy3f]http://sketchup.google.com/3dwarehouse/details?mid=4a8465f1ad70deb0febdb1f263373824&prevstart=12[/url:m79ziy3f]
In this case, we have just set the material's specular power to 1, in order to have a fully reflective surface.After placing 5 pendants, this is the result:

3. Star
Now, it's time to add a nice touch to our tree: the top star. It has been done using a 3d model and a billboard.This is the model used as a star: http://sketchup.google.com/3dwarehouse/details?mid=feade3a6252a37fd9385872b956a75d0%26amp;prevstart=12
And here is the configuration of the billboard used as light rays:

This is the result after ading the model and the billboard on the top of the tree:

4. Lights
Finally we will add a rush of little point lights to the tree.In order to make the process easier, we will create strip of lines falling from the top to the botton of the tree and then replicate and rotate the result.
To easily create these lights, we will follow these steps:
-
Create a point light, set the attenuation distance to 0.5 and a little glare (0.1)[/li]
-
Copy-paste the light 16 times and place them like this:[/li]
[img:m79ziy3f]http://img706.imageshack.us/img706/5268/5wnv.png[/img:m79ziy3f] -
Now we will select the 16 lights using the Project explorer, Ctrl+C and Ctrl+V.
-
Select these 16 new lights and deselect+select the top one, since we want to use it's place to rotate the whole selection around (that will be the second strip)
-
Enable the rotation gizmo ('G' key) and rotate them some degrees (about 40º)
-
Repeat this process for the rest of strips, and you will end up with something like:
[img:m79ziy3f]http://img15.imageshack.us/img15/474/g7b5.png[/img:m79ziy3f]
Adding some presents on the bottom part of the three too, we get the following result:
[img:m79ziy3f]http://img39.imageshack.us/img39/193/v3h8.png[/img:m79ziy3f]2. Tables
In this scene, there are two tables, both from the Warehouse:This is the little/auxiliar table: http://sketchup.google.com/3dwarehouse/details?mid=2a1397f5b9d26dfcf1f5f124a85f6530%26amp;prevstart=0
[img:m79ziy3f]http://img5.imageshack.us/img5/2649/0snw.png[/img:m79ziy3f]
And this is the "main" table: [url=http://sketchup.google.com/3dwarehouse/details?mid=17e9e2c19f4b8b638b424343280aeccb%26amp;prevstart=0:m79ziy3f]http://sketchup.google.com/3dwarehouse/details?mid=17e9e2c19f4b8b638b424343280aeccb&prevstart=0[/url:m79ziy3f]
[img:m79ziy3f]http://img837.imageshack.us/img837/2786/157i.png[/img:m79ziy3f]
Note 1: we have used a couple of spotlights in each table to create the shadows produced by the candles, in both avobe images the spotlights are selected in order to highlight this little effect. The candle flame has been created with a simple point light with a fire flame, see the section '7 - Candles' for more details.
Note 2: since we wanted a very reflectant glass material, I increased the specular power to more than the unit, this is the result + comparison. Remember that for directly go to a surface properties you just have to perform a right click on it and the property editor will automatically scroll to the selected subentity.
[img:m79ziy3f]http://img41.imageshack.us/img41/1759/qczg.png[/img:m79ziy3f]3. Fireplace
What is a Christmas scene without a fireplace, eh?[img:m79ziy3f]http://img600.imageshack.us/img600/7949/18qy.png[/img:m79ziy3f]
The fireplace consists on 5 elements:
- The model. From the warehouse: http://sketchup.google.com/3dwarehouse/details?mid=c55cd55a8c4d28a1ac51268fdb437a9e%26amp;prevstart=12 (Note that I've changed some materials using the Paradise Sandbox's built-in materials instead)
- A tronc model: http://sketchup.google.com/3dwarehouse/details?mid=47d8a1a285087f954629a8706a004e5%26amp;prevstart=0 (The main material has been switched to one wood material that comes with Paradise)
- Some billboards with a fire texture (blend type set to 'Add')
- A little point light to simulate the fire light inside the fireplace
- A spotlight to simulate the light projected to the room
This is a detail image with the spotlight selected:
[img:m79ziy3f]http://img541.imageshack.us/img541/1741/drq6.png[/img:m79ziy3f]And here are the details about the billboards used as flames:
[img:m79ziy3f]http://img5.imageshack.us/img5/1678/mp4f.png[/img:m79ziy3f]4. Lamp
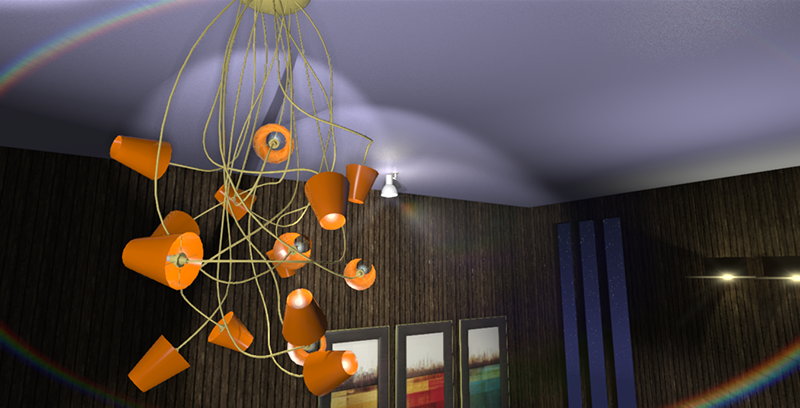
For this scene, I've choosen a really crazy lamp:
http://img36.imageshack.us/img36/6168/cbih.pngDespite the fact that manually placing 15 spotlights is a crazy task, the building process isn't much more than it. Also, a little spotlight is placed for each spotlight in order to iluminate the inner part of the focus, with a little glare in order to simulate the bulb.
5. Wall lights
The wall lighting consist on 3 groups of lights:- 4 spotlights for the above lighting
- 4 spotlights fot the bottom lighting, using the 'ApertureFX.png' texture.
- 4 (little) point lights to simulate the light leaking of the bottom spotlights, with glare enabled.
[img:m79ziy3f]http://img594.imageshack.us/img594/3738/0pu8.png[/img:m79ziy3f]
6. TV
[img:m79ziy3f]http://img534.imageshack.us/img534/3150/m301.png[/img:m79ziy3f]The TV consist on three parts:
- The TV Model: http://sketchup.google.com/3dwarehouse/details?mid=49cebed655604186e7d5e456b0c4df29%26amp;prevstart=0 (Note that the Samsung text has been removed)
- A billboard as TV image
- A green and little point light as ON LED indicator. A little glare is used.
[img:m79ziy3f]http://img707.imageshack.us/img707/7660/wr9k.png[/img:m79ziy3f]
Billboard (TV image):
[img:m79ziy3f]http://img89.imageshack.us/img89/2600/g2xo.png[/img:m79ziy3f]Point light (LED indicator):
[img:m79ziy3f]http://img853.imageshack.us/img853/6752/grr3.png[/img:m79ziy3f]7. Candles
[img:m79ziy3f]http://img62.imageshack.us/img62/6788/71gu.png[/img:m79ziy3f]
Note the huge enhancement in Paradise Sandbox: real-time reflections everywhere, HW accelerated transparencies, etc.
The cadle set consist on simply 2 different parts:
1. The main model: http://sketchup.google.com/3dwarehouse/details?mid=1b644d1469cece6291809f4c9bd6d7fc%26amp;prevstart=0
This is the original model rendered in SketchUp:
[img:m79ziy3f]http://img69.imageshack.us/img69/4905/vlj7.png[/img:m79ziy3f]2. One point light per candle flame: in order to simulate the flame light and shape, we use a point light with a little attenuation distance and a flame-like glare texture:
[img:m79ziy3f]http://img202.imageshack.us/img202/6126/k7i0.png[/img:m79ziy3f]So, in my case I have created a node for the Candle set elements, resulting in:
[img:m79ziy3f]http://img51.imageshack.us/img51/2782/yy6i.png[/img:m79ziy3f]Note 1: in order to make sure that the glare (flame) is always visible and not hidden by the candle, we set the 'Render queue' property of the candles entity to 49 instead of 50. This trick can be used with any other semi-transparent object
Note 2: Also, you can add a little spotlight to simulate the shadows casted by the candle flame, as we've previously shown in this breakdown.
That's all! Hope you've enjoyed it and happy new year again!
Advertisement


