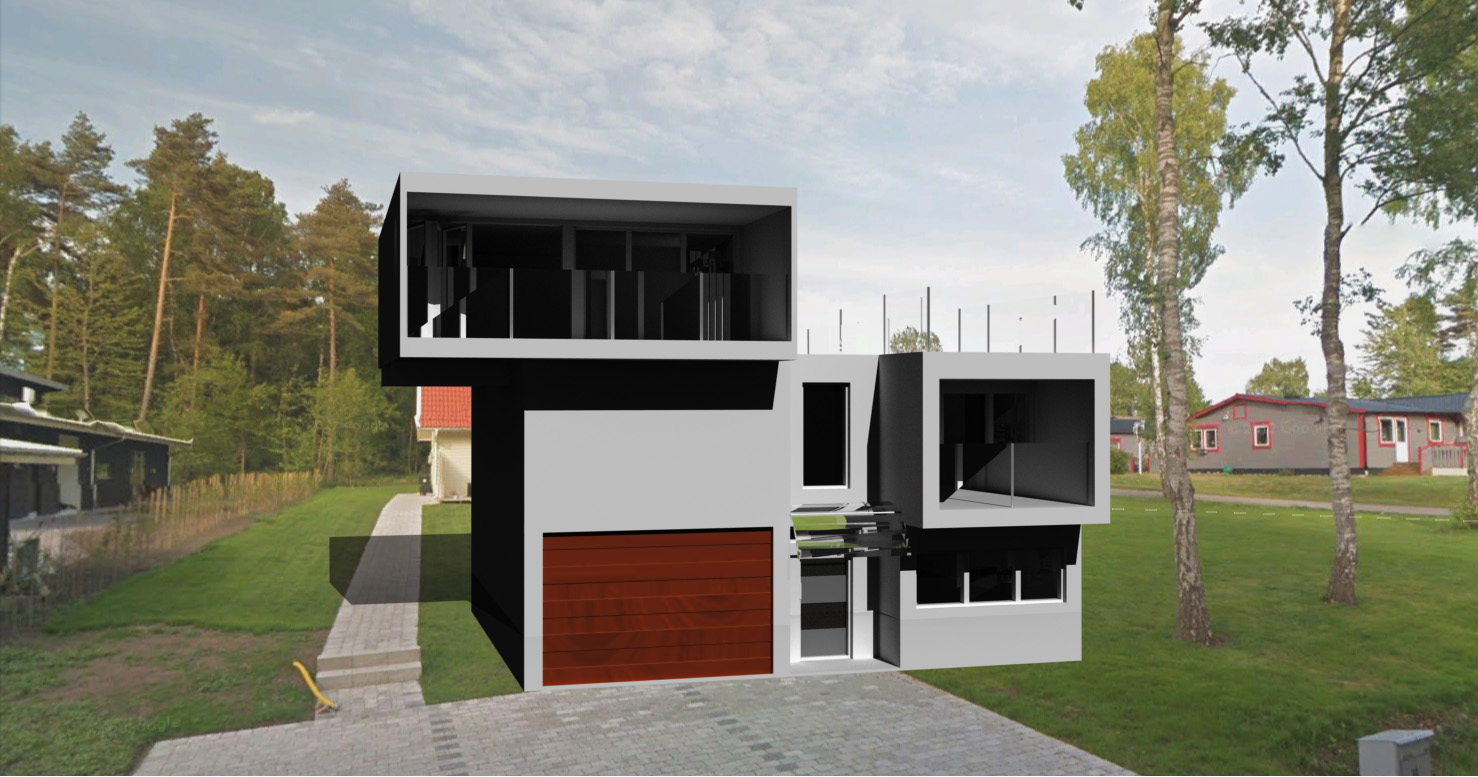
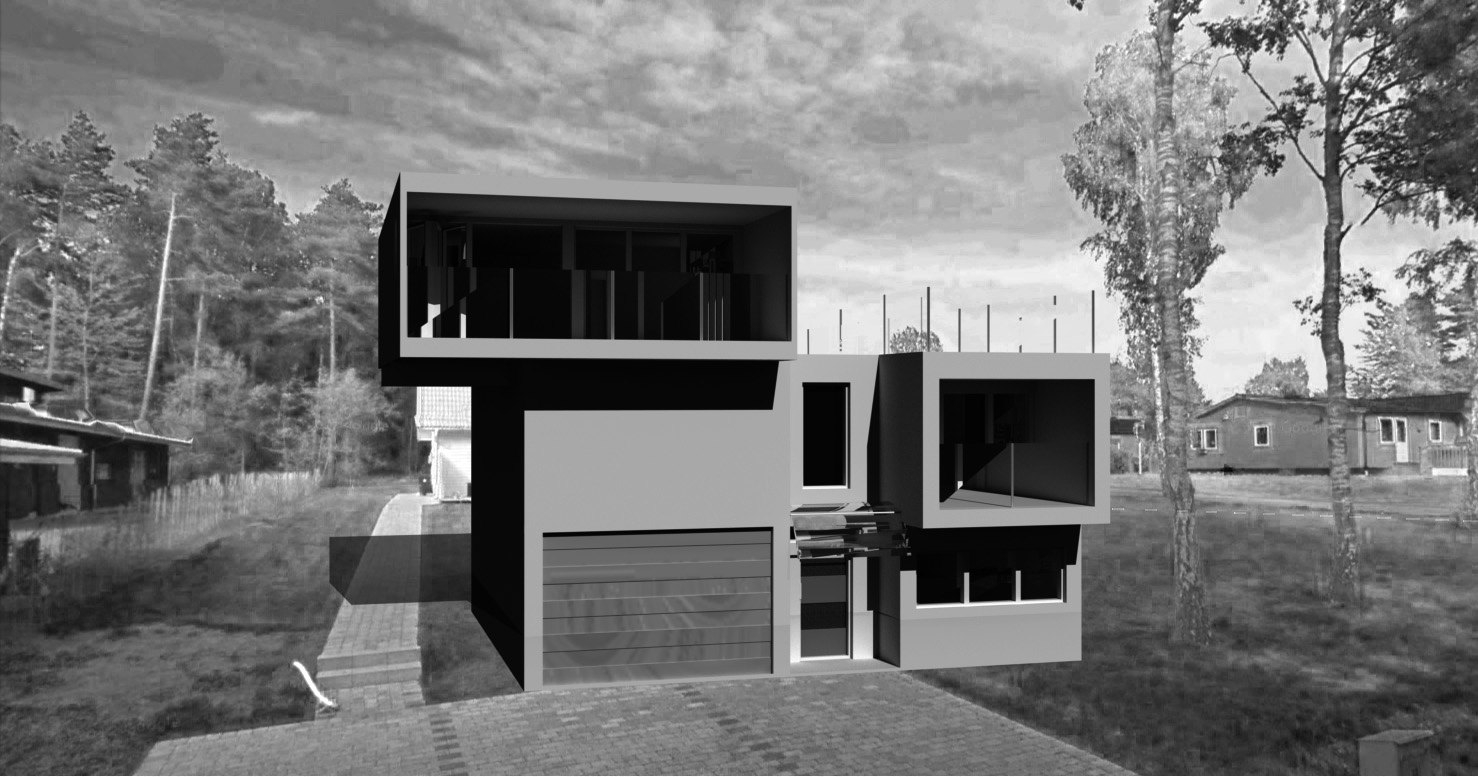
Get model integrate with background
-
Hi,
I'm not really sure this is the right section but Ill give it a try!
Photoshop is a pretty new tool for me so keep it in mind

How do I get the Sketchup model more integrate to the background? Here is to tries:
/ Niclas


-
In my opinion, the light (direction) is to much different and the contrast of the model doesn't fit the contrast of the picture.
-
Photo matching
this may help -
This looks like the project that WAS on the photomatching thread. I'd say you've gotten somewhere with it compared to the start.
The perspective might not quite match... the size of the model looks a little small compared to the house in the distance.
To follow up on Cotty's advice if you have the house on a separate PS layer, you can adjust the contrast of that layer, To match the shadows, adjust the time and location in SU before exporting to PS. Another issue that will be hard to adjust is that SU does not have soft shadows. You can export a view of the SU model that only has shadows and adjust in PS (blur edges with the blur tool etc. to simulate soft shadows. Blend this shadow image on separate layer( try different layer blending settings such as "multiply" and amount of opacity). You need to make that layer transparent (eliminate the white). Or the simplest thing to do is adjust the darkness of shadow in SU, if you can't make them soft.
There are some steps to do the PS blending and get the best effects and hard to say it all if you are new to PS. Look at the Sketchup artists site for ideas. http://www.sketchupartists.org/
edit-- oh is that from a renderer? I notice anomalies in the model that might relate to a rendering. You might get your soft shadows (and some better texturing) in the renderer.
-
I don't get the Blur tool working,using the "waterdrop", left clicking and set 100 pixels and some hardness but when using the round ring nothing happends? I inserted the sketchup model with "New 3D layer" so I guess the Photoshop setup works everything in ONE layer?
And according to the textures, I totally agree but Im not very familiar to this program so where do I get better textures?
 And the glass on the balcony seems to have a little bit problem with the light source...
Is it possible to "higher" the background around the house, I mean the grass so not the houses shape lines is that clearly?
-
@niclasbladh said:
Is it possible to "higher" the background around the house, I mean the grass so not the houses shape lines is that clearly?
The amount of artistry you have or want to learn will determine your closeness to the holy grail known as "grass".
Cheap and easy: Make a copy of the grass from your background image on another layer above the model layer. Use a layer mask and paint in grass with a spiky grass-like brush where you want it. Beyond that may involve making shadows or even adding grass components to your rendering. You may want to paint something about the foundation that shows a transition like a planting area, or pathway, or trodden grass, ambient occlusion --instead of it looking like the model is floating without relation to the picture.
but I would first address Cotty's comments, you will see the model blend better. Light on it is too high contrast and the shadows conflict with the picture.
-
Peter,
I would prefer to create the grass effect by using a mask to make the base of the house transparent, using the "spiky grass-like brush" you mentioned with spray or airbrush tool.
If you are using Photshop you could also use the free transform tool to adjust perspective.
The shadows aspect is crucial though...
Hello! It looks like you're interested in this conversation, but you don't have an account yet.
Getting fed up of having to scroll through the same posts each visit? When you register for an account, you'll always come back to exactly where you were before, and choose to be notified of new replies (either via email, or push notification). You'll also be able to save bookmarks and upvote posts to show your appreciation to other community members.
With your input, this post could be even better 💗
Register LoginAdvertisement


