Curved Staircases
-
Awe-inspiring work, knowledge, and perseverance. I hope I can design such a stair into a house someday.
-
Thank you very much for your comments.
I'm hoping that my tool set will simplify and speed up the design process.
The big bonus is helping clients visualize a complex stair. If the plan changes for what ever reason - a new stair can be quickly put into the plan without costing hrs and hrs.
-
I'm preparing to cap off this version 1.0 on the Stair Builder Plugin System. This version will include The main Stair Build plugin, The Add a Handrail Profile plugin and Extrude Handrail along Path plugin. The complete system comes with 6 pre-defined handrail profiles as described in earlier posts. The system also comes with a pre-defined file of default values in a file called defaults.txt which is found in the folder plugins\GKWare\StairMaker. A help file called StairMaker.pdf also exists in this folder. The help file is short and contains an important section which explains special behaviour of a few input box entry fields. The 6 pre-defined handrail profiles are in 6 corresponding files in the folder plugins\GKWare\StairMaker\Handrail.
There has been only 1 comment about a free version. Since that is the case I am not considering creating a free version at this time. I do however, want a few beta users. If anyone is interested in testing out the software please contact me with a personal message - either from my web site or from within this forum. I am expecting to have the documentation completed by the end of this coming week.
The attached pictures illustrate a couple of steps in modeling a stair and attaching a handrail.


-
Garry,
That looks amazing.
Will rail options include balustrade with newels top & bottom?.
regards bob -
I am fully intending in adding posts and spindles ( newels and balustrades ) in the future. But it probably won't be ready by the end of this week.
-
First run of Stairmaker... first impression is holy mackerel is it fast. PDF recommends running in another instance of SU since it uses origin for radius. I think you might be able to bypass that by making the stair in a blank group, but have not tested it yet. Wow is it fast. a lot of geometry and detail to pop out in almost instantly. It also creates a highly detailed and professional curved stair. It's the holiday and I just had to play for a bit. I'll look into more in the coming week. Great work Garry.
-
There are a number of different possibilities. Could have a drop down box that contains possible choices as an insertion point for the stair. Such as "Origin", "Click Center", "Top Left", "Top Right" etc.
Then there is the idea of rotating the stair into position.
All this could be set up prior to drawing the stair. Need more feedback on this.
-
Garry,
Initial testing of the beta plugin looks very encouraging. I am very confident that this plugin will help stair designers/manufacturers model there staircases quickly and efficiently, and best of all, can be edited in your dialogue boxes in matter of seconds. Looking forward to help develop this plugin to a invaluable tool..
Regards BOB -
click center would be my preferred method. With the speed of your code I don't think there will be any issue with running in the current model.
-
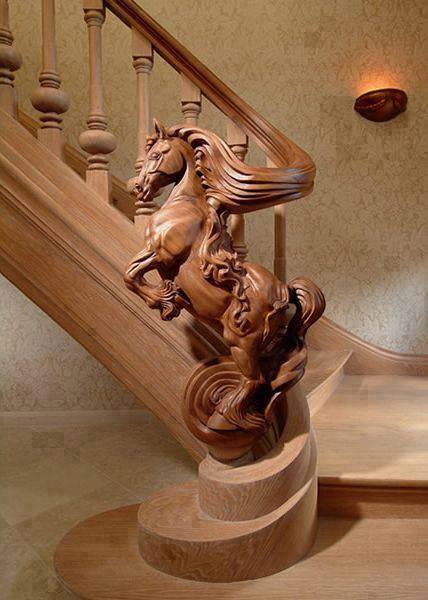
Think we can get it to make newel posts like this?
-
That is gorgeous! But unfortunately it is out of scope for this software.
Jabbers has a 5 axis CNC - maybe he could do it !!!
-
I've added the progressive flare to the plugin.
This stair has a flare amount of 20 mm, and a progressive flare of 20 mm ( could have been different ) and a flare count of 5 treads.
So starting at the bottom of the stair we have the following flares at the front of the treads in mm.
1 - 120
2 - 100
3 - 80
4 - 60
5 - 40
6 - 20
7 - 20
...
13 - 20I have also fixed a number of bugs - but before I can release a new version to the testers I've got this wild bug ( my inadequate testing let this one slip in ) OOPS !!!
It happens with flare amounts of 80 mm or greater on housed stringers.


-
what do you think about a future feature of flaring of the stringer as well? to a have a 3' top of stair with a 4' or 5 ' bottom?
-
It is possible for the future. Even a straight stair that flares both ways.
I'll add it to the wish list.
-
I will second Kristoff's idea about flaring the strings also, also might be an idea to have a straightening of strings option as Garry said , say the first X no of steps, it would make it very handy, especially the wall/outside string.
BTW ..if any one wants to 3d model the horse newel. i will machine it...min order 50 peices !!! .
Regards BOB -
I've added a couple more stair configurations to StairMaker. An Open Riser choice and a Rail Style.
The input box is getting pretty tall and there are more options to come. Once the input box gets to big I will have to either split it up into 2 or more input boxes or I can go with a web dialog box where I have way more control.
Here is a the tall StairMaker input box and also a web dialog box. The web dialog box is my preferred way of doing things but there are advantages to each.
web dialog box:
- It is easy to organize the inputs into various sections
- You can have check boxes and radio boxes
- Unfortunately there isn't an easy way to allow a mix of inputs - some metric and some imperial.
- At this stage I would only support decimal inputs for only metric or only imperial. No fractions
Sketchup input box
- A lot less coding using the built in input box.
- You can mix inputs by using mm or "
- you can use fractions for imperial
- At some point the input box will become too large and will have to be broken into several inputs.
What do you guys think? Do you like the web dialog or the built in Sketchup Input Box?
I'd love to have a vote on this - but I don't know how to set that up.


-
A little video will be very appetizing!

-
I think the Sketchup input would do, just make drop downs of each category off the main screen Treads, Stringers, Railings, etc.

-
I have considered that as a possible solution; however, it would be beneficial to have all the configurations on one form - thus the web dialog.
I have now built the parsing and conversion routines and have found a bug in Sketchup's conversion routines. This also affects Sketchup's input box when inputing fractional inches such as '2 1/2"' and using a model setup in millimeters.
I have a fix that works with the web dialog box.
-
I've got the web dialog working with the Stair Maker. I have also solved a few of the cons of using it. Since I needed a web dialog anyway - this seems like the best route.
You can use fractional inputs and you can use mixed inputs. Furthermore, I may be able to leave the web dialog box up while the stair is drawing. The advantage of this is you would be able to make changes and have the stair redraw itself ( remove the existing one and create a new one ) each time you click 'OK' providing that web dialog box hasn't closed. Once the web dialog box is closed then we could move on to a second curved stair without messing with the first one.
Another advantage is that I can fairly easily add in an expression evaluator. I am use to this feature in various CAD systems. For instance - you can type in 1000 - 27.3 for width and it would replace what you type with 972.7
The built in Sketchup input box has limitations that aren't there with a dialog box. It would be very easy to add in additional pages that could be used to store user defaults.

Hello! It looks like you're interested in this conversation, but you don't have an account yet.
Getting fed up of having to scroll through the same posts each visit? When you register for an account, you'll always come back to exactly where you were before, and choose to be notified of new replies (either via email, or push notification). You'll also be able to save bookmarks and upvote posts to show your appreciation to other community members.
With your input, this post could be even better 💗
Register Login


Advertisement